We use cookies to enable our websites to remember information, to help some website functionalities to work properly, to understand how you interact with and use our websites and to display you content and ads that are relevant and engaging for you.
By clicking Accept All you consent to the use of these cookie.
The store will not work correctly when cookies are disabled.
Quick answer: A custom wax seal stamp is an engraved brass die that presses your logo or monogram into wax. One die can serve hand sealing, machine-pressed seals and later sticker runs if you do four things before engraving starts: simplify the artwork into bold vector shapes, choose a diameter that keeps the detail readable while the finished seal stays mail-friendly, specify a line depth that flexible wax can actually fill, and approve a wax test impression as well as the digital proof.
Most brands commission a custom wax seal stamp the same way they order a business card. They upload the logo file from their website, approve a flat digital mock-up, and wait for the brass to arrive. The first impressions then show the problems. Hairline serifs vanish into the wax, a tagline becomes a smudge, the monogram reads backwards, and the die fits a hand handle but not the press the production team planned to use.
Each of those mistakes costs time, not just money. Re-engraving a die pushes back wedding stationery, product launches and holiday mailings. When the hand-sealed samples and the later sticker batch come from slightly different artwork, the brand ends up with two "official" seals that never quite match. This guide treats the die as a specified part rather than a souvenir. It covers how to adapt artwork for engraving, how to pick diameter and line depth, and how to approve proofs so a single die keeps working across every production route you may need later.
What Is a Custom Wax Seal Stamp, and What Is It Not?
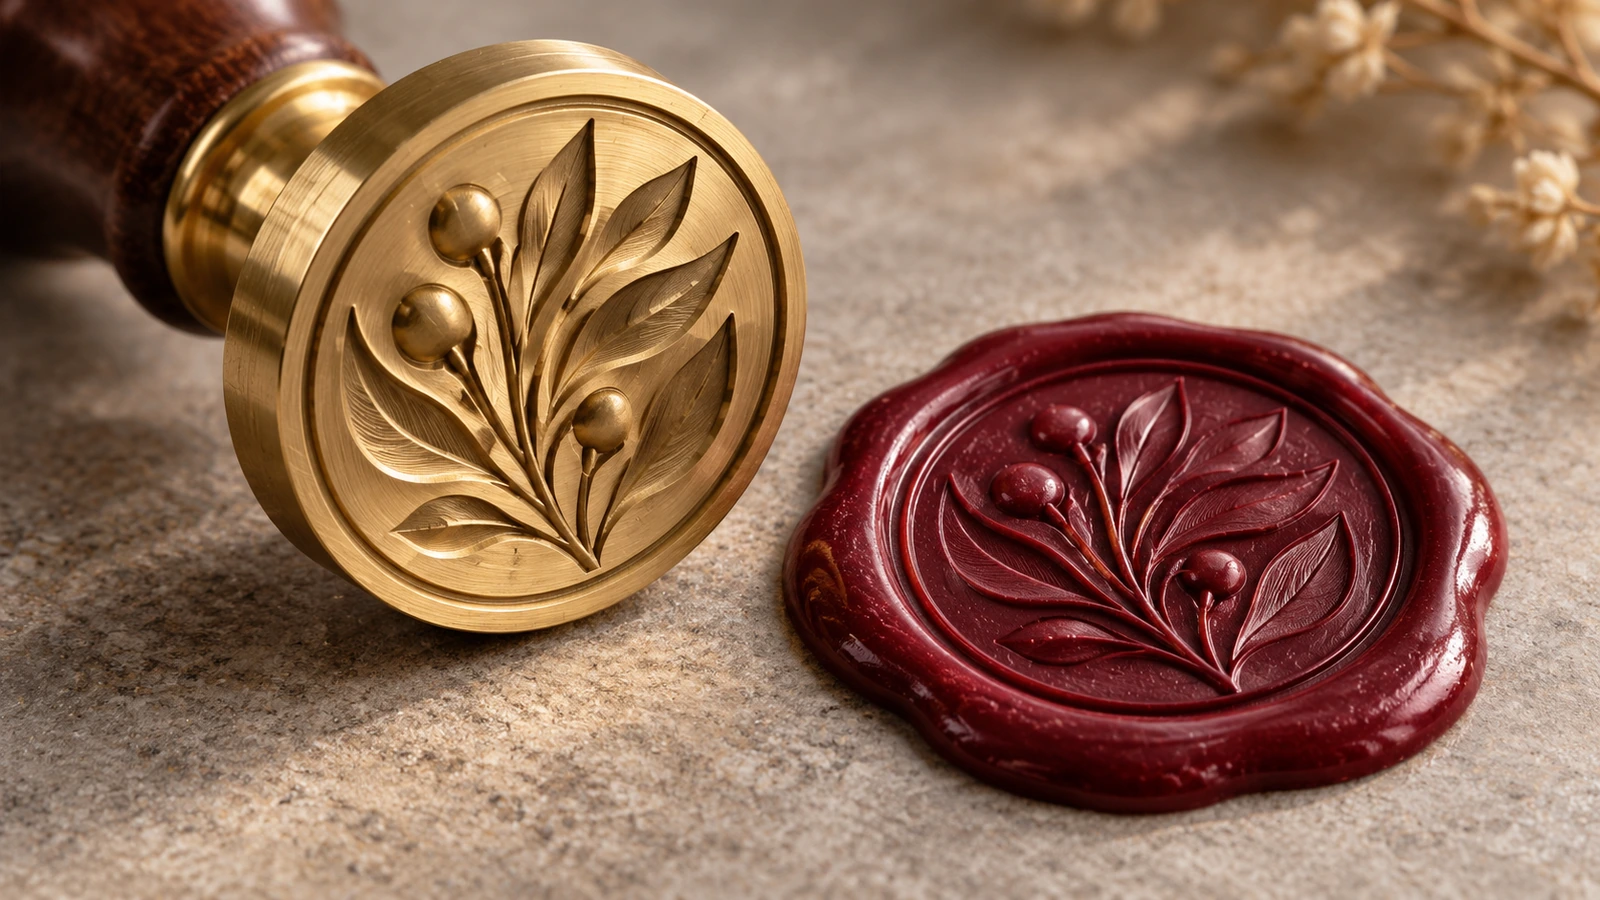
A wax seal stamp is a reusable engraved matrix. The engraved face is pressed into softened sealing wax, and the wax hardens around the relief to form the impression. A wax seal sticker is something different: a seal that has already been pressed and is then attached to a surface, usually with an adhesive backing. The Wax Seal Handbook published on CUNY Pressbooks[1] also notes that some stickers are made from genuine sealing wax, so "sticker" does not automatically mean imitation.
That distinction matters when you compare quotes. The same handbook points out that a reusable stamp, a bag of wax, a printed paper sticker and a batch of custom wax seals are four different products[2]. A quote for "custom seals" may include the die, may assume you already own one, or may describe a printed replica that never touches a die. Your die is the upstream asset. Every hand-pressed seal, machine-pressed seal and pre-made sticker you ever produce inherits its strengths and its flaws.
Seals have carried identity for centuries, and archivists still handle historic wax impressions as fragile, deformable objects. The UK National Archives' preservation guidance on seals[3] is a useful reminder that wax cracks, flattens and abrades. Good die design anticipates that wear instead of relying on detail that survives only in a perfect first impression.
Step 1: How Do You Adapt a Logo or Monogram for Engraving?
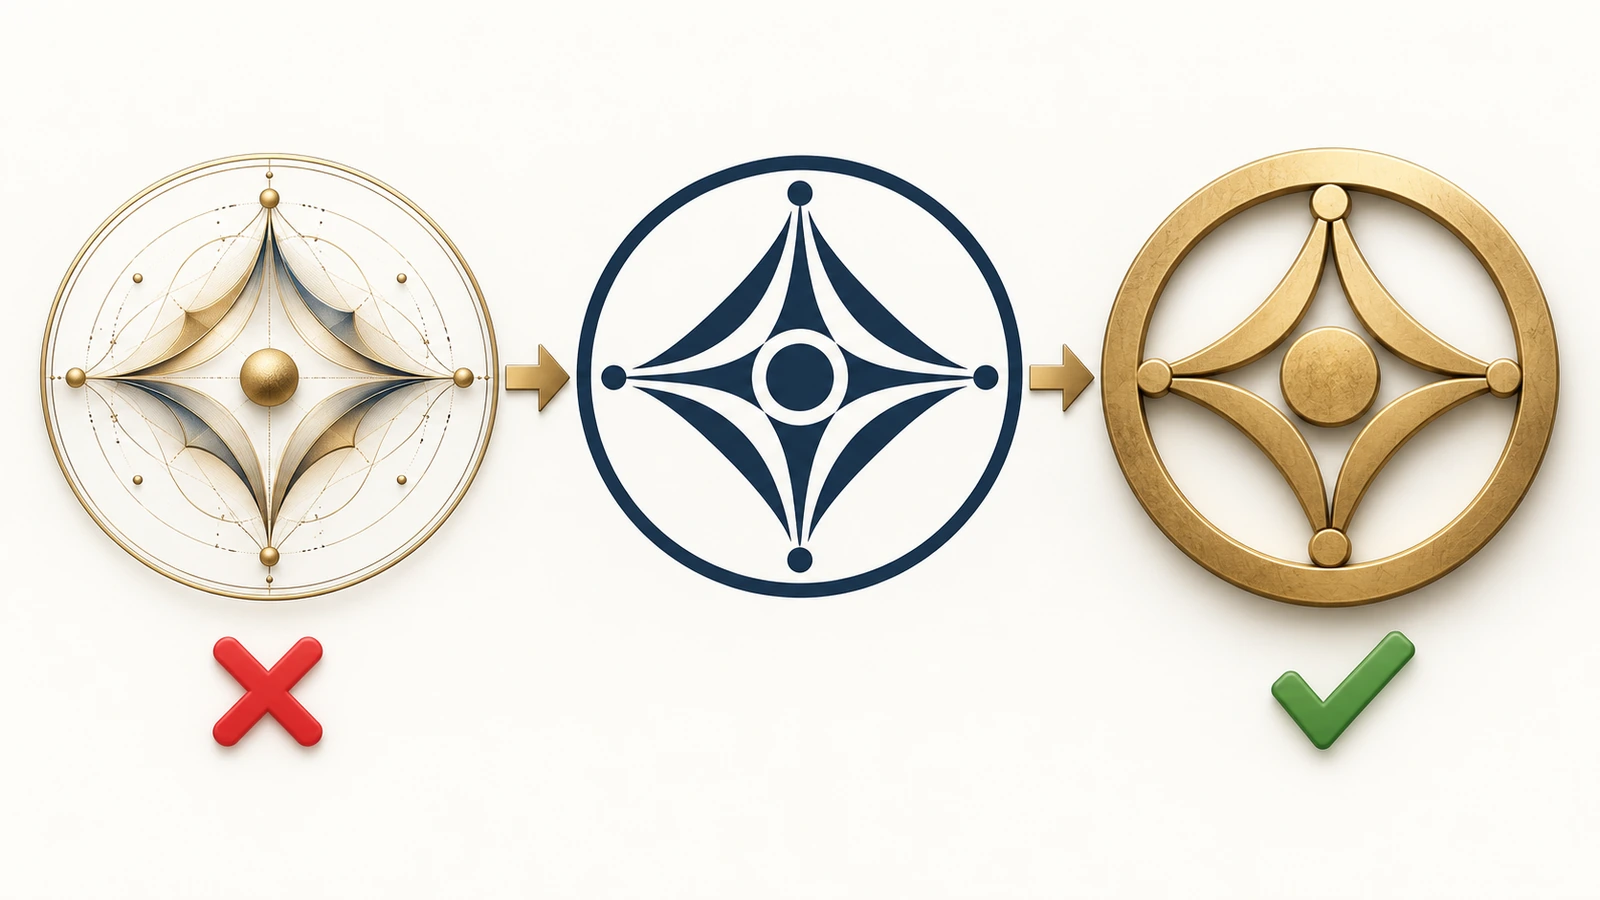
A logo built for screens relies on color, gradients and fine type that wax cannot reproduce. Wax renders only height. Every part of your mark becomes either raised or recessed, with nothing in between. Treat the conversion as a redesign, not a file export.
Start from vector artwork. Supply AI, EPS, SVG or PDF outlines. A raster logo forces the engraver to trace it, and tracing is where proportions drift.
Convert to one color with no tints. Gradients, drop shadows, transparency and halftone textures disappear in wax. Decide which shapes are solid and which are open space.
Thicken strokes and open the counters. The enclosed spaces inside letters such as e, a, B and R fill with wax first. Widen them and increase the stroke weight so letterforms survive slightly cool or slightly overfilled wax.
Cut secondary text. Taglines, web addresses and legal marks rarely read on a seal. Keep the emblem or the initials. If text must stay, make it the largest element rather than a ring of small capitals around the edge.
Design the border deliberately. A raised rim or a plain margin gives the wax a defined edge. Without one, the impression fades into the wax puddle and looks unfinished.
Check the mirror image. The die face is engraved in reverse so the impression reads correctly. Ask for both views on the proof and confirm which one is the die and which is the seal.
Monograms need one extra decision: whether the letters interlock or sit side by side. Interlocked letters look rich at large sizes but blur at small ones, because overlapping strokes leave very little open space between them. If the die must also serve small sticker formats, side-by-side initials with clear separation are the safer choice.
Before you finalize, check the legal position. A seal design should not imitate another brand's registered mark or signature trade dress. In the Maker's Mark bourbon dispute, the federal court record (W.D. Ky. No. 3:03-cv-93)[4] shows that even a red dripping-wax look on a bottle was protected as a trademark, and the Sixth Circuit upheld that ruling in 2012. Use your own mark, or artwork you are licensed to use.
Step 2: How Should You Choose the Die Diameter?
Diameter is a trade-off between detail and practicality. A larger die gives fine elements more room. A smaller die is faster to press, uses less wax and sits more comfortably on envelopes and small packaging. Three facts should drive the decision.
The finished seal is larger than the die. Wax spreads beyond the engraved face, so the outer diameter of the seal exceeds the die head. Plan your envelope flap, label panel or box lid around the finished seal size, not the die size, and ask your engraver for the expected overflow with the wax you will use.
Detail density sets the minimum size. Two bold initials work at compact sizes. A family crest, a detailed illustration or a logo with an internal symbol needs a larger face. A practical test is to print the artwork at the proposed finished size and view it at arm's length. If you cannot identify the mark on paper, you will not identify it in wax.
Mail rules apply to the whole piece. If seals will travel on outer envelopes, remember that the USPS treats letters thicker than 1/4 inch as outside letter dimensions, and it separately flags rigid, uneven or clasp-like pieces as nonmachinable under Domestic Mail Manual section 201[5]. The Wax Seal Handbook adds that the USPS does not classify mail by the word "wax"; it judges the size, thickness, rigidity and evenness of the piece[6]. Independent coverage in 2026 reported the First-Class nonmachinable surcharge at $0.49 per piece, according to LegalClarity[7]. Confirm the current figure in USPS Notice 123 before you budget a mailing. A larger, taller seal raises the chance of that surcharge.
If one die must serve both outer envelopes and premium packaging, size it for the most constrained use, usually the envelope, and keep the artwork bold enough that it does not look sparse on a gift box. Ordering a second, larger die for packaging only makes sense if the extra detail genuinely adds something to the brand.
Step 3: How Deep Should the Engraved Lines Be?
Line depth determines whether wax fills the design cleanly and releases from the die without tearing. There is no universal standard number, because the right depth depends on the wax, the diameter and the pressing method. What you can do is specify the behavior you need and test it.
Wax has a working window. The Wax Seal Handbook explains that wax only needs to be hot enough to flow. Wax that is too cool will not fill the engraving, and wax that is too hot spreads too far[8]. The handbook also says cooling time varies with the wax type, the amount of wax, the room temperature and the die temperature, so you should not rely on a fixed number of seconds. Deep, narrow recesses demand hotter, more fluid wax. Shallow, broad relief tolerates a wider window, which helps when several people seal by hand at different speeds.
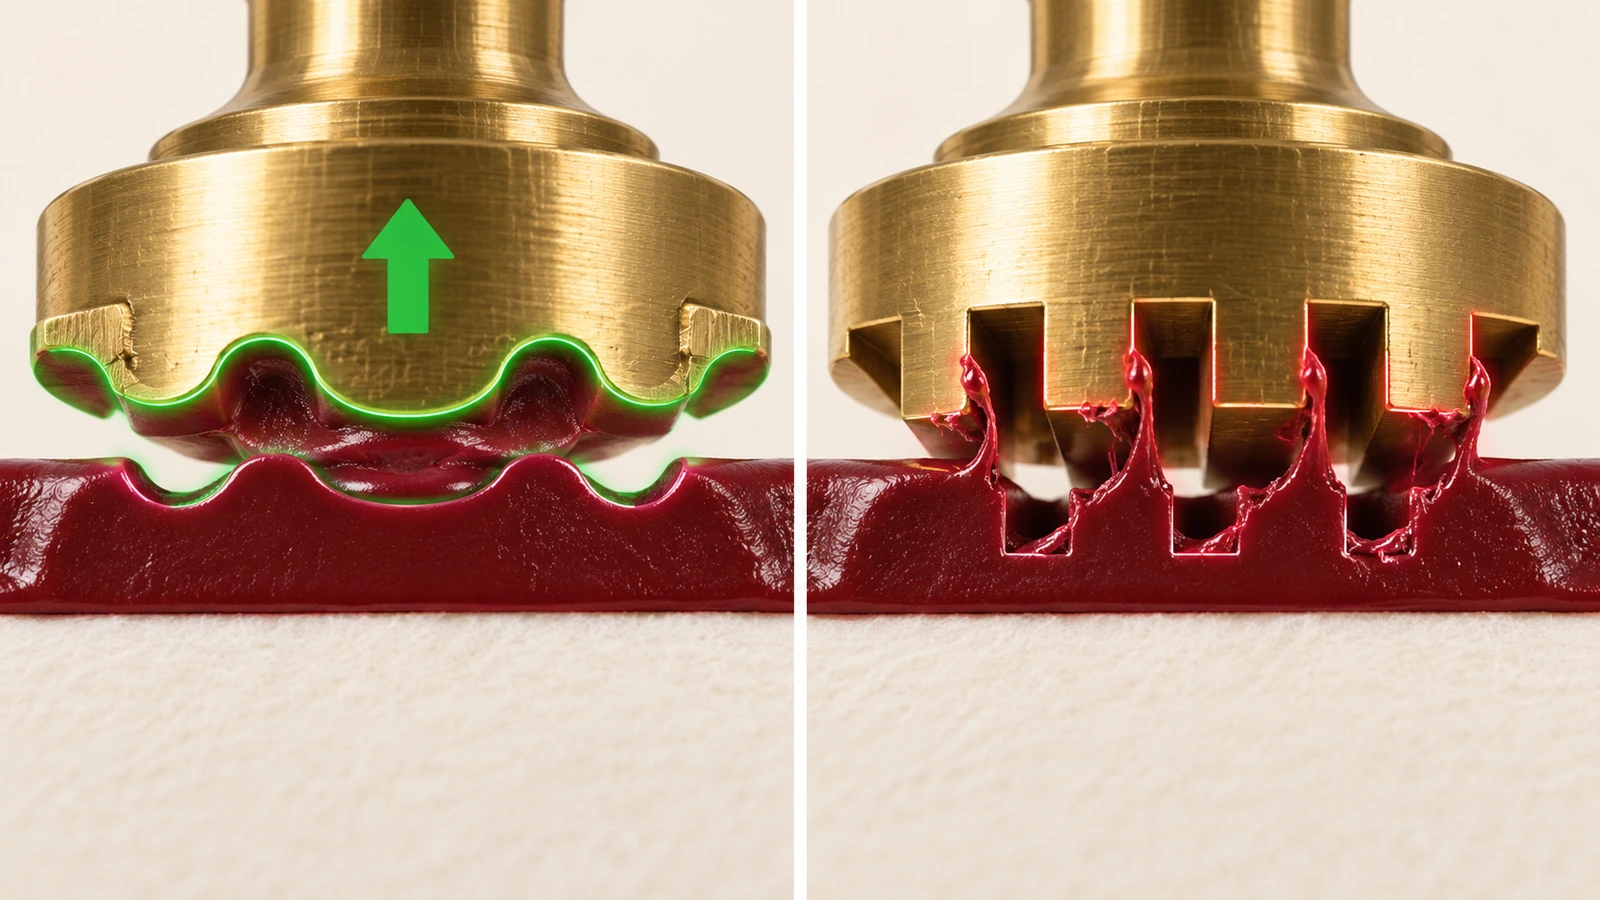
Sticking is the other failure mode. When a die stays in warm wax too long, or heats up after repeated pressings, the impression can tear as you lift it. The handbook's guidance on wax sticking to the stamp[9] is to wait until the wax sets, lift vertically and let the metal cool between uses. Engraving can reduce the problem. Slightly sloped walls release more easily than vertical walls, and avoiding long, deep slots stops wax from locking into the die.
Write these points into your brief for the engraver:
Whether the main mark is raised or recessed in the final impression. Raised letters on a recessed field usually read best in metallic waxes.
Sloped side walls on deep areas, so wax releases cleanly in machine pressing.
Consistent depth across the design. Mixing very deep and very shallow areas produces uneven fill.
Machine tooled marks polished out of the field, since every scratch on the die transfers to every seal.
Any mounting requirement, such as a handle thread or a press fitting, confirmed before engraving starts.
Step 4: How Do You Approve Proofs So the Die Works Everywhere?
A flat digital proof confirms the artwork, but it cannot confirm how wax behaves. Approve in two stages, and do not let anyone engrave the production die before both are signed off.
Stage one: the digital engraving proof. Check that the artwork matches your master vector file, that the mirror orientation is correct, that removed elements really were meant to be removed, and that the proof states the die diameter and the expected finished seal size. Ask for the proof at actual size as well as enlarged. Problems that look minor at 400% are obvious at 100%.
Stage two: the wax test impression. Ask for photographs or physical samples of test pressings in the wax color you plan to use. Dark, matte waxes hide detail differently from metallic or pale ones. Judge the samples against a short, written acceptance checklist so approval does not come down to who in the team has the strongest opinion:
The main mark is identifiable at arm's length.
Letter counters are open, not filled.
The border is complete around the full circumference.
There are no visible tool marks or scratches transferred from the die.
The impression released without tearing or leaving wax in the recesses.
Run the check across a small batch rather than a single best example. Twenty pressings are enough to show whether success depends on perfect technique. If only half of a batch passes, the die will struggle in hand sealing, where temperature and timing vary. Accept that seals are handmade: the CUNY handbook reminds buyers that durability and appearance depend on materials, adhesive and surface, and pressed wax will never match printed labels piece for piece. Your checklist should test legibility and clean release, not identical outlines.
Step 5: How Do You Keep One Die Usable for Future Runs?
A die only stays a reusable asset if its paperwork survives as well. Create a one-page record when the die is approved, and keep it with the master artwork:
A die reference name, plus the approved proof file with its version number.
The finished seal size measured from approved test pressings.
The wax colors that were approved, with photographs under neutral light.
Notes on pressing behavior, such as whether the die needed cooling between impressions.
Where the physical die is stored: in-house, or retained by your production partner.
One more consideration applies when sticker runs go onto food gift packaging. In the United States, adhesives used as components of food packaging fall under 21 CFR 175.105[11]. That rule expects either a functional barrier between adhesive and food, or contact limited as the regulation describes. A seal on the outside of a sealed box is a different situation from a seal touching the food itself. Tell your supplier where the seals will go, and plan the pack layout accordingly.
Custom Wax Seal Stamp Specs Compared: Hand Sealing vs Machine Pressing vs Sticker Runs
The same die faces different demands in each production route. The table shows which design decisions matter most for each, so you can judge whether a single die can cover all three or whether one route needs its own die.
Design factor
Hand sealing
Machine-pressed seals
Pre-made sticker runs
Artwork boldness
High priority: wax temperature varies from one person to the next
Medium: controlled heat tolerates finer detail
High: seals are judged up close on invitations and boxes
Line depth
Moderate, broad relief that forgives cool wax
Consistent depth with sloped walls for clean, repeated release
Consistent depth so every seal in the batch reads the same
Die diameter
Set by the surface and the mailing thickness limit
Must match the press fitting and the wax dispense size
Set by the finished seal size buyers expect
Heat and wear
Die warms with repeated use; cool between pressings
Continuous duty; brass and polished faces matter most
Medium to high volume; surface scratches multiply
Mounting
Handle thread or magnetic mount
Press-specific fitting, confirmed before engraving
Producer's tooling; confirm the die can be retained
Proof priority
Wax test across several people's technique
Release test over a long run of pressings
Color-matched test impressions to sign off once
The pattern is clear. Bold artwork, consistent depth and sloped walls help in every column. A die designed only for a skilled hand sealer, with deep and intricate engraving, is the version most likely to fail when the job moves to a press or a sticker batch. If your brand wants intricate detail, keep it for a separate large-format die used on premium packaging and let the everyday die stay simple.
FAQ
FAQ: Can I use the same file I send to my printer for a wax seal die?
Start from it, but expect changes. Printer files usually contain color, gradients and small type. An engraving file needs one-color vector shapes, heavier strokes, open counters and no secondary text. Budget time for one round of simplification before the digital proof.
FAQ: Why does my monogram look backwards on the proof?
The die face is engraved as a mirror image so that the wax impression reads correctly. A good proof shows both the die view and the seal view. Approve the seal view for legibility, and confirm the engraver is cutting the mirrored version.
FAQ: Will a deeper engraving make my seal look more premium?
Only up to a point. Deep, narrow grooves need hotter wax to fill and are more likely to stick and tear on release. Moderate depth with sloped walls gives crisp relief that holds up across hand, machine and sticker production.
FAQ: Does a wax seal automatically make an envelope nonmachinable?
No. The USPS judges the whole mailpiece, including its thickness, rigidity and evenness, under Domestic Mail Manual 201. A seal adds height and unevenness, though, so it raises the chance of a surcharge. Mail a test piece through your own post office first, and check current rates in USPS Notice 123.
FAQ: Can the die I order now be used later for adhesive sticker seals?
Yes, if the artwork, depth and mounting suit production pressing and you keep a record of approved sizes and wax colors. Ask your sticker producer whether they can work from your existing die or need to hold it. Lead times, minimums and pricing should be confirmed by quote; see our wax seal sticker product page to start one.
FAQ: How many test impressions should I check before approving?
Check a small batch, not a single best example. Around twenty pressings in your chosen wax color will show whether clean results depend on perfect technique. If several fail on legibility or release, revise the artwork or the depth before engraving the production die.
Key Takeaways
Price the die, the wax and the finished seals as separate items — 4 distinct products are often confused in quotes (Source)
Size the die for the finished seal and the whole mailpiece, not the die face alone — USPS letters thicker than 1/4 inch fall outside letter dimensions (Source)
Taller, uneven seals carry a postage risk to budget for — a $0.49 nonmachinable surcharge was reported in 2026; verify current USPS rates (Source)
Seal artwork must be original or licensed — a wax-drip trademark was upheld in case No. 3:03-cv-93, affirmed on appeal in 2012 (Source)
Food gift packaging adds an adhesive compliance check for sticker runs — US food-packaging adhesives fall under 21 CFR 175.105 (Source)
Conclusion: Specify the Die Once, Use It for Years
A custom wax seal stamp pays off when it is treated as a specified part. Simplify the artwork into bold shapes, choose the diameter around the finished seal and the mailing limits, ask for moderate and consistent depth with sloped walls, and approve a batch of real wax impressions before the brass is cut. Record what you approved so the next production run matches the first.
If your plan includes peel-and-stick seals for invitations, packaging or brand mailings, share your die record or artwork with us and request a quote through our custom wax seal stickers page. We will confirm what your design needs for pressing before anything goes into production.
Hi there! I'm Bruce, proud dad to my amazing son. I'm the founder of Zigpac, a printing and packaging company empowering small and medium-sized businesses with custom solutions. Let's create something great together!



 Blog PDF for offline reading






The information below is required for social login
Sign In
Create New Account