


 Blog PDF for offline reading
Quick answer: The best adhesive backing for rubber patches depends on the surface the patch goes on, not on the patch itself. Use a plasticizer-resistant acrylic transfer tape on clean nylon, polyester and bare metal. Use a low-surface-energy (LSE) modified acrylic on textured PP or PE plastics. Use acrylic foam tape on curved, rigid hard goods that expand and contract with temperature. For anything that goes through a washing machine, skip tape and sew the patch on or heat-seal it.
Why a Good Patch Peels Off in Three Weeks
You order soft PVC patches with a peel-and-stick back, press one onto a nylon backpack or a plastic case, and it looks right. A few weeks later a corner lifts. Dust gets under the edge, and by the end of the season the patch has fallen off or left a gummy ring behind. Most of the time the patch was not the problem. The adhesive was matched to the wrong surface, applied too cold, tested before it had finished wetting out, or slowly softened by plasticizer moving out of the PVC.
The cost is real. A failed bond shows up as a returned bag, a bad product photo, or a reorder with a different backing and new samples. Buyers searching for the best adhesive backing usually want one tape that works everywhere, and no such tape exists. What does work is a short decision process: identify the substrate, match the adhesive chemistry to it, prepare the surface, give the bond time, and know when tape is the wrong tool. This guide walks through that process for six common surfaces.
What an Adhesive Backing on a Rubber Patch Actually Is
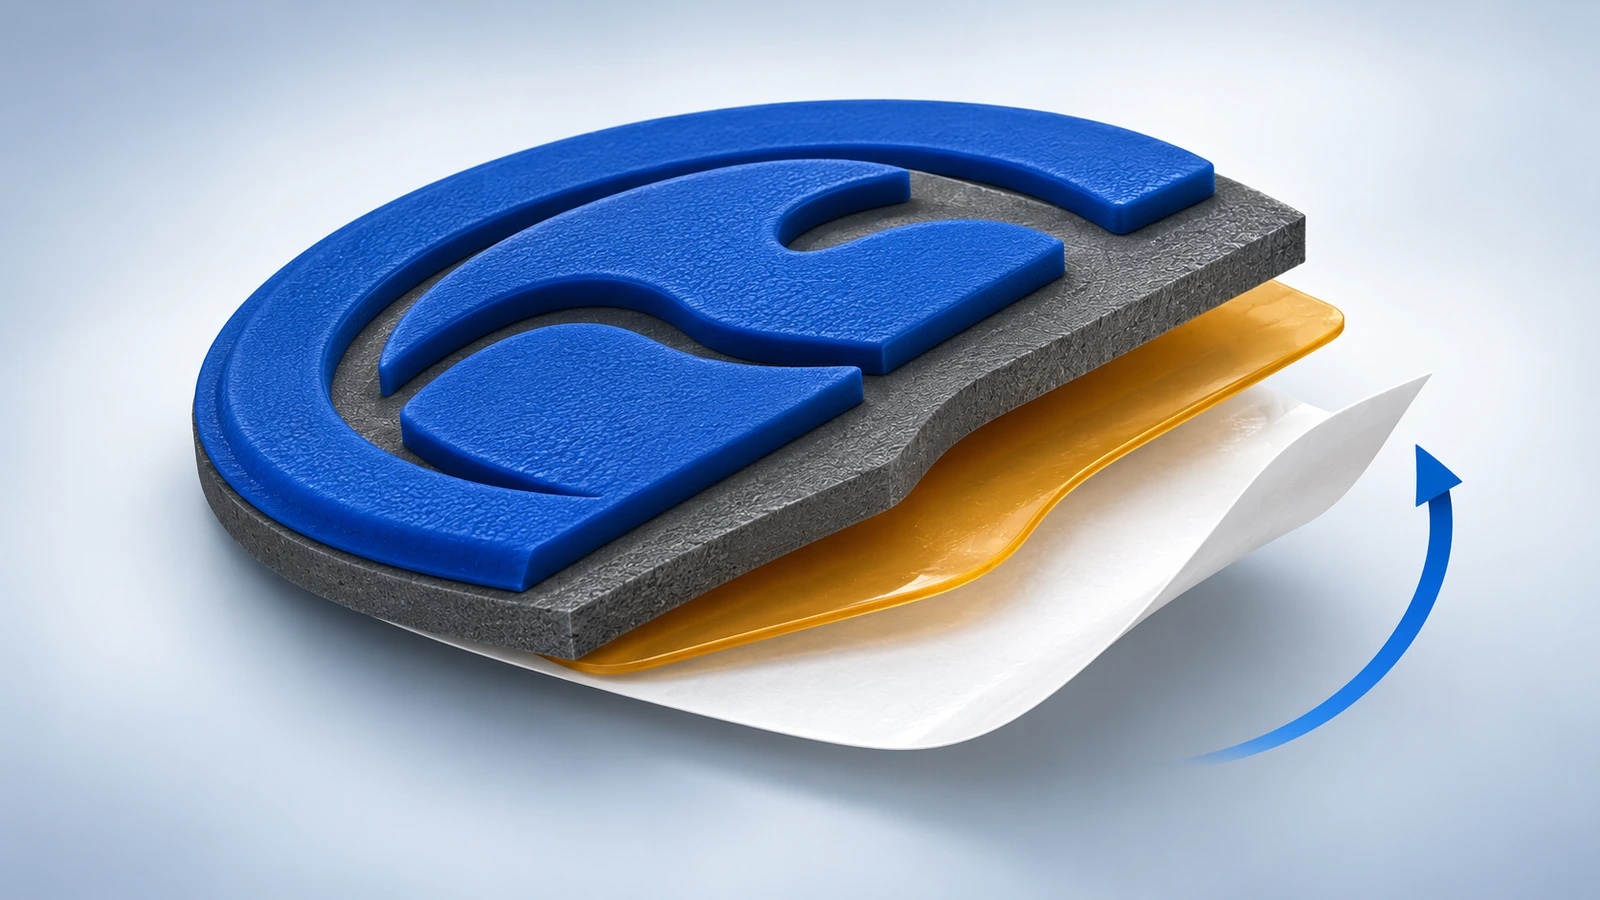
A peel-and-stick rubber patch has three layers under the logo: the molded PVC base, a pressure-sensitive adhesive (PSA), and a release liner. A PSA does not cure the way glue does. It is a permanently soft, viscous film that flows into the microscopic texture of the surface under pressure, and bond strength rises as it flows. Tape makers call this "wet-out."
The adhesive comes in three main builds. A transfer tape is a bare adhesive film, typically 0.05–0.13 mm (2–5 mil) thick, laminated straight onto the patch. A double-coated tape has adhesive on both sides of a thin tissue or film carrier, which makes die-cutting cleaner. A foam tape puts adhesive on both faces of an acrylic or PE foam core, often 0.4–1.1 mm thick, so it can fill gaps and absorb movement.
Two properties decide which build works on a given surface.
Surface energy. Measured in dynes/cm, surface energy describes how readily a liquid spreads on a surface. Water beads up on low-energy plastics and spreads out on clean metal, and adhesive behaves the same way. Commonly cited approximate values are about 29–31 dynes/cm for polypropylene, about 31 for polyethylene, about 42 for ABS, about 43 for polyester (PET), about 46 for nylon, and several hundred for clean steel or aluminum. General-purpose acrylic adhesives struggle below roughly 36–38 dynes/cm. That threshold is the dividing line between standard and LSE adhesives.
Plasticizer resistance. Soft PVC gets its flexibility from plasticizers, which can migrate slowly into an adhesive layer touching the PVC. The adhesive then softens, oozes at the edges, loses shear strength and sometimes yellows. Rubber-based adhesives are the most vulnerable. Specialty acrylics formulated for vinyl hold up far better. Plasticizer chemistry is also regulated: CPSC limits eight phthalates to 0.1% each[1] in accessible plasticized parts of children's toys and child care articles. The plasticizer system therefore affects both the bond and the compliance file.
How to Choose the Best Adhesive Backing for Rubber Patches, Surface by Surface
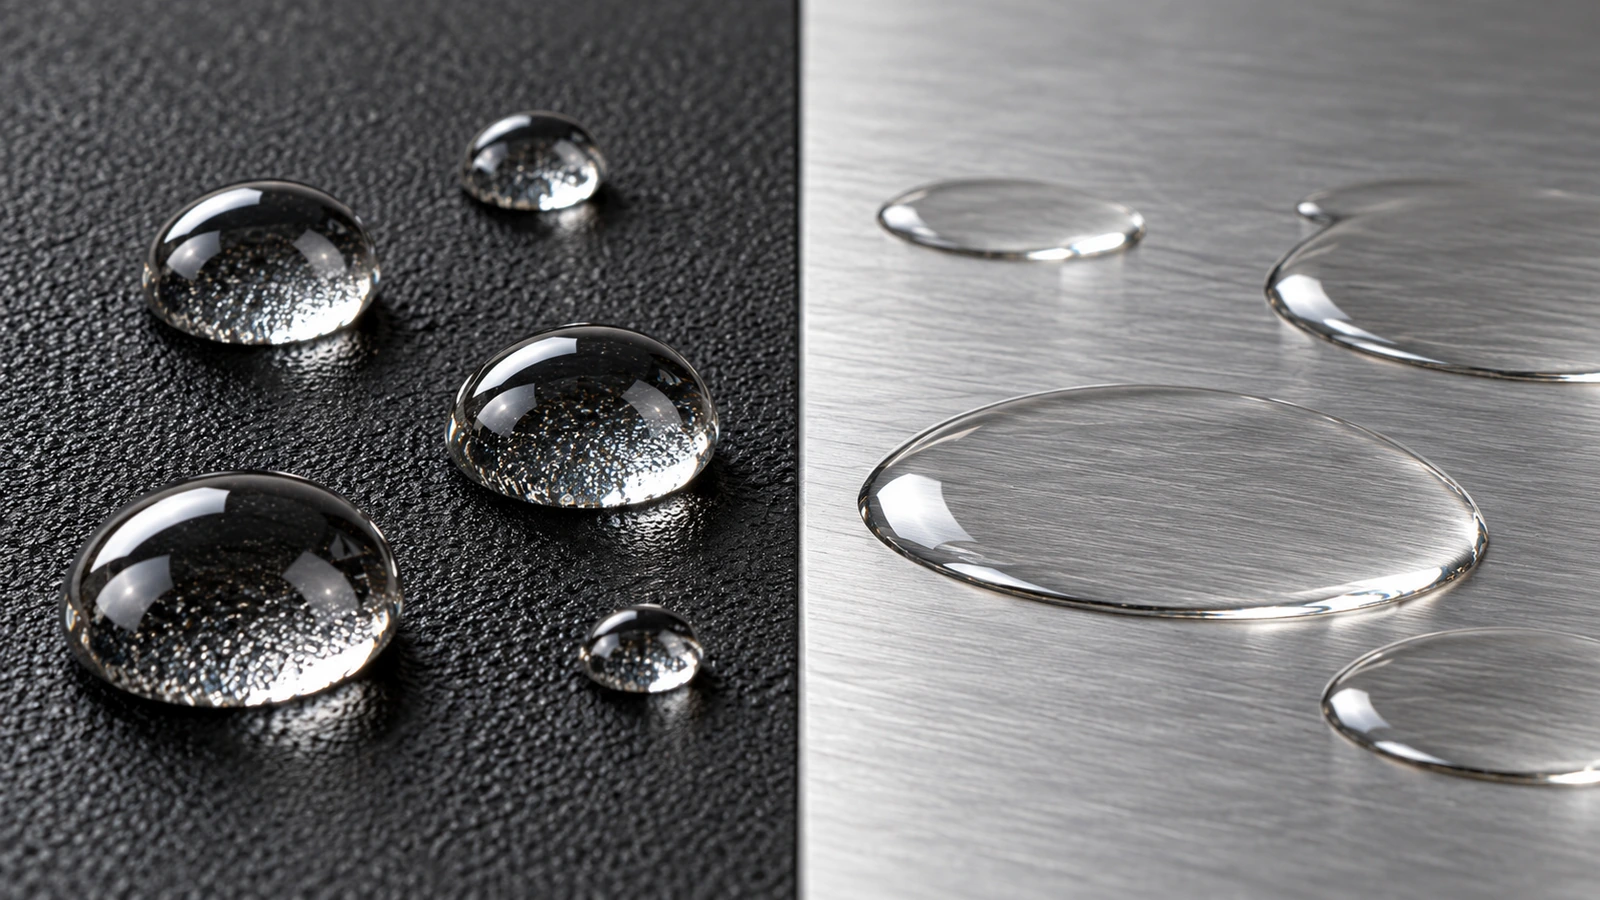
Step 1: Run a 10-second water test. Put a drop of water on the exact surface the patch will touch, meaning the coated side of the fabric or the finished side of the part. If the drop beads into a tight sphere, treat it as low-energy and plan for an LSE adhesive. If it spreads, a standard acrylic will usually work. Dyne test pens give a numeric reading if you need one for a supplier spec.
Step 2: Match the substrate to a backing, using the guidance below.
Nylon bags and packs
Adhesive rubber patches on nylon bags are the most common request and the most common failure. Bare nylon is moderately receptive, at around 46 dynes/cm. Bag fabric, though, is rarely bare. Most packcloth has a polyurethane back coating, and many face fabrics carry a water-repellent (DWR) or silicone-softened finish. Those finishes can push surface energy down into LSE territory and make adhesive bead up. The woven texture also reduces contact area.
Specify a thicker, high-tack adhesive, around 0.13 mm (5 mil) rather than 0.05 mm, in an LSE-grade acrylic. Apply it to a flat panel, not across a seam or a fold. On panels that flex every time the bag is packed, treat the adhesive as a positioning aid and add a perimeter stitch.
Polyester fabric
Polyester sits around 43 dynes/cm, which is fine for a standard acrylic on rigid, unfinished goods. The limiting factor is laundering, not chemistry. Detergent, warm water and dryer heat all attack a PSA. Polyester tote bags, banners and display pieces that are never washed can take an adhesive backing. Polyester garments should be sewn.
Leather
Leather behaves like several different substrates. Pigmented, top-coated leathers have a sealed surface that accepts acrylic adhesive reasonably well. Aniline, oiled, waxed or "pull-up" leathers release oils that migrate into the adhesive and break the bond, sometimes within days. Suede and nubuck offer almost no continuous surface.
On anything other than coated leather, sewing or rivets are the dependable choice. If you must use adhesive, test on an offcut from the same hide lot and look for darkening around the patch edge, which signals oil migration.
Textured plastic (cases, luggage shells, coolers)
Molded PP and PE housings combine two problems: low surface energy and a grained texture that leaves only the peaks touching the tape. A thin general-purpose transfer tape will grip the peaks and nothing else. Use a modified-acrylic LSE adhesive, or a foam tape with an LSE face, thick enough to flow into the grain. For production runs on PP, an adhesion-promoter wipe or a flame or corona treatment of the part raises surface energy before application.
Metal
Clean aluminum and steel have very high surface energy, so the risks come from contamination and movement rather than chemistry. Machining oils, fingerprints and anti-corrosion films must come off. Metal also expands and contracts at a different rate from PVC, and cold metal collects condensation during application. An acrylic foam tape absorbs that differential movement better than a thin transfer film, especially on equipment that moves between a hot vehicle and a cold warehouse.
Painted surfaces
Paint is the substrate, so the bond can only be as strong as the paint's own adhesion. Powder coats and textured paints vary widely in surface energy, and some fall into LSE range. Freshly painted parts can outgas solvent and blister the adhesive. Wait until the coating supplier's stated full-cure time has passed. A strong foam tape can also pull paint off when the patch is removed. If the item may be rebranded later, choose a removable or medium-tack acrylic and confirm that removal is clean on a test panel.
Application: Temperature, Pressure and the 72-Hour Rule
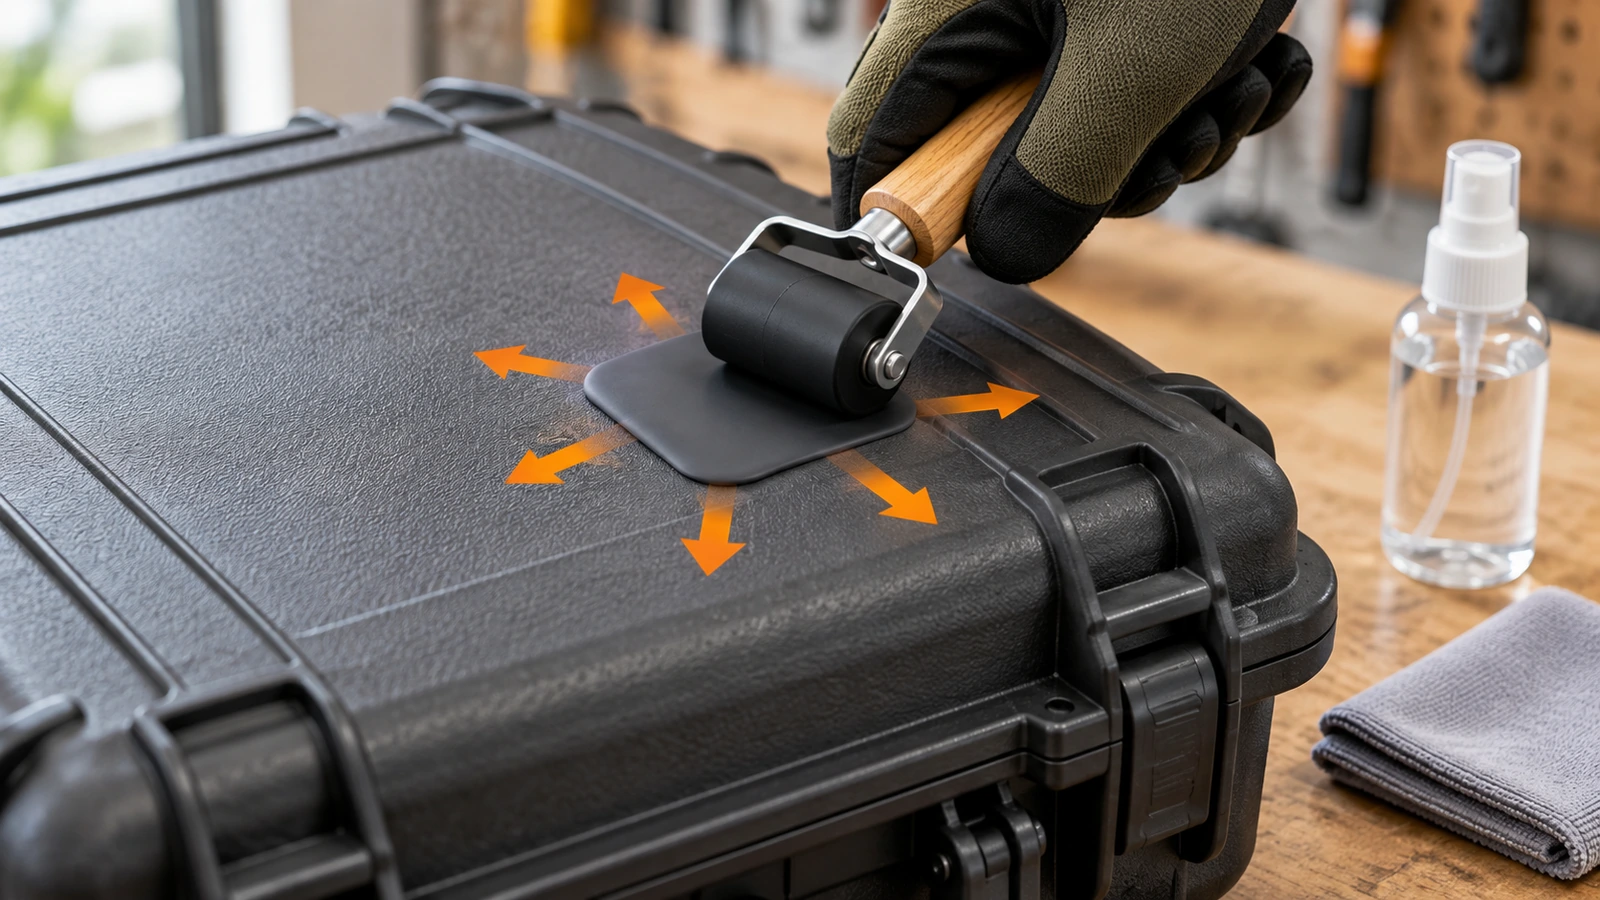
Step 3: Prepare the surface. Wipe with a 50:50 to 70:30 isopropyl alcohol and water mix on a lint-free cloth and let it flash dry. Avoid household cleaners that leave surfactant or silicone residue.
Step 4: Apply warm and with pressure. Acrylic adhesive makers typically recommend applying in roughly 21–38°C (70–100°F) and not below about 10°C (50°F), because cold adhesive is too stiff to wet out. Apply firm, even pressure with a hand roller, working from the center outward. Pressure, not time, starts the flow. A light thumb press on a textured surface leaves most of the adhesive untouched.
Step 5: Wait before judging the bond. Tape makers commonly publish a wet-out curve for acrylic PSAs along these lines: about half of the final strength at 20 minutes, about 90% at 24 hours, and full strength around 72 hours at room temperature. Peel-testing a patch an hour after application and rejecting the adhesive is one of the most frequent evaluation mistakes.
Step 6: Validate on your real part. After 72 hours, try to lift an edge with a fingernail, flex the substrate, and leave one sample in the hottest place the product will realistically sit, such as a car interior in summer. If you need numbers, a 180° peel test on the lines of ASTM D3330 gives a comparable force reading. The broader acceptance criteria for an order, such as size, color and finish, are covered on our custom rubber labels page, so they are not repeated here.
Sew-On vs Adhesive Rubber Patches vs Heat-Seal
The sew-on vs adhesive rubber patches question comes down to two exposures, washing and flexing, plus whether the patch must be repositionable or removable.
| Substrate | Recommended backing | Prep | Main failure risk | Switch to |
|---|---|---|---|---|
| Uncoated nylon, rigid panel | Plasticizer-resistant acrylic transfer tape | IPA wipe | Flex at folds | Perimeter stitch if the panel flexes |
| PU-coated / DWR nylon | Thick LSE acrylic (~5 mil) | Water test first | Finish repels adhesive | Sewing |
| Polyester (non-laundered) | Standard acrylic | IPA wipe | Laundering | Sewing for garments |
| Coated leather | Acrylic, tested per hide lot | Dry wipe, no solvent soak | Oil migration | Sewing or rivets |
| Textured PP/PE plastic | LSE acrylic or LSE-faced foam | Adhesion promoter or flame treatment | Low contact area | Mechanical fastening for heavy use |
| Bare metal | Acrylic foam tape | Degrease, warm part | Condensation, expansion mismatch | Rarely needed |
| Painted / powder coat | Acrylic foam or medium-tack acrylic | Full paint cure | Pulls paint on removal | Removable adhesive |
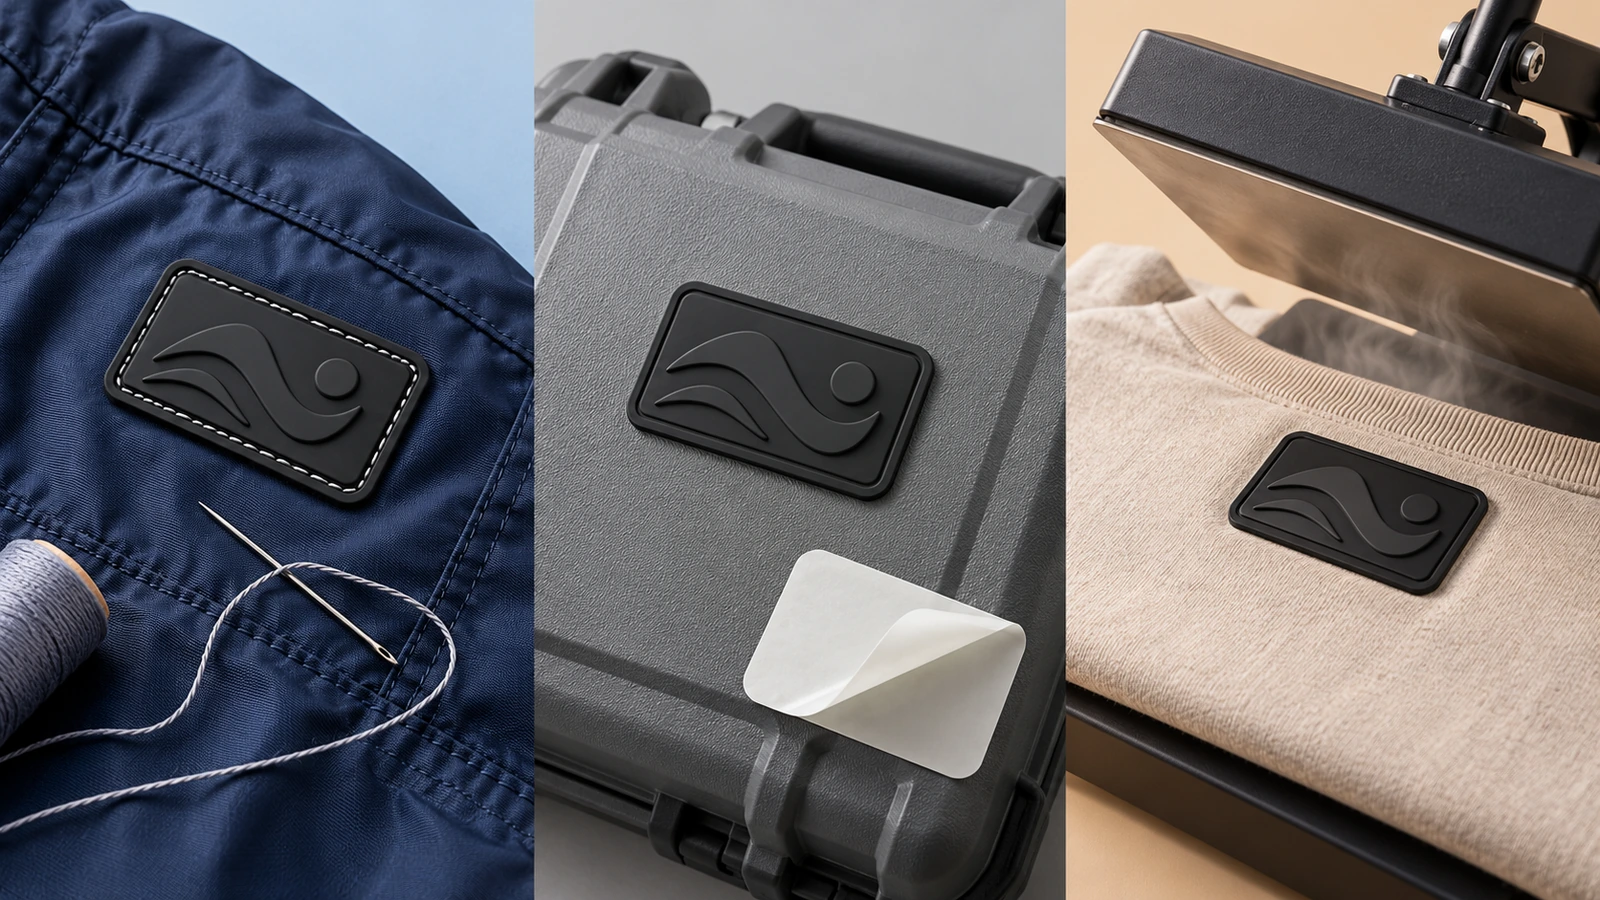
Sewing is the most secure mechanical attachment for fabric, and it survives laundering. It needs a sewing channel molded into the patch edge and an operator at a machine. On thick patches, keep the patch away from areas that rub skin. Independent health reporting notes that label friction alone can irritate sensitive skin[2], even without an allergy.
Adhesive is the fastest option and needs no equipment. It suits hard goods, packaging, cases and bag panels that are never laundered.
Heat-seal uses a hot-melt layer pressed onto fabric, typically at around 150–160°C for several seconds with a cold peel. Published application guides warn against stretch fabrics containing spandex and against textured substrates. Some material suppliers also advise against high-temperature heat-seal for PVC because it can bubble or warp, so heat-seal is generally paired with silicone rather than PVC.
How Long Do Adhesive Rubber Patches Last?
No standard defines a lifespan for an adhesive rubber patch. Any single figure you see is a vendor claim. What can be stated is which factors shorten the bond, roughly in order of impact:
- Laundering. Detergent plus heat breaks down a PSA quickly, which is why adhesive is a poor choice for apparel.
- Heat. Both the adhesive and soft PVC soften as temperature rises. One supplier puts soft PVC's comfortable service ceiling around 45–50°C, which a parked car's dashboard can exceed.
- Plasticizer migration. This is gradual and is the usual cause of failures after several months on otherwise good surfaces. A plasticizer-resistant acrylic slows it significantly.
- Flex and edge stress. A patch on a panel that folds daily works its edges loose.
- UV and outdoor exposure. Acrylic adhesives handle UV far better than rubber-based ones.
In practice, a correctly matched acrylic on a clean, rigid, indoor hard good can hold for years. The same patch on a flexing, coated fabric outdoors may not survive one season. One supplier comparison specifically flags that standard 3M-type backings on rubber labels can weaken within about a year in apparel-type use. Treat that as a risk signal, not a lab result.
If you sell into children's or California channels, durability is only half the specification. Lab screening lists such as SATRA's Prop 65 high-risk list[3] flag phthalates in plastics and rubbers at a non-detect level below 0.005%. The AAFA Restricted Substance List[4], whose 2026 English edition was published on 28 January 2026, is the reference many brands screen trims against. Children's products also need third-party testing and a Children's Product Certificate under the CPSIA framework[5].
FAQ
FAQ: Is 3M adhesive good for PVC labels?
"3M adhesive" covers dozens of different chemistries, so the brand name alone tells you little. For PVC labels, what matters is that the adhesive is a plasticizer-resistant acrylic, plus an LSE grade if the target surface is PP, PE or a powder coat. Ask your supplier for the specific tape type and its intended substrate rather than accepting "3M backing" as a specification.
FAQ: Can adhesive rubber patches go through the washing machine?
Not reliably. Pressure-sensitive adhesives soften in warm water and detergent. For anything laundered, use a sewing channel or, on suitable fabrics, a silicone heat-seal patch.
FAQ: Can I reposition a patch after sticking it?
Within the first few minutes, usually yes, because the bond is still low. After 24 hours, peeling will distort the soft PVC and contaminate the adhesive, and the patch will not stick properly again. Position it with a light touch first, then roll it down firmly.
FAQ: How do I remove an adhesive rubber patch without residue?
Warm the patch gently with a hair dryer, peel slowly at a low angle, then remove the remaining adhesive with isopropyl alcohol. On painted surfaces, test the solvent in a hidden spot first.
FAQ: Can I stick a peel-and-stick patch on a tire, rubber mat or hose?
No. Vulcanized rubber goods use a different class of label that is bonded during the cure. Patent literature describes curing such labels at 150–200°C under at least 1 MPa for 10–20 minutes[6], conditions that a PSA-backed PVC patch is not designed for.
FAQ: Does a rubber patch replace the legal label on a bag or garment?
No. In the US, textile products still need fiber content, country of origin and maker identity under the FTC Textile Fiber Rule[7], codified at 16 CFR Part 303[8]. Care instructions follow the Care Labeling Rule[9]. A branded patch sits alongside these labels and does not replace them.
Key Takeaways
- Plasticizer chemistry affects both bond life and compliance. — 8 phthalates capped at 0.1% each in children's toys and child care articles (Source)
- Retail screening lists are stricter than federal law for rubber and plastic trims. — phthalates screened to non-detect below 0.005% (Source)
- Brands screen trims against an annually updated restricted substance list. — RSL 26 English edition published 28 January 2026 (Source)
- Peel-and-stick patches cannot replace cure-bonded labels on rubber goods. — 150–200°C, ≥1 MPa, 10–20 minutes in patent examples (Source)
- A branded patch is decoration, not the legal label. — 3 required disclosures: fiber content, country of origin and maker identity (Source)
Conclusion
No single tape fits every surface. A water drop tells you whether you need an LSE adhesive. The PVC itself tells you to require plasticizer resistance. Flexing and washing tell you when to stop using adhesive and sew or heat-seal instead. Apply warm, roll firmly, and wait 72 hours before judging the bond.
If you know your substrate, whether that is a coated nylon pack, a grained PP case or a powder-coated tool box, send it with your artwork and we will recommend a backing and quote samples for testing on your actual part. See our self-adhesive soft PVC rubber labels to start a quote.
References
- U.S. Consumer Product Safety Commission – Phthalates Business Guidance (CPSIA Section 108, 16 CFR Part 1307) ↩
- CNA Lifestyle – Sensitive skin, dermatographia and clothing labels (2024-08-18) ↩
- SATRA – California Proposition 65 High Risk Substances Summary List, Issue 04 (September 2026) ↩
- American Apparel & Footwear Association – Restricted Substance List (RSL 26, 2026-01-28) ↩
- U.S. Consumer Product Safety Commission – CPSIA FAQ ↩
- US Patent 11,466,180 B2 – Vulcanization tire label (granted 2022-10-11) ↩
- U.S. Federal Trade Commission – Textile Fiber Rule ↩
- eCFR – Title 16, Part 303: Rules and Regulations under the Textile Fiber Products Identification Act ↩
- U.S. Federal Trade Commission – Clothes Captioning: Complying with the Care Labeling Rule ↩







The information below is required for social login
Sign In
Create New Account