We use cookies to enable our websites to remember information, to help some website functionalities to work properly, to understand how you interact with and use our websites and to display you content and ads that are relevant and engaging for you.
By clicking Accept All you consent to the use of these cookie.
The store will not work correctly when cookies are disabled.
Quick answer: Custom spray paint stencils work when four design choices are made before cutting. Bridges have to hold every letter island without breaking legibility. The stencil font needs open counters and strokes wide enough to survive overspray. An overspray border has to be sized for the job. The sheet thickness has to stay flat through the number of passes you plan to spray. Thin film suits wall logos and crate marking. Heavy polyethylene suits pavement.
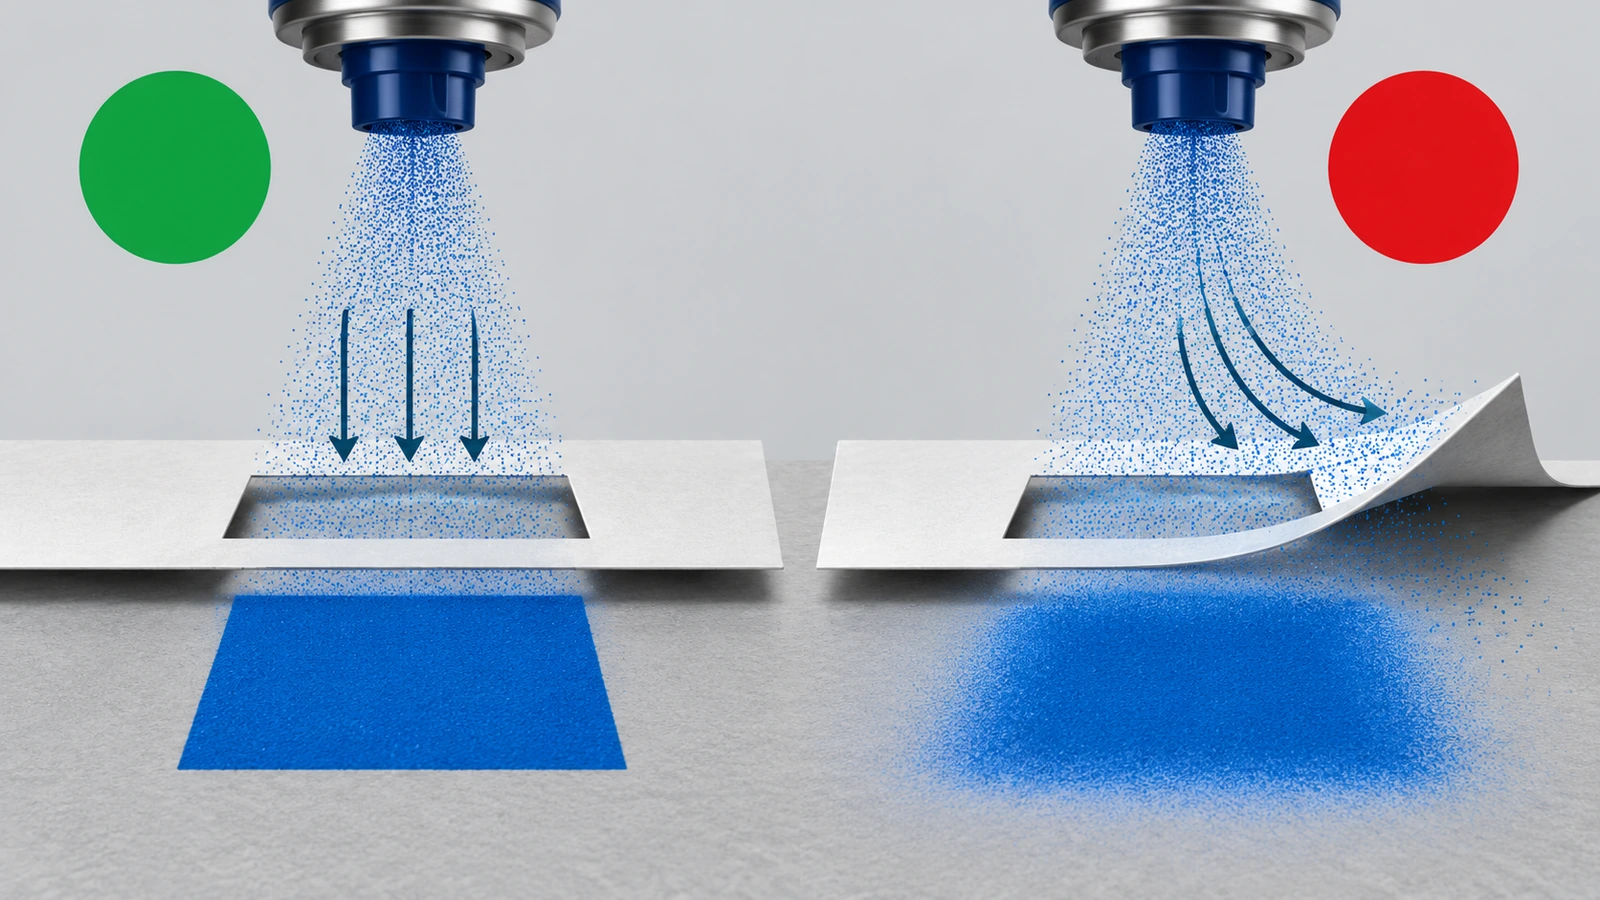
Custom spray paint stencils fail differently from roller or brush stencils. An aerosol can pushes moving air and fine paint mist toward the edge of every cut. If the sheet lifts even slightly, the mist travels underneath. If a letter's center has no bridge, it flaps or falls out. If the font's counters are too tight, the letter fills in after two coats. Many business buyers find this out on the job: a logo on a storefront wall comes out fuzzy, a parking legend reads as a smudge from the driver's seat, or a crate number turns illegible after the third repaint.
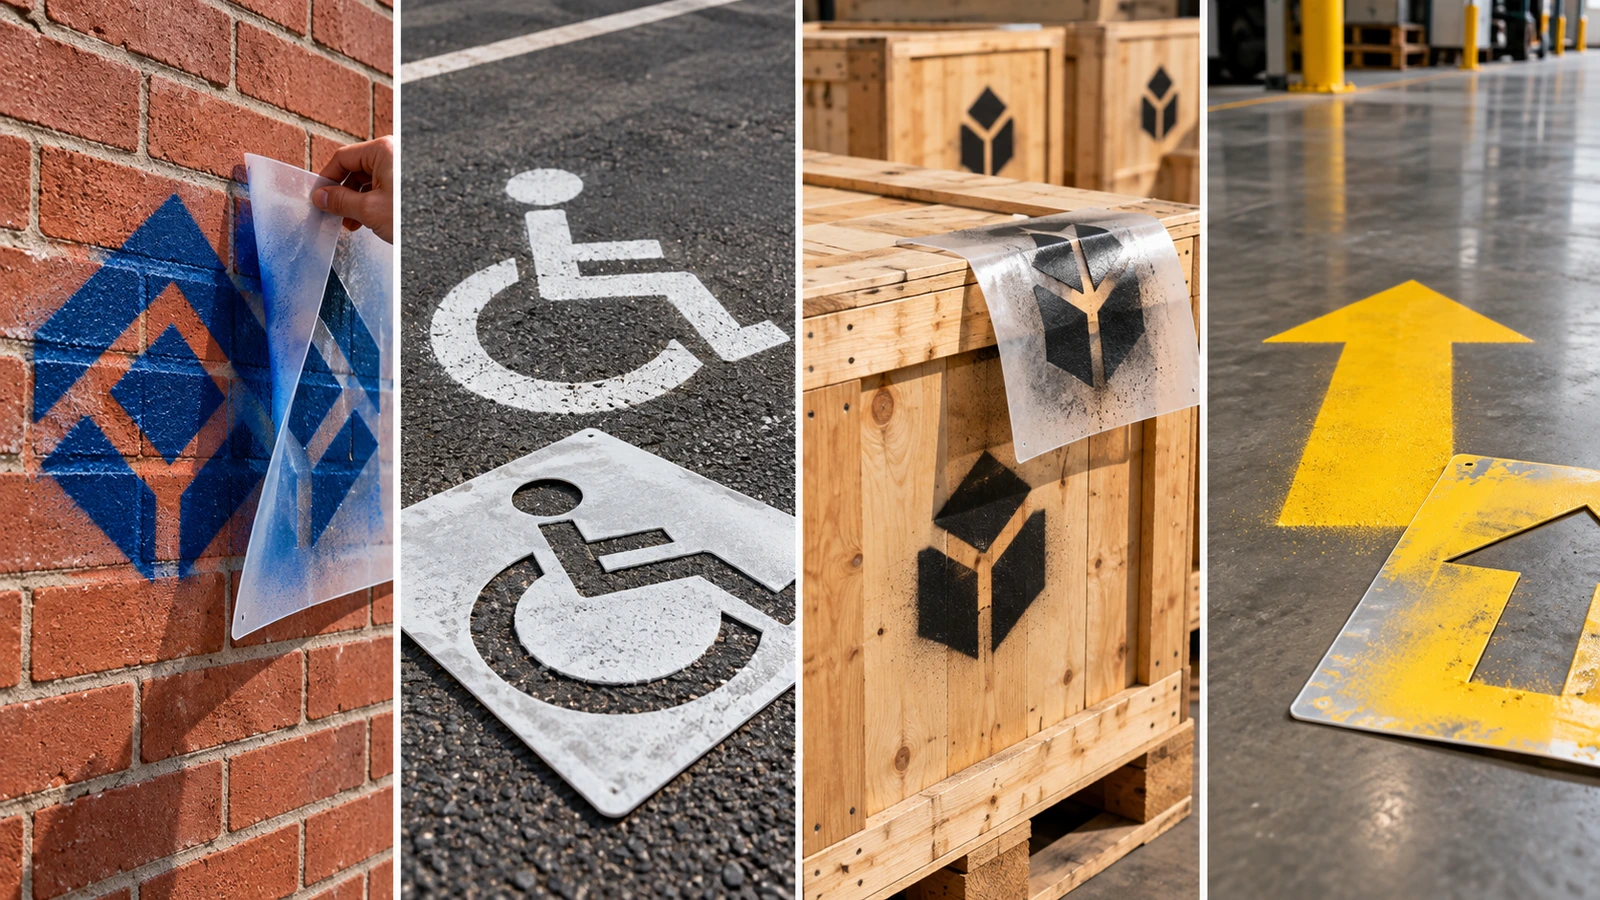
The fixes are design decisions, not painting tricks. This guide covers bridge placement, stencil font choice, overspray control, and how sheet thickness holds up across repeated spray passes. It then applies those rules to four common aerosol jobs: logo branding on walls, pavement marketing and parking marks, crate and equipment marking, and safety signage.
What Makes Custom Spray Paint Stencils Different From Other Stencils?
A spray stencil is a masking sheet with your artwork cut through it. The cut openings let aerosol paint reach the surface, and the solid areas block it. Three properties matter more for spray work than for brush or roller work:
Edge contact. The cut edges must lie flat against the surface while the spray airflow pushes against them.
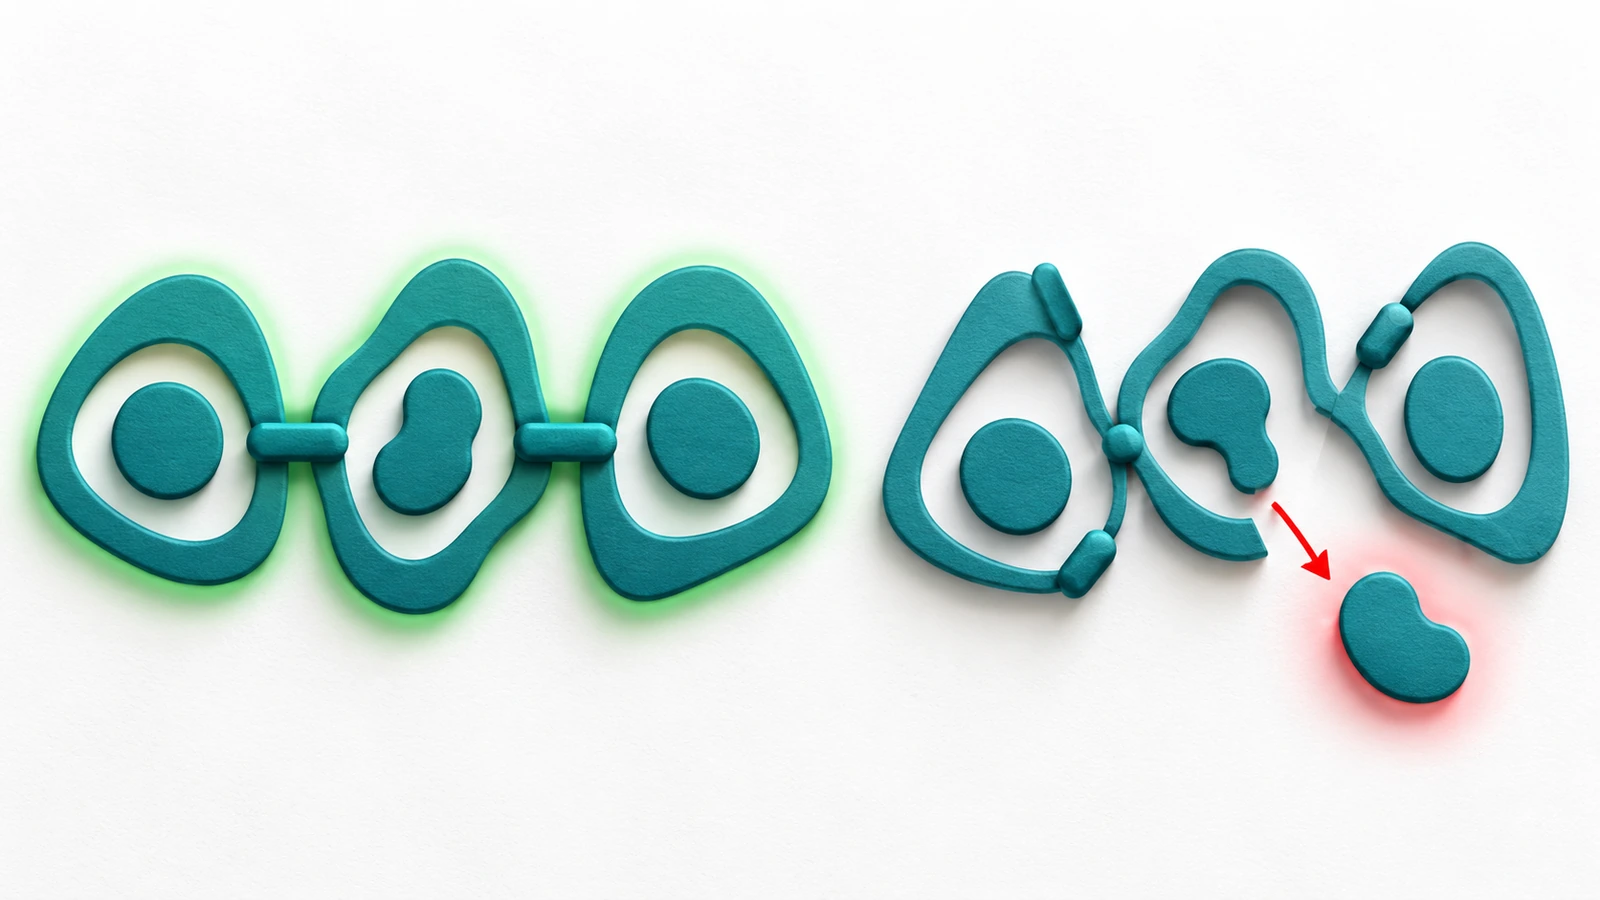
Structural continuity. Every enclosed shape must stay connected to the sheet.
A margin around the design. A solid border has to be wide enough to catch the mist that drifts past the target area.
Most reusable film stencils are made from biaxially oriented polyester, sold under trade names such as Mylar. Chemically it is the same BoPET family used for packaging and electrical film (BoPET film[1]). Heavy-duty pavement stencils usually move to low-density or linear low-density polyethylene sheet, because extra weight keeps the sheet from lifting outdoors. If you want to know what our PET stencils are and how they are made, the custom reusable PET painting stencils page covers that. This article stays on spray design.
Bridge Placement: Keeping Letters Intact Without Hurting Legibility
A bridge is a thin strip of stencil material that connects an island to the rest of the sheet. Islands are enclosed shapes such as the center of an O, A, B, D, P, R, 0, 6, 8 or 9, and the inner parts of most logos. Without a bridge, the island falls out. With a bridge that is too thin, the island tears loose after a few cleanings. With a bridge in the wrong place, the painted letter reads as a different letter.
Width rules that hold up
Laser-cut film stencils commonly use about 1 mm as the minimum width for bridges and for the gaps between cut elements. Lines narrower than that tend to melt together or tear. On thicker sheet and on large pavement letters, makers report that bridges of roughly 3 mm (about 1/8 in) hold up better. Scale bridge width with letter size, because spray airflow on a large island exerts more force on the bridge. Large counters, such as a 12-inch O, usually need two bridges rather than one. A single bridge lets the island act like a flap under the spray.
Placement rules that keep letters readable
Put bridges where strokes are thickest, never at a curve's tightest point or where two strokes meet.
Align bridges on a shared horizontal band across a word. A consistent band reads as a deliberate stencil style. Random breaks read as damage.
Do not bridge through a distinguishing feature, such as the tail of a Q, the crossbar of an e, or the gap that tells C from O.
On logos, check the bridged artwork at painted size, not on screen. A bridge that disappears at 300% zoom can split a mark in half on the wall.
When the bridge gaps must disappear
Some specifications do not accept stencil gaps in the finished mark. For airport pavement, the FAA's advisory circular on airport markings states that all gaps created when painting with a stencil template must be filled in (FAA AC 150/5340-1M[2]). Many brand guidelines expect the same for a logo. In those cases, place bridges where a crew can touch them up with a single brush stroke or a short second masking pass: straight stroke sections, not curves. Another option is to split the design into two stencil layers so neither layer needs bridges across the visible mark.
Choosing a Stencil Spray Paint Font for Legible Lettering
Font choice decides whether lettering stays readable after overspray softens every edge. Aerosol paint adds a slight halo to each cut, so any detail close to that halo's width disappears. Ready-made stencil typefaces already include bridges. A standard font converted to a stencil needs bridges added by hand, using the rules above.
Open counters. Fonts with large interior spaces in a, e, g and s stay legible when the halo narrows those spaces. Condensed and geometric fonts with tight apertures fill in first.
Even, heavy strokes. Avoid hairline serifs and high-contrast display faces. For clean cutting and spraying, a practical floor is about 1/4 in for the smallest feature. Logos with thin lines need to be enlarged rather than thinned.
Looser letter spacing. Add tracking beyond what looks right on screen. Overspray closes gaps between letters before it closes counters.
Uppercase for distance. Crate codes, equipment IDs and floor legends read faster in uppercase with clearly separated characters. Numerals such as 6, 8 and 9 need distinct bridge positions so they cannot be mistaken for each other.
Public roads are a special case. Pavement word markings follow the alphabets and layouts in the federal Manual on Uniform Traffic Control Devices (MUTCD). The current text is the 11th Edition with Revision 1, dated December 2025 (FHWA MUTCD[3]). Pavement legends are elongated so they read correctly from a moving vehicle. Interpretations of the word-marking section put letters at about 6 ft for posted speeds of 25 mph or below and about 8 ft at 30 mph or above on conventional roads (MUTCD Part 3 summary[4]). Private parking lots usually use much smaller legends. Do not apply road heights to a lot, or lot heights to a road, without checking which rules govern the site.
Overspray Control Starts in the Stencil File
Painters can reduce overspray with technique, but the stencil design sets the limits. Build these controls into custom stencils for spray paint before cutting:
Size the border to the job. Pavement stencils commonly carry a solid margin of 2–4 in around the design. Buyer guidance for standard 12-inch parking letters suggests at least 3 in. A wall logo sprayed in a sheltered interior can use less, but the border should still extend beyond the reach of a sweeping pass.
Design for hold-down. On film stencils, leave solid areas where tape or a light mist of repositionable adhesive can grip near the cut edges. On pavement sheet, a wide border also gives room to place weights or step on the sheet without blocking the openings.
Avoid long unsupported fingers. A narrow strip of sheet between two long cuts, such as the space inside an M or between arrow shafts, lifts first in wind or spray airflow. Widen it or add a cross-bridge.
Plan light passes, not one heavy coat. Several light coats leave less wet paint pooled at the edges. Pooled paint wicks under the sheet. Follow the spray distance printed on the can label rather than a generic rule, because valve and nozzle designs vary.
Mask beyond the border. On walls and vehicles, extend the masking with paper or film past the stencil's outer edge. On pavement, check wind direction before spraying.
How Stencil Thickness Holds Up Across Repeated Spray Passes
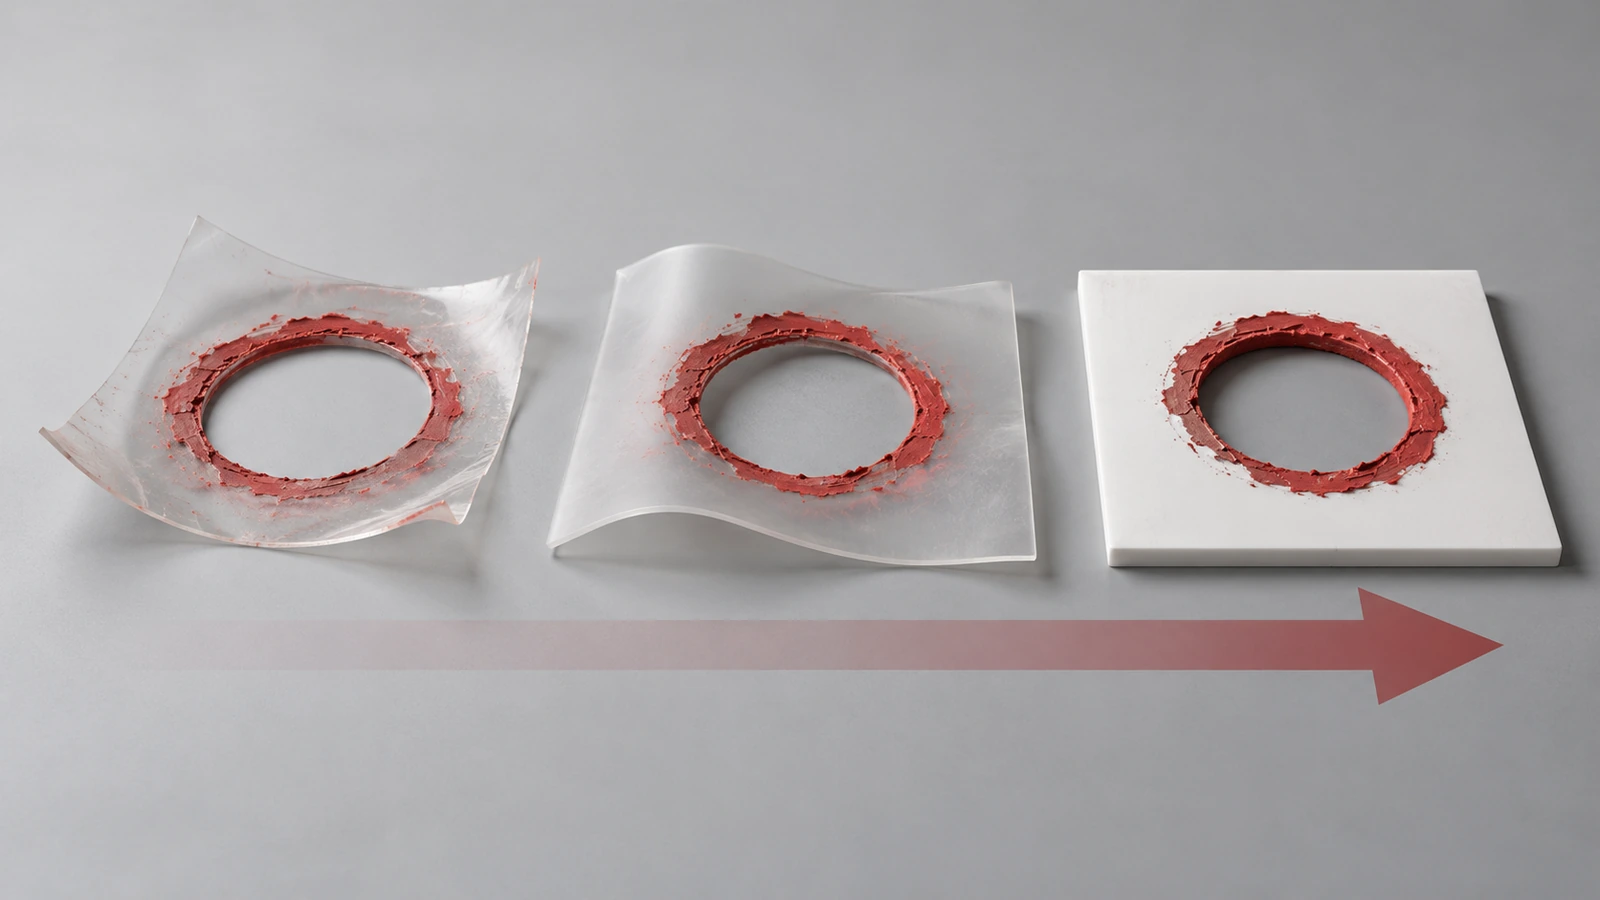
Each spray pass leaves a thin film of paint on the stencil. As that paint dries, it shrinks and pulls on the sheet. Over many passes, the stress makes thin plastic curl or warp. A warped stencil no longer lies flat, and that is when bleeding starts. Thickness therefore determines how many spray cycles a stencil survives between cleanings and how it behaves outdoors. Thickness is usually quoted in mil. One mil equals 0.001 in, or 0.0254 mm.
Sheet class
Thickness
Behavior over repeated spray passes
Watch for
Typical spray job
Thin polyester film
7–7.5 mil (≈0.18 mm)
Sharpest edges and finest detail. Curls soonest as paint builds up.
Tearing at narrow bridges, and lifting under spray airflow
Small logos, fine lettering under 1 in, short runs
Mid polyester film
10 mil (≈0.25 mm)
Balances detail and stiffness. Cleans well between sessions.
Edge lift on rough concrete or asphalt
Crate and equipment codes, interior wall branding
Heavy polyester film
14 mil (≈0.36 mm)
Holds shape over more cycles, and bends to mild curves such as a drum side
Loss of very fine detail, and creases if folded
Repeated logo runs, signage on smooth substrates
Polyethylene sheet
60 mil, about 1/16 in (≈1.52 mm)
Stays in place under its own weight
Small strokes, and rolled-shipping memory
Occasional parking and warehouse floor marks
Polyethylene sheet
125 mil, 1/8 in (≈3.18 mm)
Resists the curl caused by heavy overspray
Weight, and poor detail below letters of a few inches
High-frequency contractor striping, windy sites
Two points keep this table honest. First, no ASTM or ISO test defines how many spray passes a stencil should last. Claims of "hundreds" or "thousands" of uses are vendor statements, and real life depends on paint buildup, cleaning and storage. Second, the heavy sheet has a real material specification behind it: ASTM D4801 covers polyethylene sheeting 0.25 mm (0.010 in) and thicker, which gives buyers a shared vocabulary for specifying pavement-grade sheet (ASTM D4801[5]). For help matching a material to your budget, see the custom plastic stencils product page rather than this guide.
Extending life between passes
Flex off dried paint. Once water-based or latex paint dries, flexing the sheet cracks and releases most of it. Oil-based paints generally do not peel this way and need cleaning instead.
Store flat. Storing a stencil rolled or folded sets permanent memory into the plastic, and a folded crease becomes a bleed line. If a polyethylene stencil arrives rolled, laying it flat in warm sun before the first use is a common field fix.
Respect heat and UV limits. Polyester film melts at roughly 250–254 °C. Its long-term UV resistance is poor, so store it out of the sun between outdoor jobs (technical guide to BoPET[6]). Hot-applied thermoplastic marking is not a job for plastic spray stencils.
Label the resin. Write the material code on large or shared stencils, following the generic plastics identification marking in ISO 11469, so crews know which solvents are safe (ISO 11469[7]).
Design Notes for Four Common Aerosol Jobs
Logo branding on walls
Brand marks carry the most detail and the strictest approval, so start from the vector master. Enlarge thin elements rather than thinning them, and decide early whether bridge gaps will stay or be filled. Translucent film helps crews align the stencil with existing architecture. On textured block or brick, expect some edge softness however flat the sheet is, and use a heavier font weight to compensate. Get written permission from the trademark owner before spraying a client's or partner's logo.
Pavement marketing and parking marks
Outdoor ground work brings wind, rough texture and heavy spray volume, which is why thick polyethylene dominates this job. New public-road markings follow the 11th Edition MUTCD. FHWA also added minimum retroreflectivity maintenance requirements for pavement markings, which affect paint and bead choice more than the stencil itself (FHWA pavement marking rules[8]).
For accessible parking, a ground wheelchair symbol is never the whole solution. ADA rules require an above-ground sign showing the International Symbol of Accessibility, mounted with its bottom edge at least 60 in above the ground (ADA.gov parking guidance[9]). The U.S. Access Board states that symbols painted on the parking surface, even where state or local rules require them, cannot replace those signs. The federal standards also leave striping color to state and local codes (Access Board parking guide[10]). Some states set exact sizes. California, for example, requires a ground symbol of at least 36 × 36 in. Confirm the rules for the site's state before finalizing the artwork.
Crate and equipment marking
These jobs involve high repetition, small to mid-size characters and often curved or ribbed surfaces. Mid-weight film bends around drum sides and crate slats while keeping alphanumeric codes sharp. Give every character set consistent bridge positions so codes read the same across a fleet. If the same stencil sprays several colors, clean it between colors rather than letting layers build up. Mixed paint layers shrink unevenly and speed up warping.
Safety signage
Floor arrows, "keep clear" zones and hazard legends have to read at a glance, often from a forklift seat. Use bold sans-serif lettering, uppercase text and generous borders. Use the color your site's safety program specifies rather than one chosen to match the brand. Floor stencils in warehouses take foot and wheel traffic between uses, so thicker sheet that stays flat outlasts film on concrete. When a single sign mixes a small pictogram with large text, consider two stencils: thin film for the detailed symbol and heavy sheet for the lettering.
FAQ
FAQ: Do stencil bridges make lettering look unprofessional?
Only when they are placed at random. Bridges aligned on a shared horizontal band read as an intentional stencil style. Where gaps are not acceptable, as on FAA airport markings or strict brand guidelines, design bridges on straight stroke sections so they can be filled in with one quick touch-up, or use a two-layer stencil.
FAQ: Can one stencil handle both an interior wall and an asphalt lot?
Rarely well. Thin film that gives a crisp wall logo tends to lift on rough asphalt under spray airflow. Heavy polyethylene that stays put outdoors loses fine detail. If the same mark must appear in both places, plan two versions sized for each surface.
FAQ: How many spray passes will a custom stencil survive?
No standard test defines it, so treat repeat-use claims as estimates. Replace or recut the stencil when edges stay raised after you flex it, when bridges start to tear, or when paint consistently bleeds in the same spot. Cleaning dried paint off and storing the stencil flat do more for its life than any single thickness choice.
FAQ: Does a stenciled wheelchair symbol make a parking space ADA compliant?
No. Federal rules require an above-ground sign, mounted at least 60 in to the bottom of the sign. Space and access aisle dimensions and state marking rules also apply. A ground symbol is a supplement, not a substitute.
FAQ: What artwork do I need to get started?
Vector artwork drawn at 1:1 painted size makes bridge and border decisions far easier. For file preparation and the proof process, see the custom PET stencil product page.
FAQ: Can I use a client's logo on a spray paint stencil?
Owning the stencil does not give you rights to the design. Get written approval from the brand owner before cutting or spraying their trademark, especially for pavement marketing on public-facing property.
Key Takeaways
Airport stencil work must leave no bridge gaps in the finished mark. — AC 150/5340-1M, signed 2019 (Source)
Public-road pavement legends are elongated and much larger than parking-lot lettering. — about 6 ft at ≤25 mph and 8 ft at ≥30 mph (Source)
The current federal marking manual has been revised since the 2023 release. — 11th Edition, Revision 1, December 2025 (Source)
A painted accessibility symbol never replaces the required sign. — sign bottom at least 60 in above ground (Source)
Pavement-grade polyethylene can be specified to a published standard. — ASTM D4801 covers sheet of 0.25 mm (0.010 in) and thicker (Source)
Polyester film stencils have hard heat and UV limits. — melting point about 250–254 °C, with poor long-term UV resistance (Source)
Conclusion
Good custom spray paint stencils are designed for the spray before they are cut. Place bridges where they hold the most and show the least. Choose a font whose counters survive overspray. Size the border to the site, and match sheet thickness to the number of passes and the conditions outdoors. Get those four decisions right and the same artwork can brand a wall, mark a lot, code a crate fleet or label a safety zone cleanly, job after job. When your artwork is ready, send it through our custom reusable PET stencil page to request a proof and a quote for your sizes and quantities.
Hi there! I'm Bruce, proud dad to my amazing son. I'm the founder of Zigpac, a printing and packaging company empowering small and medium-sized businesses with custom solutions. Let's create something great together!



 Blog PDF for offline reading











The information below is required for social login
Sign In
Create New Account