We use cookies to enable our websites to remember information, to help some website functionalities to work properly, to understand how you interact with and use our websites and to display you content and ads that are relevant and engaging for you.
By clicking Accept All you consent to the use of these cookie.
The store will not work correctly when cookies are disabled.
Quick answer: Fridge magnet printing relies on three main methods. Digital printing suits short or personalized runs on flexible magnet stock. Offset lithography suits long runs that need tight spot-color control. UV-curable inkjet prints directly onto rigid faces such as aluminum, acrylic or die-cast metal. Choose by substrate, run size and how strictly your brand colors must match, then confirm the setup and per-unit costs with your supplier before you approve artwork.
Most problems in fridge magnet printing come from a mismatch between the print method and the order, not from bad artwork. A promotional buyer orders several thousand magnets for a campaign and the logo comes back a shade off-brand. Or a short run of personalized agent magnets is quoted on a press that carries plate and makeready costs. Or a metal-faced design is printed with inks that never bonded properly and start flaking after a few months of kitchen humidity.
These mistakes cost more than a reprint. The magnet is meant to sit on a household appliance for years, so any flaw is on display for years too. This guide covers how printed magnets are produced, how the three dominant print technologies behave on flexible and rigid substrates, where each one becomes economical, and what color accuracy you can realistically expect from a bulk order.
What is fridge magnet printing?
Fridge magnet printing is the process of putting artwork onto a decorative face layer and joining that face to a magnetic component. The ink does nothing magnetic. Holding power comes entirely from the backing, while the print determines how the piece looks, how long the colors last and how closely they match your brand. Keeping those two functions apart in your head simplifies supplier conversations, because print quality and magnetic performance are specified, tested and priced separately.
There are two substrate families, and they shape every later decision.
Flexible substrates. Ferrite powder bound in a polymer is calendered into a bendable sheet. The face is either a white vinyl top layer printed directly or a printed paper or vinyl sheet laminated on top. Buyers often call these custom flex magnets. Cards, calendars, schedules and simple die-cut shapes are made this way.
Rigid substrates. A rigid face made of aluminum, tinplate, acrylic, wood or die-cast zinc alloy carries the graphics. A separate magnet is bonded to the back, usually a ferrite disc, a strip of magnetic sheet or a small neodymium insert. Color is added by UV printing, enamel fill, plating effects or a printed insert under an epoxy dome.
The category matters to marketers because of where the product ends up. A CBS News poll found that 87% of Americans have magnets on their refrigerator[1]. Few promotional formats get daily household exposure at that rate, so a weak print is a visible and lasting brand problem.
How printed fridge magnets are produced, step by step
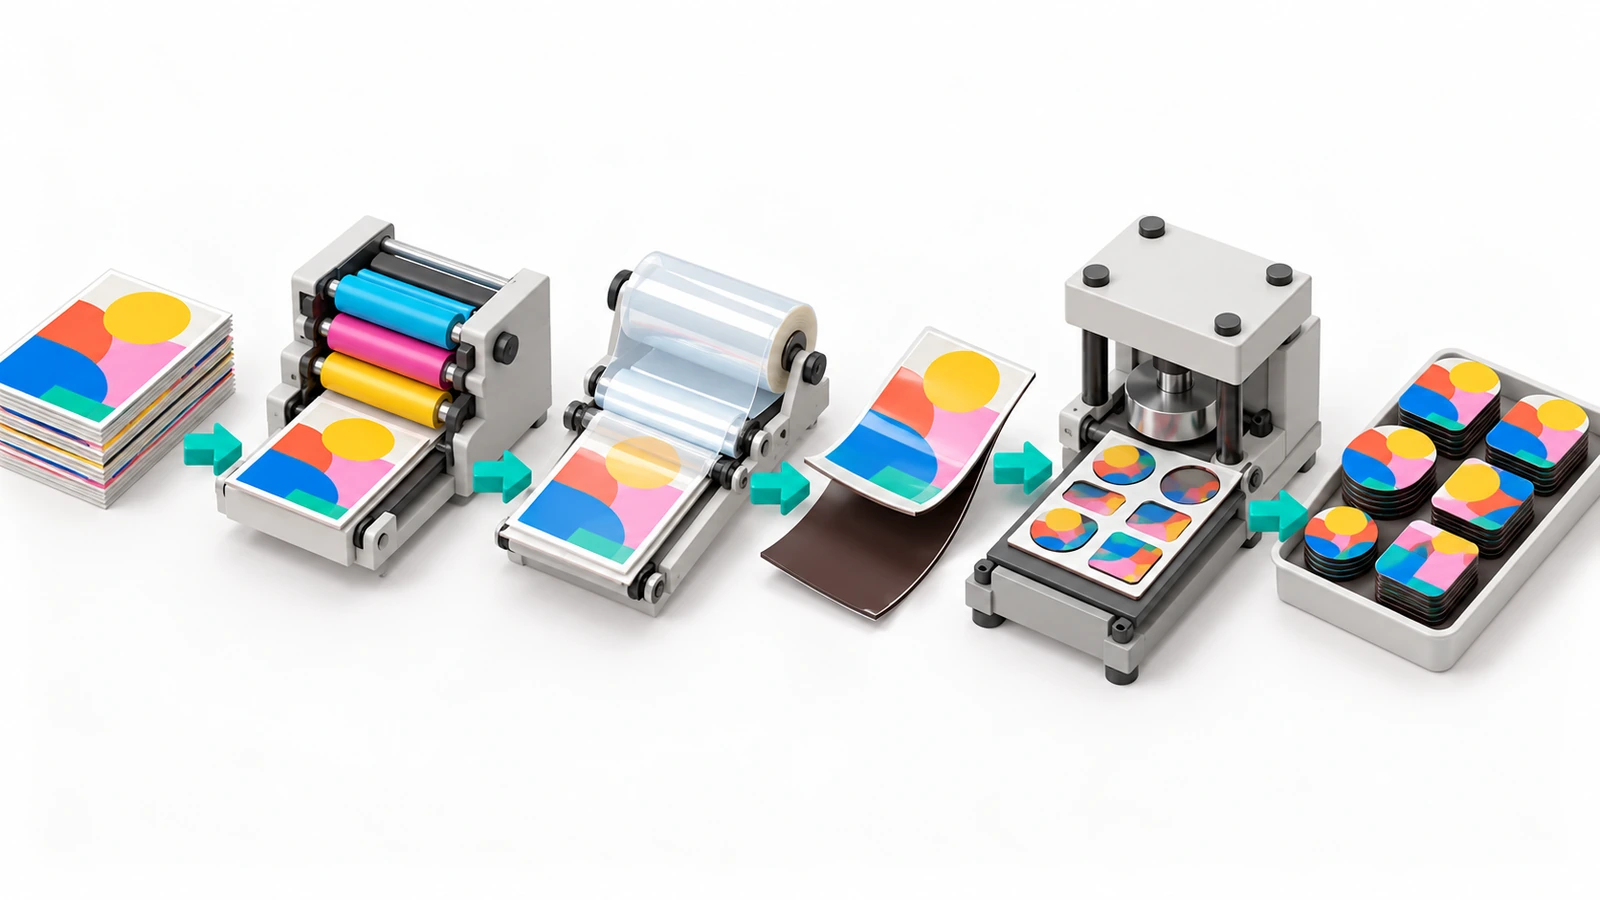
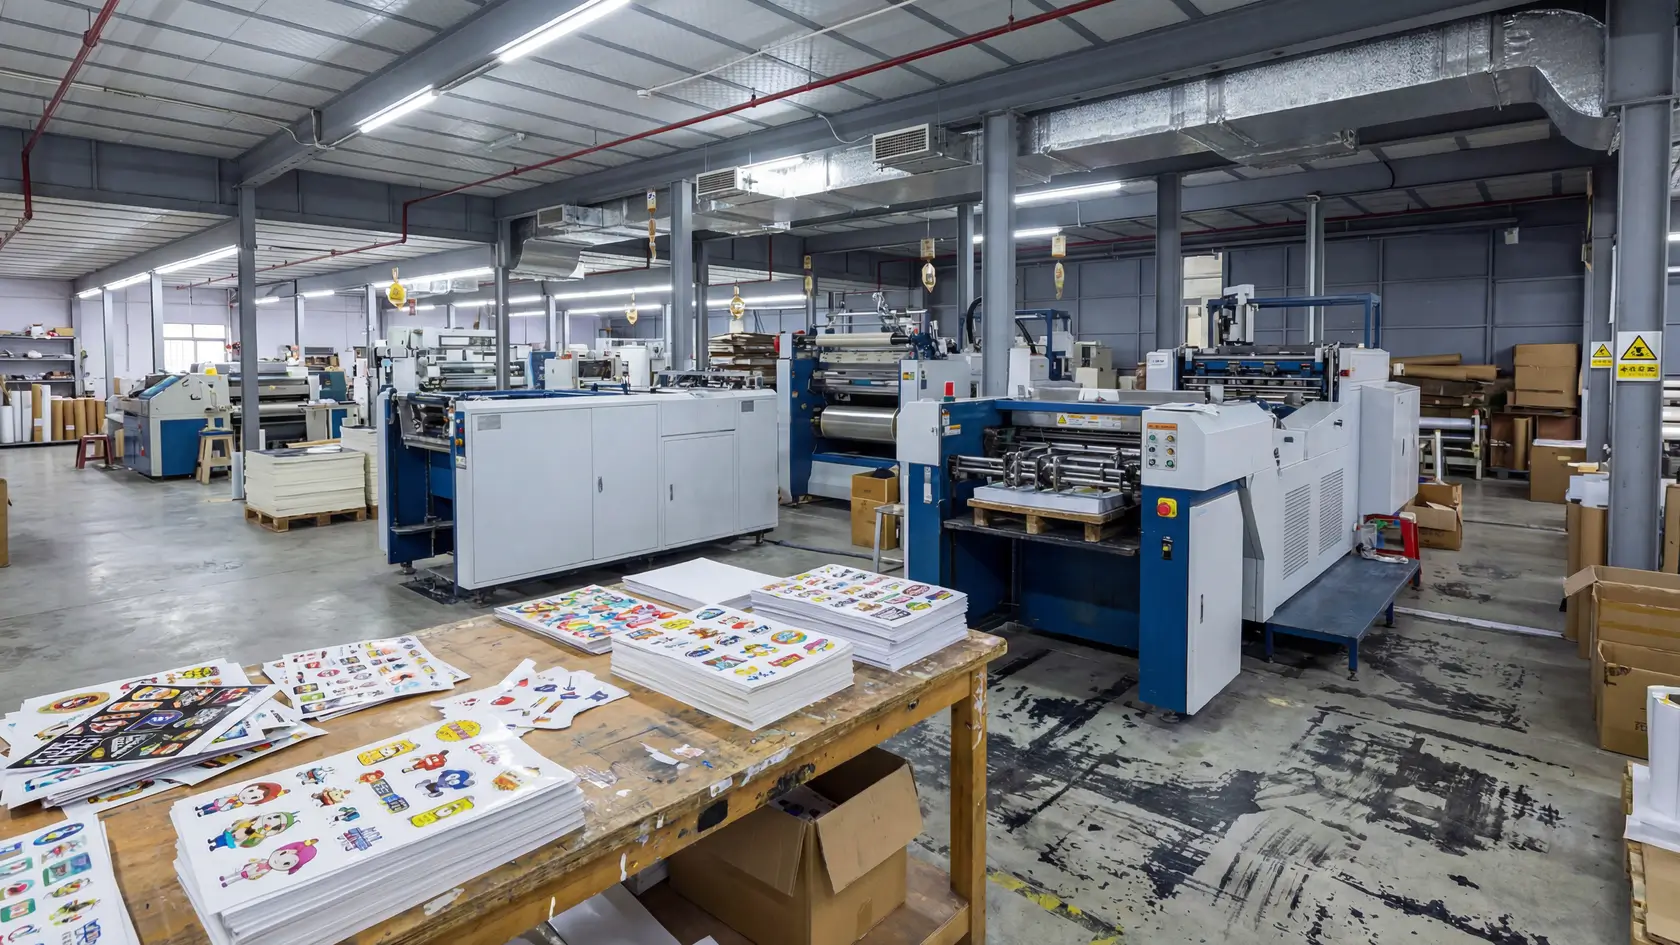
Factories differ in equipment, but the production logic follows the same six stages. Knowing them helps you read a quotation and see where cost and risk actually sit.
1. Prepress and color conversion
Artwork is converted into the color system of the chosen press. Digital and UV presses use CMYK, sometimes with added white or extended-gamut channels. Offset can run CMYK, dedicated spot inks, or both. Prepress also adds bleed beyond the cut line, builds a separate die line for the shape, and checks resolution. Raster images generally need about 300 pixels per inch at final printed size to avoid visible pixelation. Low-resolution photos are one of the most common causes of complaints about "blurry" magnets.
2. Printing
Flexible jobs are usually printed on sheets or rolls, many images per sheet. Rigid faces are printed on flatbed UV machines, often in jigs that hold dozens of blanks in register. Pre-cast metal parts with raised relief need a jig made for that part so the print head stays at a consistent distance from the surface.
3. Surface protection
Printed faces get a gloss or matte laminate, a UV varnish, or a clear epoxy dome. This layer controls scratch resistance, moisture resistance and light fastness more than the ink does. Skipping it is a common cost cut and a frequent reason colors fade near a sunny kitchen window.
4. Joining the print to the magnet
For flexible magnets, the printed face is laminated to the magnetic sheet before cutting, so the whole stack is cut at once. For rigid magnets, the backing is bonded after the face is finished, usually with an industrial adhesive or by pressing it into a recess. Poor glue coverage at this stage causes the "magnet fell off the back" complaint.
5. Cutting and shaping
Long flexible runs are cut with steel-rule dies. Short runs and complex shapes are often cut on digital knife or laser systems, which need no physical die. Rigid faces get their outline from the casting mold, a stamping die or a laser before printing begins.
6. Inspection and packing
Typical checks include color against the approved proof, print registration, edge quality, adhesion of the backing, and holding power on a magnetic steel plate. The buyer-side checks for samples and finished goods are covered on our custom metal fridge magnets page, so this guide does not repeat them.
Digital vs offset vs UV fridge magnet printing: how the methods compare
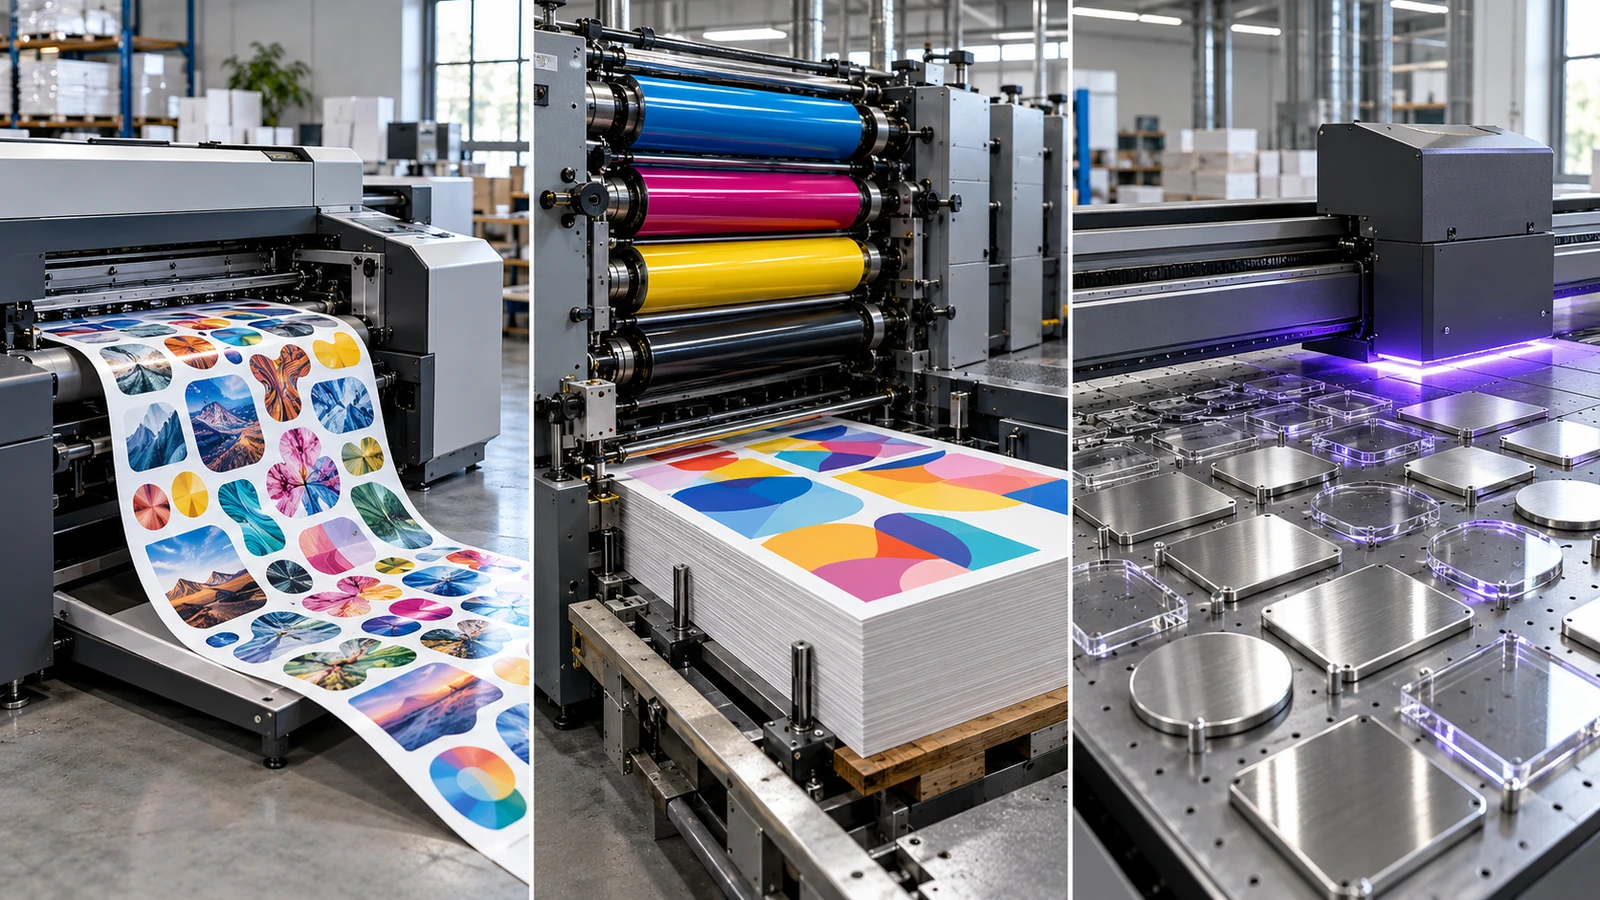
Digital printing
Digital presses, either toner or aqueous/solvent/latex inkjet, print straight from a file with no plates. Every sheet can differ, which makes variable data cheap. A realtor team can order one design with a different agent name and phone number on each batch, or a school can print a separate schedule for each sports team. Quality on white vinyl or laminated paper is good for photos and gradients. The limits are a CMYK gamut that misses some brand colors and possible small color drift between press runs. Most custom magnet printing services that offer instant online pricing are built on digital workflows for this reason.
Offset lithography
Offset transfers ink from metal plates through a rubber blanket onto paper or vinyl sheets, which are then laminated to magnetic stock. Each color needs a plate, and the press needs makeready time and waste sheets to reach stable color. Those are fixed costs. Once the press is running, the cost per sheet falls sharply. Offset's main advantage for brand work is spot color: a premixed Pantone ink matches a brand guide more reliably than a CMYK build. It is still the traditional method for very large calendar and business-card magnet runs.
UV-curable inkjet
UV printers jet ink that ultraviolet lamps cure instantly, so the ink sits on the surface instead of soaking in. That lets it print on non-porous rigid materials: aluminum, coated tinplate, acrylic, wood and the flat areas of die-cast metal. A white underbase can be laid down first so colors stay bright on metallic or clear materials, and stacked layers can add a slight tactile relief. On bare metal, adhesion depends on surface preparation and often a primer. A standard cross-hatch tape test such as ASTM D3359 is a reasonable thing to ask a supplier about when inks go onto metal.
Side-by-side comparison
Factor
Digital
Offset
UV inkjet
Typical substrate
Flexible magnet sheet with printable vinyl or laminated paper
Paper or vinyl sheets laminated to flexible magnet stock
Rigid faces: aluminum, tinplate, acrylic, wood, die-cast metal
Setup cost
Very low; no plates
High; plates per color plus makeready waste
Low to moderate; jigs for odd-shaped parts
Per-unit cost as volume grows
Stays fairly flat
Drops steeply
Stays fairly flat; driven by print area and number of layers
Color system
CMYK, sometimes extended gamut
CMYK plus true spot inks
CMYK plus white, sometimes varnish
Variable data / personalization
Excellent
Impractical
Good
Brand-color precision
Good; drift between runs possible
Best for specified Pantone colors
Good on white base; substrate tint affects color
Main durability lever
Laminate quality
Laminate quality
Surface prep, primer, clear coat or epoxy
Best fit
Short runs, versioned campaigns, photo magnets
Very long runs of one design with strict brand colors
Premium rigid pieces, metal faces, short-to-mid runs
Two techniques fall outside this table but are worth knowing. Dye sublimation transfers ink by heat into polyester-coated aluminum or ceramic blanks and is common for photo gifts. Screen printing still shows up for bold one- or two-color logos on rigid faces. On die-cast metal, color is usually not "printed" at all. It is filled into recessed areas as enamel, with UV printing reserved for fine gradients or photographic detail. That combination is how the die-cast zinc alloy magnet handles artwork that mixes raised metal outlines with full-color areas.
Run-size economics: where each method pays off
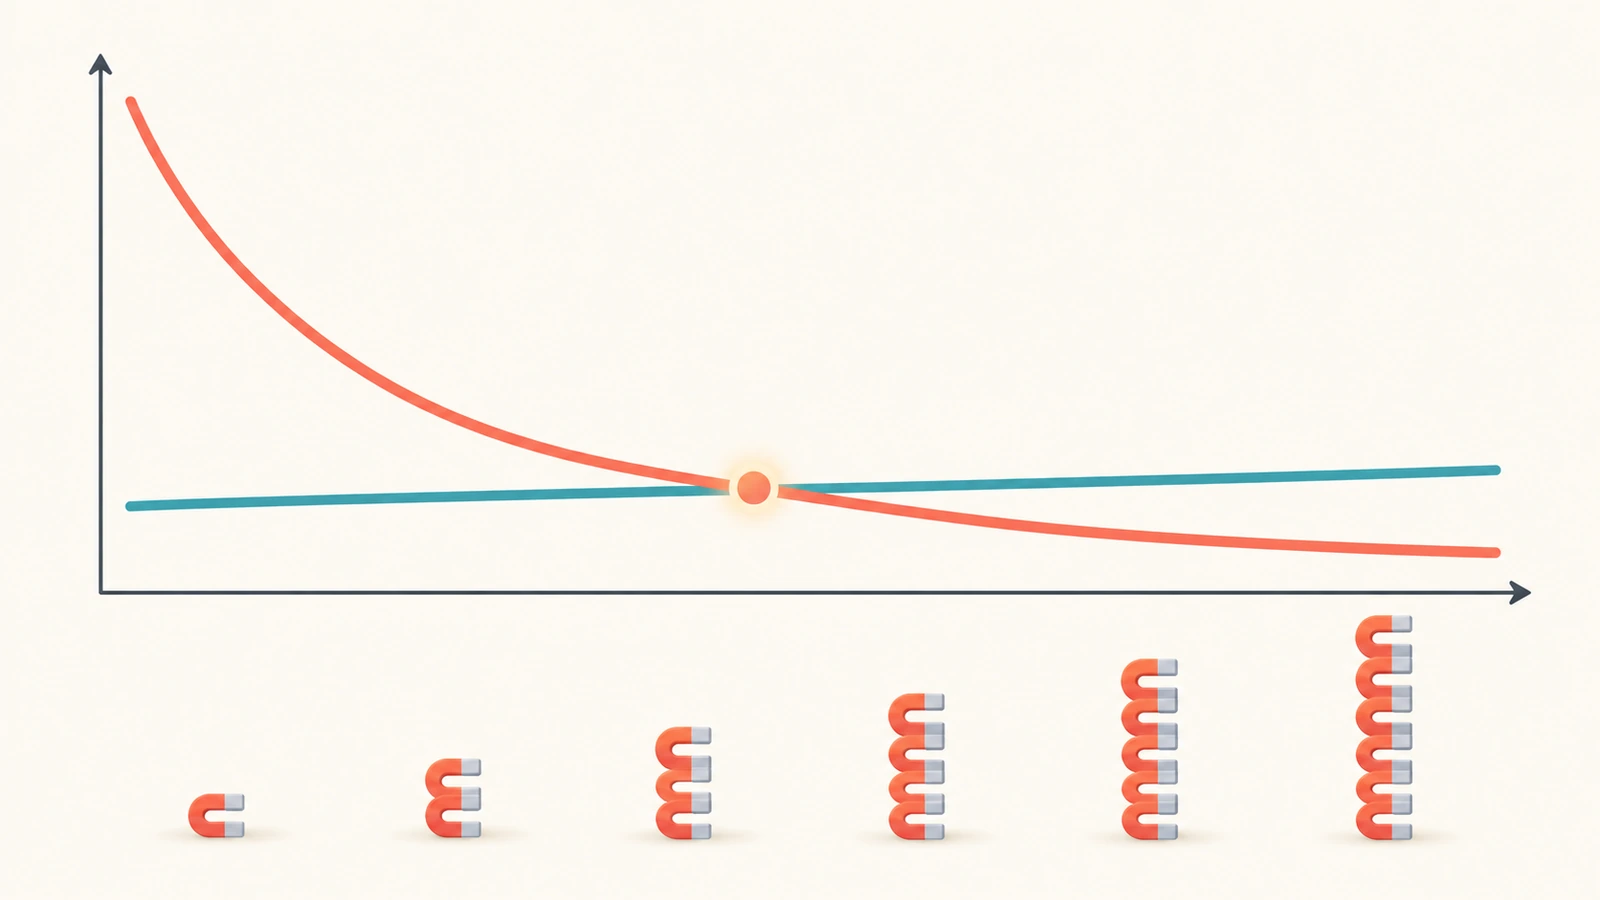
A quotation for custom print magnets breaks into fixed costs, which you pay once per design, and variable costs, which you pay per piece. The method changes the balance between them.
Digital: almost no fixed cost, so a small order is not penalized. Variable cost per unit stays similar from the first piece to the last, which means very large runs gain little from volume.
Offset: plates, makeready and the steel-rule cutting die are fixed costs spread across the run. Short runs carry a heavy setup share per unit. Long runs dilute it until offset becomes the cheapest option per piece.
UV on rigid faces: printing setup is modest, but the blank's own fixed costs dominate. A casting mold or stamping die for a custom metal outline is paid once and then amortized. Reorders of the same shape avoid it, which is why keeping mold records matters.
Cutting: digital knife or laser cutting avoids die cost but is slower per piece. A physical die costs money up front and then cuts quickly. Many suppliers switch from one to the other at a volume threshold.
The crossover point between digital and offset depends on the number of colors, sheet size, how many magnets fit on a sheet, and local labor rates, so no universal number is reliable. A practical approach is to request quotes at two or three quantity breaks and compare per-unit totals that include setup. If the per-unit price barely moves between breaks, you are on a digital-style cost curve. If it drops sharply, fixed costs are being amortized.
Color-matching expectations for promotional bulk orders
Color is where expectations and physics most often diverge. Set expectations early by knowing these constraints.
CMYK cannot reproduce every brand color. Saturated oranges, vivid greens, deep blues, fluorescents and metallics often sit outside the CMYK gamut. A digital or UV press shows the closest achievable version, which may look slightly duller than the Pantone chip. If one brand color is non-negotiable, offset with a spot ink or an enamel fill on a metal piece is the reliable route. Otherwise, approve a printed proof rather than a screen preview.
The substrate tints the ink. Process inks are partly transparent. On white vinyl they look as designed. On brushed aluminum, gold plating or silver plating, the metal shows through and shifts the color warmer or cooler. A white underbase restores the intended color but hides the metallic sheen in that area. That trade-off is a design decision, so make it before production, not after.
Tolerance is measured, not eyeballed. Printers express color difference as Delta E (ΔE), a numeric distance between the target and the measured print. Lower is closer. Ask what tolerance your supplier works to and under what light the comparison is made, since a standardized viewing booth gives different impressions than a fluorescent office or a warm kitchen bulb.
Batch-to-batch consistency needs a reference. Digital presses can drift slightly between runs, and enamel batches vary with mixing. For campaigns that will be reordered, keep a physical retained sample from the approved run and send it back as the target. A file alone does not lock in color, because the same file prints differently on different presses.
To print refrigerator magnets that match an existing campaign, such as a calendar magnet that must sit next to brochures, send the printed brochure itself as a reference and say so on the order. That gives the operator a physical target instead of a digital approximation.
Durability and safety factors that start at the print stage
Most visible failures trace back to print-stage choices. Fading comes from missing UV-resistant laminates or clear coats. Peeling on metal comes from skipped surface preparation or primer. Edge lifting on flexible magnets comes from weak lamination before die-cutting. Kitchens add heat, steam and cleaning sprays, so a protective layer is worth paying for even on low-cost promotional runs.
Backing thickness affects whether the print is ever seen. Industry guidance commonly treats very thin flexible backings, roughly under half a millimeter, as weak holders that slide down a door when loaded with paper. Many modern "stainless" refrigerator doors use austenitic grades that do not attract magnets at all. Neither issue can be fixed by the print shop, but both damage how the printed piece is received, so raise them when you specify the job.
FAQ: Which printing method gives the sharpest photos on magnets?
Digital and UV inkjet both reproduce photographs well when the source image has enough resolution at final size, roughly 300 pixels per inch. Digital on white vinyl gives the most neutral photo color. UV on metal gives a premium look but needs a white underbase in photo areas to avoid a metallic color cast.
FAQ: Can I get an exact Pantone match on a printed fridge magnet?
An exact match is most achievable with offset spot inks on flexible stock or with enamel color fill on metal pieces. CMYK-based digital and UV printing can only approximate colors outside their gamut. If precision matters, approve a physical proof and agree on a measured tolerance with your supplier.
FAQ: Is offset printing still used for fridge magnets?
Yes, mainly for very long runs of a single design such as calendar, schedule and business-card magnets, where plate and makeready costs are spread across many units and spot-color control matters. For shorter or versioned runs, digital printing usually costs less overall.
FAQ: Why do printed colors look different on a metal magnet than on paper?
Process inks are semi-transparent, so the substrate shows through. Silver, gold or brushed metal tints the ink, and plating color changes the result. A white base layer under the ink restores the intended color but covers the metallic finish in that area.
FAQ: How do I stop printed magnets from fading?
Specify a UV-resistant laminate, clear coat or epoxy dome rather than bare ink, and avoid long exposure to direct sunlight. On rigid metal faces, ask how the surface is prepared and primed before UV printing, since adhesion failures often look like fading or chipping.
FAQ: Does the print affect how strongly the magnet holds?
No. Holding power comes from the magnetic backing, its thickness and grade, and whether the door surface is ferromagnetic. Print and coatings sit on the front and do not change magnetic pull. A heavy rigid face does, however, need a stronger backing than a thin flexible magnet.
Key Takeaways
Printed magnets get long household exposure, so print flaws stay visible for years. — 87% of Americans keep magnets on their refrigerator (Source)
Magnets compete for promo budgets on retention, which depends on durable printing. — $27.1 billion in U.S. promotional products distributor sales in 2025 (Source)
Contact details must stay legible, because recipients keep magnets as reference tools. — 51% keep a magnet for contact information (Source)
Small, strong magnets on rigid printed pieces fall under a defined U.S. hazard threshold. — Flux index of 50 kG² mm² or more for magnets that fit the small-parts cylinder (Source)
Decorative fridge magnets are not exempt from enforcement by default. — About 4,640 sets recalled by CPSC in 2026 (Source)
Conclusion
Choosing a print method comes down to three questions. What is the face made of: flexible sheet or a rigid material such as metal? How many pieces will be identical, and will the design be reordered? Which colors must match the brand guide exactly? Digital printing works well for short and personalized runs, offset for long single-design runs with spot colors, and UV printing for rigid and metal faces. Die-cast metal adds enamel fill as a fourth option for colors that cannot drift.
If your campaign calls for a heavier, longer-lasting piece than a flexible magnet, start with the custom die-cast zinc alloy fridge magnets page and send your artwork, target quantity and brand color references. We will recommend a color method for your design and quote it at the quantities you are considering.
Hi there! I'm Bruce, proud dad to my amazing son. I'm the founder of Zigpac, a printing and packaging company empowering small and medium-sized businesses with custom solutions. Let's create something great together!



 Blog PDF for offline reading








The information below is required for social login
Sign In
Create New Account