


 Blog PDF for offline reading
Quick answer: Leather labels are usually attached in one of four ways: sewn (best for jeans, knitwear, and washable garments), riveted (bags and heavy denim), heat-applied (caps and flat panels, ideally backed by a perimeter stitch), or looped as removable hang tags. Choose the method by product type and wash route, and attach at the right stage of the line. The method determines whether the label outlives the garment or peels off after a few washes.
Last reviewed: October 2026. Written for apparel and accessory brands, sourcing leads, and factory floor managers.
Most brands spend weeks approving the artwork on their leather labels and minutes deciding how those labels will go on. That imbalance shows up later in production. A patch gets sewn onto jeans before an enzyme wash and comes out darker and wavier than the approved sample. A rivet goes into a bag panel after the lining is closed and there is no room for the anvil. A heat-pressed tag on a knit beanie lifts at one corner after the first wash.
These failures rarely come from the label itself. They come from the wrong attachment method for the product, or the right method at the wrong step in the line. This guide works through each product type and covers where the label goes, how it is fixed, where that step sits in the factory workflow, and what each choice means for wash performance and lifespan.
What "Attachment Method" Means for Leather Labels
An attachment method is the combination of three decisions: how the label is fixed (thread, metal hardware, adhesive, or a cord), where on the product it sits, and when in the production sequence it goes on. On a cutting-and-sewing floor, the third decision matters as much as the first two. A label that has to be sewn onto a flat panel cannot be added once that panel becomes a tube, a crown, or a closed bag body.
There is also a legal difference between a label and a tag. A permanently fixed brand patch is a label. A tag on a cord is a hang tag that the customer removes after purchase. The US Care Labeling Rule defines a care label as one "attached or affixed in such a manner that it will not become separated from the product and will remain legible during the useful life of the product" (16 CFR Part 423[1]). This guide uses that same standard of permanence for brand labels. If a patch is meant to stay on, the attachment has to survive the product's real use and cleaning route.
Material choice, sampling, and approval are covered in our product guide to custom embossed PU leather brand tags. This article focuses on what happens after the tag is approved and reaches the sewing line.
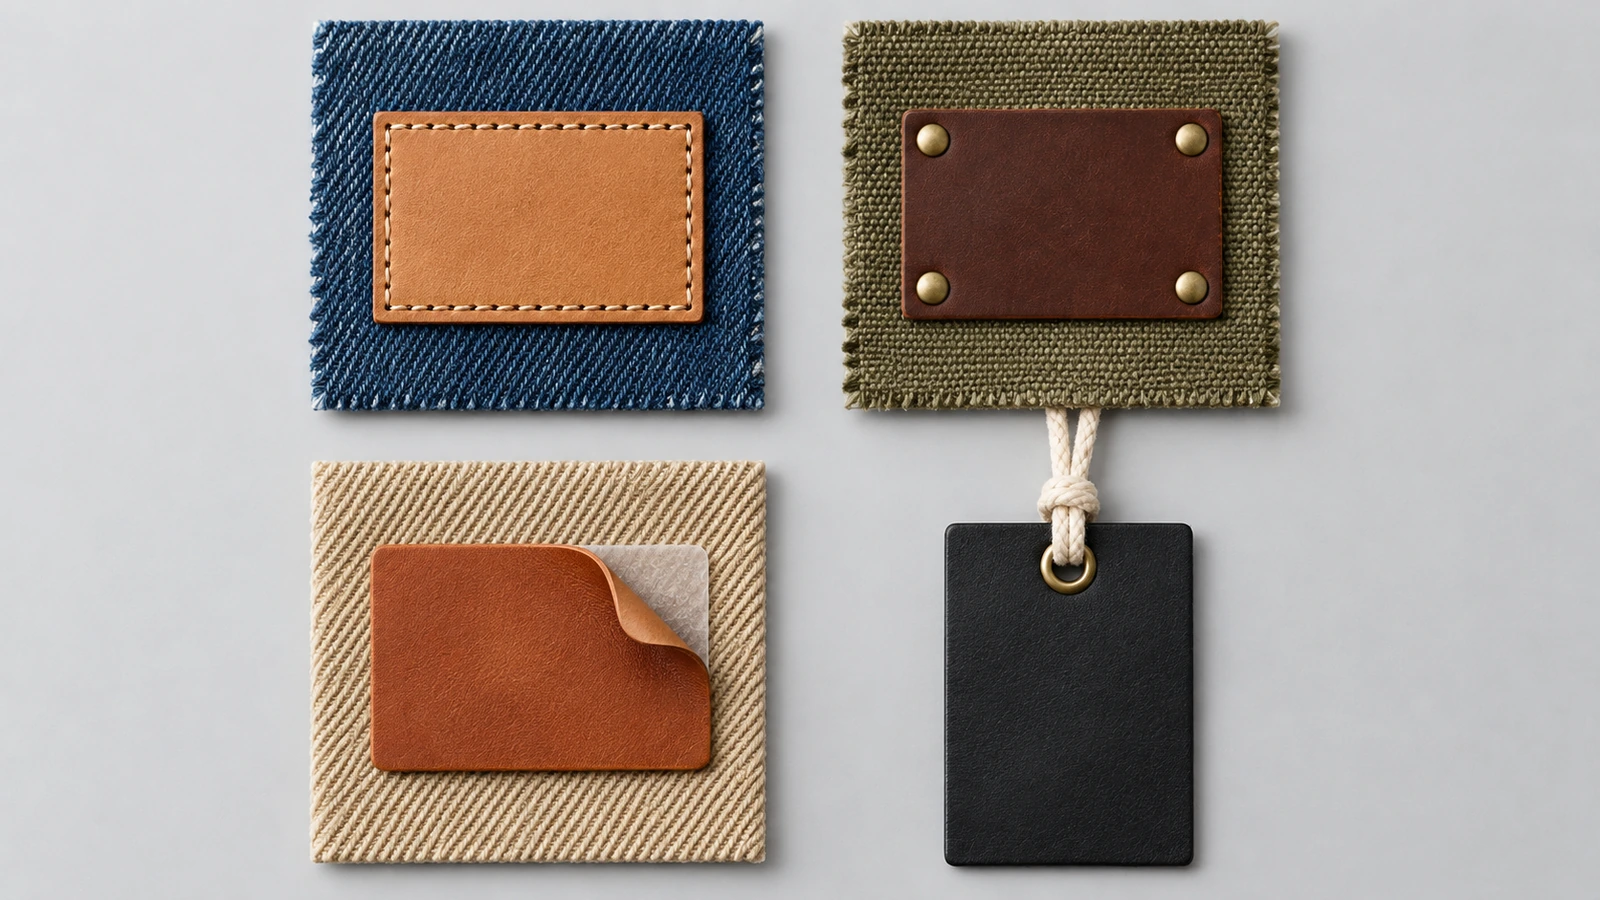
The Four Ways to Attach Leather Labels, and Where Each Sits in the Line
1. Sewn: perimeter stitch or pre-punched holes
Sewing is the default for garments because thread moves with the fabric. Machine work typically uses a lockstitch around the perimeter. Hand finishing on knits uses holes punched into the label in advance, so the needle never has to pierce the leather on the garment itself.
- Line position: Usually on a flat panel before seams close, such as the back waistband, front cap panel, or bag front. Hand-stitched knit labels go on at the end, after blocking.
- Floor notes: Genuine leather is usually sewn with a wedge-point leather needle. PU and microfiber generally work better with a fine sharp point, because a wedge can cut the coated face. Start with a longer stitch, around 3–4 mm, and adjust on a sample. A short, dense stitch perforates the label like a sheet of stamps, and it tears along that line.
- Wash: Sewing gives the best mechanical security. What it cannot do is protect a material that does not tolerate water.
2. Riveted: metal hardware through label and substrate
Rivets suit heavy substrates such as denim, canvas, and bag leather, because they clamp the label in place without a stitch line.
- Line position: Before lining or interlining closes, because the setting tool needs access to the back. On bags, this means the panel stage, not final assembly.
- Floor notes: Add a backer or washer behind thin fabric, or the rivet will pull through under load. Mark rivet positions from a jig, not by eye. A hole punched 1–2 mm off-center is visible on a small label.
- Wash: The hardware survives laundering, but uncoated metal can leave rust or color stains on light fabric. On hats and other items worn against the body, the back of a rivet can catch hair. Knitters raise this concern often enough that many skip rivets on headwear altogether.
3. Heat-applied: adhesive backing activated by press
An adhesive film on the back of the label is bonded with a heat press. This is fast and needs no needle, which makes it useful for structured caps and finished goods that cannot go back under a sewing machine.
- Line position: Often on finished or near-finished goods, using a curved platen for caps.
- Floor notes: Leather is heat-sensitive. Genuine leather can shrink or stiffen, and the plasticizer in PU can migrate out with repeated heat, leaving the label brittle. Stay inside the time, temperature, and pressure window given by the adhesive supplier, and confirm that window on your actual label material.
- Wash: Adhesive alone is the weakest choice for anything that goes into a washer or dryer. For washable garments, use heat as a positioning step and follow it with a perimeter stitch (often called "tack and stitch").
4. Looped: hang tag on cord, chain, or ribbon
The label goes through a punched hole or grommet and hangs from a belt loop, zipper pull, or bag handle.
- Line position: Finishing and packing, the last touch before bagging.
- Floor notes: No sewing operator is needed, and the tag never meets the wash. A looped tag is for retail presentation. It does not count as permanent product marking.
- Longevity: Leather hang tags are often kept by customers as key fobs or bag charms. That extends brand exposure even though the tag is designed to be removed.
Where Leather Labels Go: Placement by Product Type
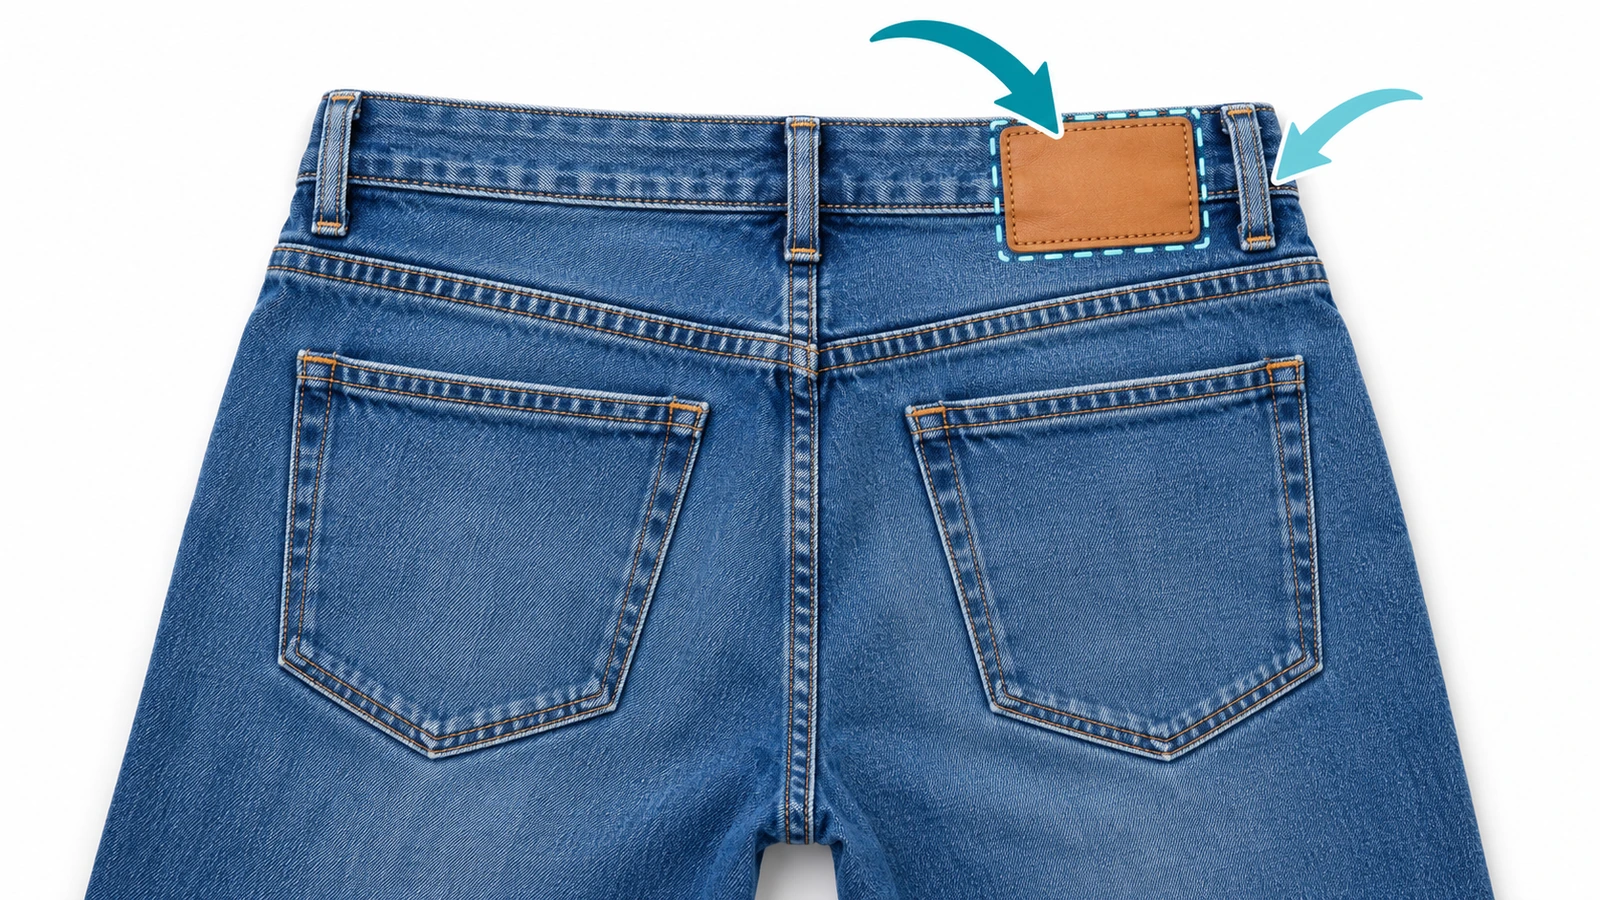
Jeans and denim jackets
Placement: The classic spot is the back waistband, on the wearer's right, centered between a belt loop and the center back seam. On jackets, the inside yoke and the outer hem tab are the usual positions.
Method: Perimeter lockstitch. Rivets are an option on heavyweight denim.
Workflow trap: Garment washing. Most denim is stone-, enzyme-, or rinse-washed after sewing, and the patch has to survive that wash, not just home laundering. You have two options:
- Specify a patch material that tolerates the full garment-wash recipe, and approve the sample after it has been washed with a garment.
- Attach the patch after garment wash. This adds a second pass on finished jeans, which is slower because operators are handling a three-dimensional garment instead of a flat waistband.
Whichever you choose, plan the order of operations so the patch goes on before any belt loop that overlaps it is bar-tacked.
Bags and small leather goods
Placement: Front panel, flap, or the inside pocket facing. On totes, a patch near the handle base gets the most visibility.
Method: Stitch or rivet onto the flat panel. Use a backer on unlined canvas.
Workflow trap: Once the bag body is closed, a flatbed machine cannot reach the panel and a rivet setter has no room for the anvil. Lock the label position at pattern stage and mark it on the cut panel, using notches or drill marks, so it goes on before assembly. Bag labels see more abrasion than water, so edge finishing and corner reinforcement matter more here than wash resistance.
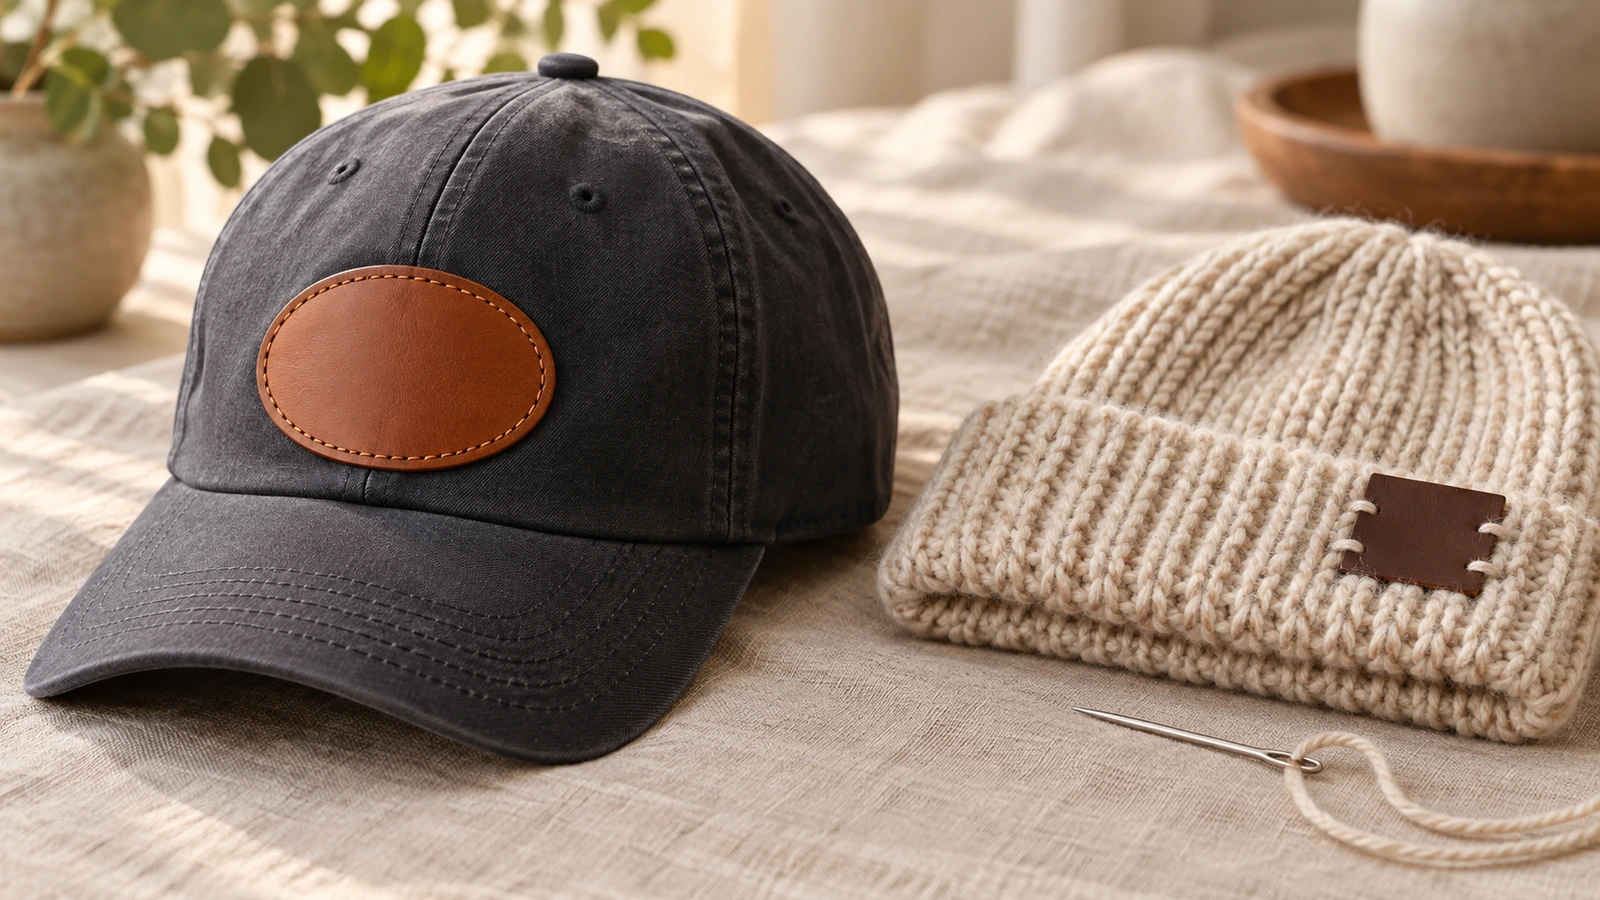
Hats and caps
Placement: Front crown panel on structured caps. The cuff on beanies. Side or back near the adjuster on dad caps.
Method: Sew the patch onto the flat front panel before the crown is built. On finished caps, heat-apply the patch and then stitch the edge with a cap-frame machine.
Workflow trap: Curved surfaces. A rigid patch pressed onto a curve lifts at the edges. Plan the curvature into the patch, or attach it while the panel is still flat. Avoid rivets where the back of the hardware would sit against the scalp.
Knitwear and crochet
Placement: The hem, side seam, or cuff, where the fabric is most stable. Makers often put a label at the front hem so the wearer can tell front from back at a glance.
Method: Hand-stitch through pre-punched holes, using yarn or strong thread, through the label and a few knit stitches. Fold-over labels sewn into a seam also work well.
Workflow trap: Running a machine through knit loops can ladder the fabric and pull it out of shape. Knitwear also tends to be washed in ways genuine leather does not tolerate. Two approaches work: stitch the label loosely so it can be removed before washing, or use a washable synthetic and state its limits on the care label.
Attachment Methods Compared: Workflow, Wash Performance, Longevity
| Method | Best product fit | Line stage | Equipment | Wash performance | Main longevity risk |
|---|---|---|---|---|---|
| Machine-sewn perimeter | Jeans, jackets, flat bag panels, cap fronts | Flat panel, before seams close | Lockstitch; leather needle for genuine | Strong attachment; limited by the label material | Perforation tear if stitch is too dense |
| Hand-sewn through pre-punched holes | Knitwear, crochet, handmade goods | Final finishing | Needle and yarn or thread | Good; easy to remove before washing | Loose stitches snag; label rotates |
| Riveted | Heavy denim, canvas and leather bags | Before lining or assembly | Rivet press, positioning jig | Hardware survives; possible metal staining | Pull-through on thin fabric; hair catch on headwear |
| Heat-applied only | Caps, non-washed accessories | Finished goods | Heat press, curved platen for caps | Weakest; edges lift with repeated wash and dry | Adhesive failure; heat stiffening of leather |
| Heat-tack plus stitch | Caps, washable garments that need exact placement | Finished or near-finished goods | Heat press plus sewing machine | Good | Two operations add handling time |
| Looped hang tag | All products at retail | Packing | Tagging gun, cord, or chain | Not applicable (removed before use) | Separated in transit; not a permanent mark |
How to Verify Leather Label Attachment Before Bulk
Approve the attachment, not just the label. Use a pre-production garment that has been sewn, riveted, or pressed exactly as bulk will be. Then run that garment through the product's actual cleaning route. The checks below use published methods, so you and the factory can write them into the PO in shared terms.
- Wash the whole garment, not the loose label. ASTM's leather standards include methods for color transfer and dimensional change after washing (D2096), and for crocking (D5053). They are listed in the ASTM leather standards index[5]. Wash at the temperature printed on your care label, then check for edge lift, shrinkage, stiffening, and stitch-line tears.
- Flex the label at its attachment point. Coating cracks begin where the label bends next to stitches or rivets. Flex resistance (ASTM D6182 / IUP 20, Bally flexometer) and finish adhesion (IUF 470) are standard methods at the University of Cincinnati's Leather Research Laboratory[6].
- Rub-test for dye transfer onto the garment. A dark label sewn onto light fabric is a common source of color complaints. ISO 11640:2018[7] rubs the leather with a wool felt about 15 × 15 mm, 6.0 ± 0.5 mm thick, at roughly 40 ± 2 cycles per minute, and grades the result on grey scales. On the floor, a quick screen is 10 rubs with a dry white cloth followed by 10 with a damp one. Strong discoloration means the leather is not good enough for that placement (Leather Dictionary[8]).
- Pull-test rivets and corners. Hand-tug every hardware position on the first article. Pull-through and torn corners show up immediately on samples, long before customer reviews would reveal them.
- Keep the signed sample. File the washed, approved garment with its attachment settings: needle, stitch length, rivet type, and press time, temperature, and pressure. Use it as the reference for reorders, so the second batch matches the first.
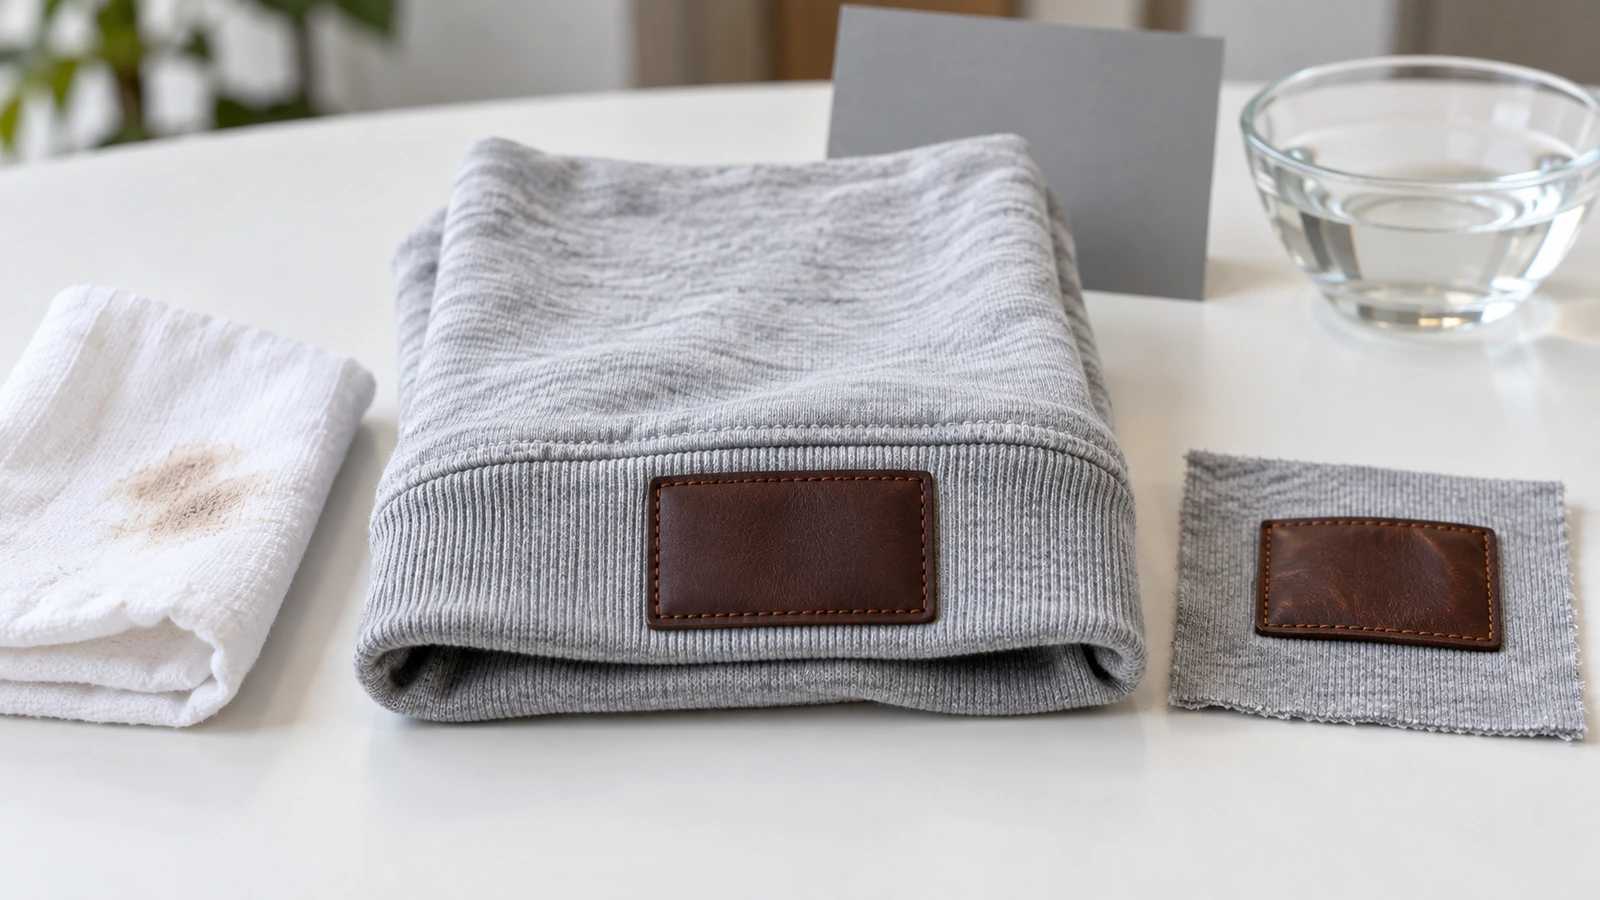
What Leather Labels Cannot Replace
A debossed brand patch is decoration. It does not replace the labels the law requires.
- Fiber, origin, and identity. US textile labeling requires fiber content, country of origin, and the name or RN of the responsible company (16 CFR Part 303[3]). Textile World[12] summarizes these as the three key pieces of information every covered label must carry. Leather patches are generally not counted in fiber percentages.
- Care instructions. These belong on a durable care label, written in words or in ASTM D5489 symbols[9]. If your genuine-leather patch cannot be washed, the care label for the garment has to reflect that. The FTC's Clothes Captioning guidance[2] explains that instructions must cover the whole product, trims included.
- Material claims. Do not describe a PU patch as "leather" without qualification. The FTC's Leather Guides[4] treat unqualified "leather" claims on imitation material as deceptive.
- EU skin-contact chemistry. Leather in skin contact must contain less than 3 mg/kg of chromium VI (Regulation (EU) No 301/2014[10]). This makes placement relevant: a patch on a waistband that touches skin is tested differently from a patch on a bag. Since 10 October 2026, leather in clothing and related accessories sold to the general public must also stay below 25 ppb PFHxA and its salts, or 1,000 ppb PFHxA-related substances, measured in the homogeneous material (ECHA, REACH Annex XVII entry 79[11]). Water-repellent finishes on PU labels are the first thing to check.
FAQ
FAQ: Can a leather label double as the care label?
Only if it meets the same requirements as a care label: it must be permanently attached, stay legible for the useful life of the product, and carry complete care instructions. Most brand patches are too small for this and are often made of a material that would not survive the instructions printed on it. Use a separate soft printed or woven care label inside the garment, and let the leather patch handle branding.
FAQ: Should I sew or rivet a patch onto jeans?
Sewing is the standard, because the patch flexes with the waistband and the stitch line is part of the classic denim look. Rivets work on heavy denim but add a hardware supply line and a setting operation, and they need backing on lighter fabric. In both cases, decide whether the patch goes on before or after garment wash. That decision affects material choice and line routing more than the fastening method does.
FAQ: How do I attach a leather label to a knit without stretching it?
Use a label with pre-punched holes and hand-stitch it through stable areas such as the hem, cuff, or seam. Catch only a few knit stitches, and keep the tension light so the fabric still stretches around the label. Avoid running a machine through knit loops. If the item will be washed, sew the label so it can be taken off easily, or choose a washable synthetic.
FAQ: Is heat-applied attachment enough for washable garments?
Usually not. Repeated washing and drying weakens adhesive bonds, and heat can stiffen genuine leather or pull plasticizer out of PU. Use heat to position the label precisely, then add a perimeter stitch. Keep heat-only application for caps and accessories that are spot-cleaned rather than laundered.
FAQ: When in production should hang tags go on?
At finishing and packing, after final inspection and pressing. Attaching them earlier risks scuffing the leather on the line or losing the tags in garment handling. Loop them through a belt loop, zipper pull, or handle, not through the fabric itself, so the customer can remove them without leaving a hole.
FAQ: Does placement change testing for EU export?
Yes. EU chromium VI limits apply to leather articles that come into contact with skin, so a waistband patch or hat-band label needs that test, while an exterior bag patch may not. The PFHxA limit applies to leather in clothing and related accessories regardless of skin contact, and is measured in the label material itself, not averaged across the whole garment.
Key Takeaways
- Attachment is part of the label spec: approve it on a washed garment, not a loose tag. — Care labels must stay attached and legible for the product's useful life (Source)
- Screen dark labels for dye transfer before they meet light fabric. — 10 dry plus 10 damp white-cloth rubs as a floor check (Source)
- Use a recognized rub test for color fastness in the PO. — ISO 11640 felt at about 40 ± 2 cycles per minute (Source)
- A brand patch never replaces the required fiber, origin, and identity label. — 3 required items on US textile labels (Source)
- Skin-contact placements in the EU need a chromium VI test. — Below 3 mg/kg of dry leather weight (Source)
- PU and coated labels on EU apparel now need PFAS screening. — 25 ppb PFHxA limit from 10 October 2026 (Source)
Conclusion: Plan Leather Labels Around the Line, Not Just the Logo
The durability of leather labels is decided as much on the sewing floor as in the tannery. Sew labels onto flat panels before seams close. Rivet only where there is backing and access for the setting tool. Treat heat as a positioning aid rather than a final fix for anything that will be washed. Keep looped hang tags for retail presentation. Then approve the whole assembly after it has been through the product's real wash route.
If you are ready to put these placement decisions into a tag brief, our guide to specifying, sampling, and testing embossed PU leather tags covers the next step. Send us your product type and wash route, and we will advise on construction and quote against your specification.
Sources
- eCFR, 16 CFR Part 423: Care Labeling of Textile Wearing Apparel and Certain Piece Goods. Accessed October 2026. ↩
- US Federal Trade Commission, Clothes Captioning: Complying with the Care Labeling Rule. Accessed October 2026. ↩
- eCFR, 16 CFR Part 303: Rules and Regulations under the Textile Fiber Products Identification Act. Accessed October 2026. ↩
- US Federal Trade Commission, Guides for Select Leather and Imitation Leather Products (16 CFR Part 24). Accessed October 2026. ↩
- ASTM International, Leather Standards index (including D2096, D5053, D6013). Accessed October 2026. ↩
- Leather Research Laboratory, University of Cincinnati, Finish Durability testing methods. Accessed October 2026. ↩
- ISO 11640:2018, Leather: Tests for colour fastness, colour fastness to cycles of to-and-fro rubbing. Published August 2018. ↩
- Leather Dictionary, Dye transfer from leather. Accessed October 2026. ↩
- ASTM D5489, Standard Guide for Care Symbols for Care Instructions on Textile Products. Accessed October 2026. ↩
- Commission Regulation (EU) No 301/2014, amending REACH Annex XVII entry 47 (chromium VI in leather). Adopted 25 March 2014; applicable from 1 May 2015. ↩
- European Chemicals Agency, REACH Annex XVII entry 79: PFHxA restriction (Regulation (EU) 2024/2462). Applicable to clothing and related accessories from 10 October 2026. ↩
- Textile World, "Avoid Being Labeled Noncompliant: The Basics of Textile and Wool Product Labeling". December 2025. ↩







The information below is required for social login
Sign In
Create New Account