


 Blog PDF for offline reading
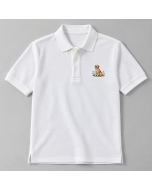
Quick answer: Polo shirts with logo embroidered look sharpest when the mark sits on the left chest at roughly 3–3.5 inches wide, stays within about 5,000–10,000 stitches, and keeps every letter above about 0.2 inch (5 mm). The artwork should also be redrawn as flat thread colors so gradients, hairlines and dense fills don't pucker or vanish on piqué knit.
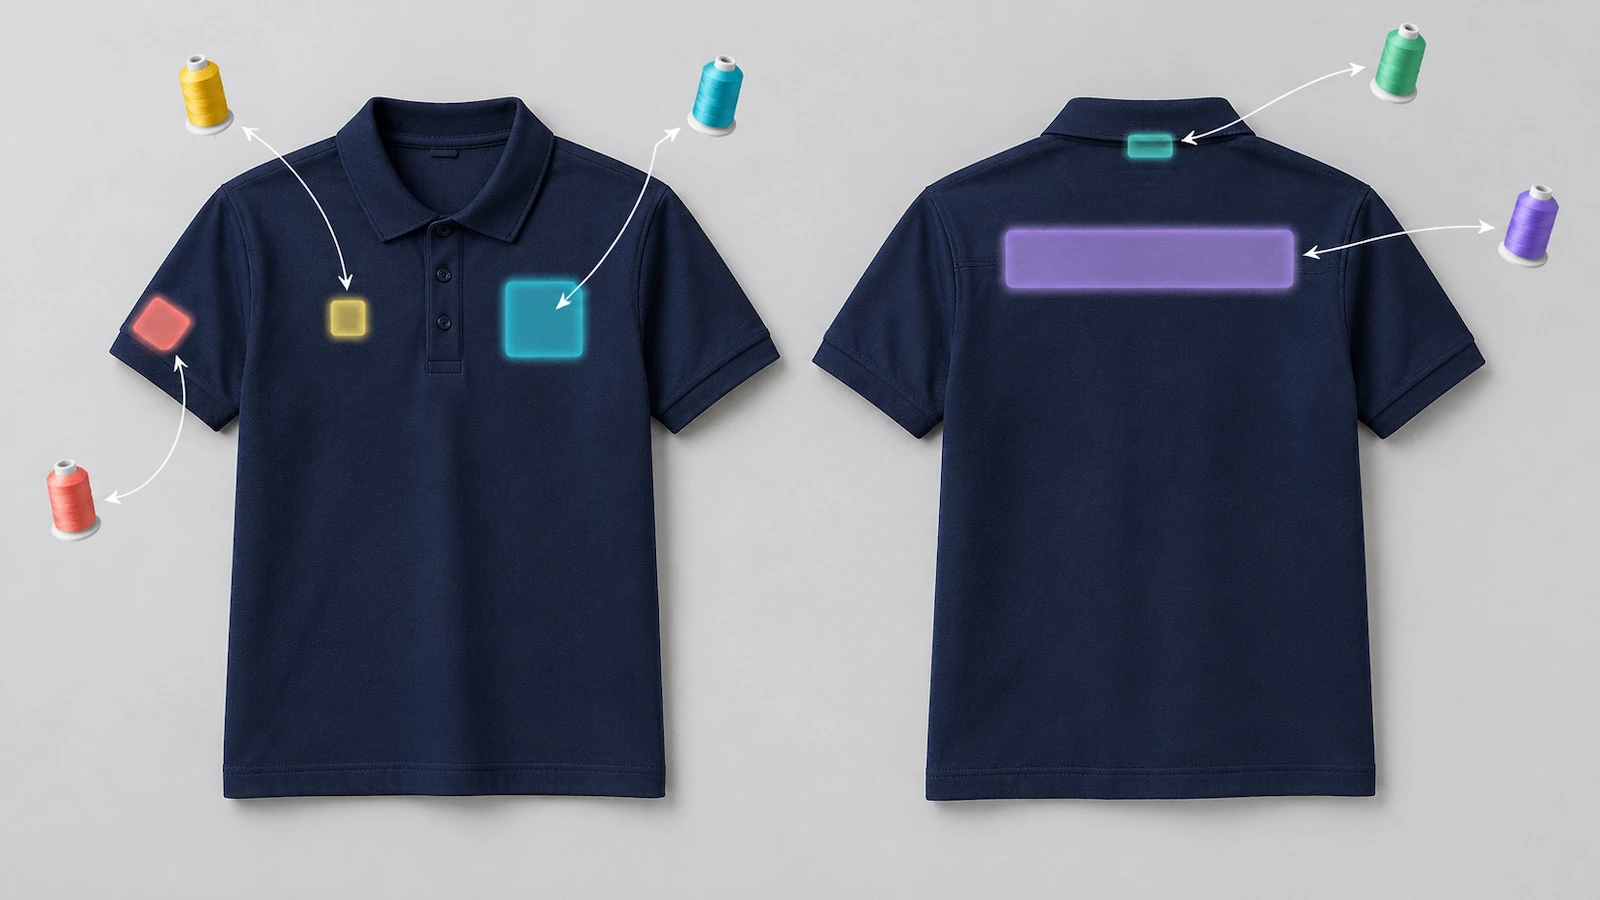
Why a Logo That Looks Perfect on Screen Can Fail on Piqué
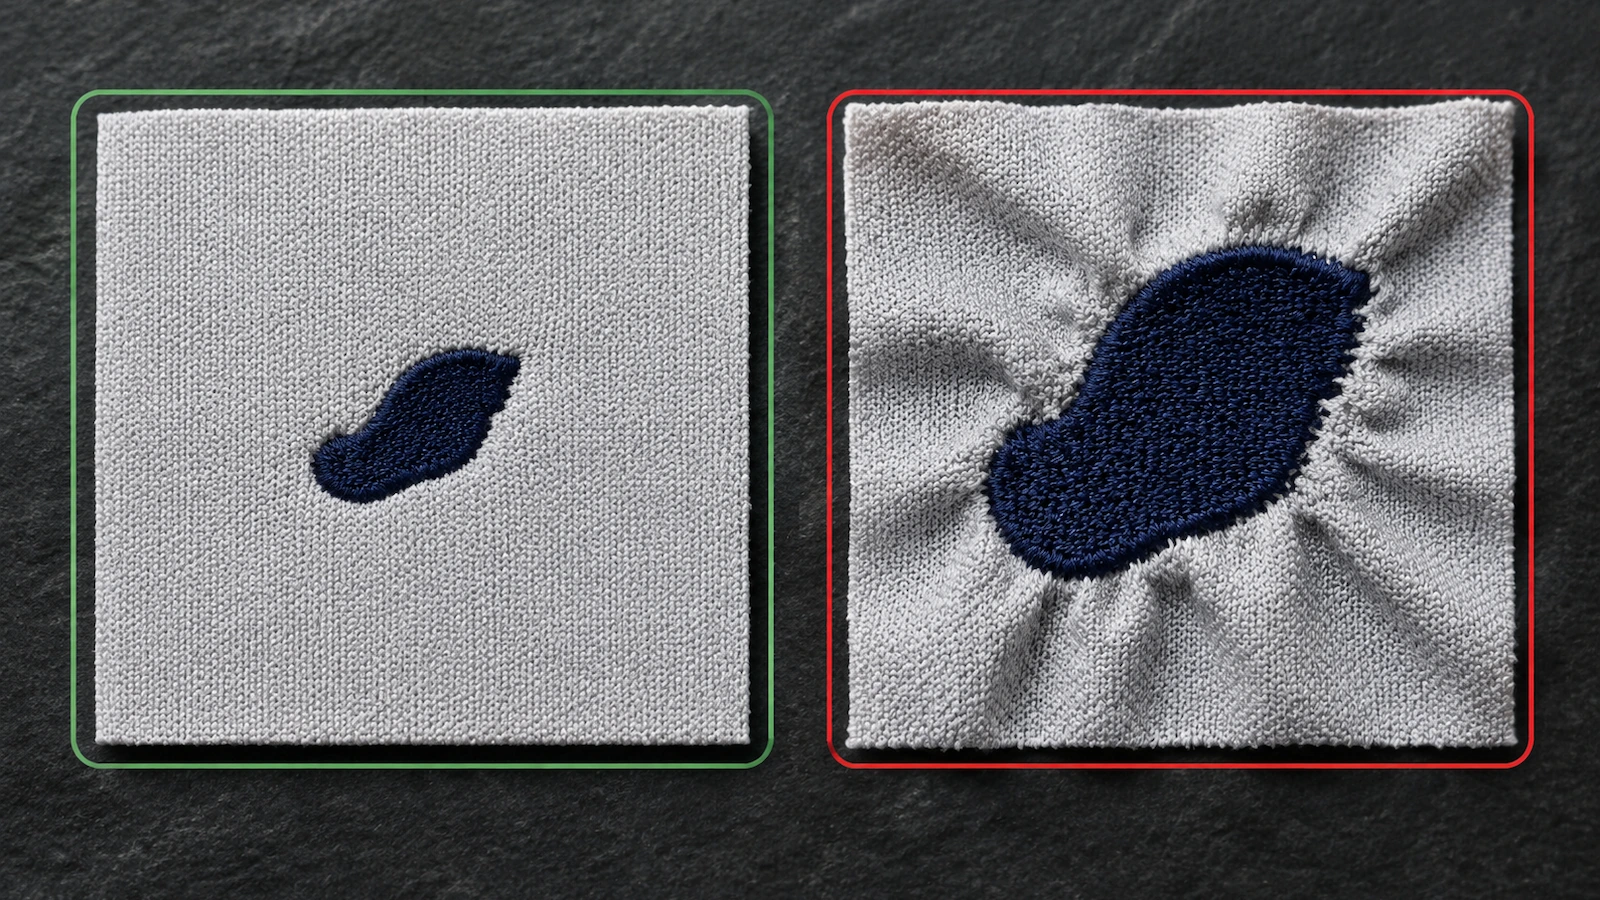
Most logos are designed for screens and print. On a monitor, a 1-pixel hairline, a soft gradient and a tiny tagline all render perfectly. Piqué knit is different. It is a textured fabric of raised cells that stretches when it is hooped and springs back afterward. A run stitch that is thinner than one of those cells sinks into the texture. Lettering below about 5 mm closes up. A large solid fill pulls the knit inward until the area around the logo ripples like corrugated card.
For a business buyer, these problems surface late and at a cost. Decorated garments are usually non-returnable once stitched. A logo sewn too low or in the wrong thread shade affects every shirt in the run, not just one. A reorder six months later can also look different if the supplier redigitizes the file from scratch. The stakes are not trivial. Apparel was the largest product category in the US promotional channel, at 26.6% of 2024 distributor sales, according to the Promotional Products Association International[1]. Branded shirts are often the most visible thing a company hands out.
This guide covers only the logo: where it goes, how large it can be, how it is digitized, how many stitches it should carry, how thread color is matched, and how to adapt a complex mark before it reaches the machine. If you are still choosing the garment itself, our page on custom embroidered polo shirts covers fabric, ordering and inspection.
What Makes Polo Shirts with Logo Embroidered Look Professional?
An embroidered logo is not an image applied to a shirt. It is a stitch file: a set of machine instructions that sets the needle position, stitch length, direction and color change for every penetration. Commercial embroidery machines form a lockstitch, in which the top thread interlocks with a bobbin thread beneath the fabric. That stitch family sits in Class 300 of ISO 4915[2], which sorts hand and machine stitches into classes 100 to 600. ASTM's companion practice for stitches and seams makes a point that applies directly to logos: the stitch, the fabric structure and the thread must be chosen together, because a wrong choice in any one of them can cause failure (ASTM D6193[3]).
Inside a logo, a digitizer works with three stitch types:
- Satin stitches zigzag across a narrow column. They give letters and borders a smooth, glossy edge, but become loose and snag-prone when a column gets too wide.
- Fill (tatami) stitches cover larger shapes in staggered rows. They carry the most thread, so they cause the most pull on the knit.
- Run stitches are single lines used for fine detail and outlines. On piqué they are the first to disappear into the fabric texture.
The fabric sets the ceiling for all three. Published embroidery guidance treats cotton piqué of roughly 180–220 GSM as the standard corporate base because it supports a dense left-chest mark without puckering. Lightweight jersey under about 150 GSM generally cannot carry the same mark. Taste is also shifting. A polo supplier interviewed by PPAI in July 2026 described growing use of "tonal applications, smaller logo sizes and softer executions" among corporate buyers, while noting that crisp, high-density embroidery "remains a preferred choice" (PPAI, 2026[4]). A professional result therefore depends on three things lining up: the right location, a stitch count matched to the fabric, and artwork simplified on purpose.

How to Prepare Your Logo for Piqué Embroidery: 7 Steps
Step 1: Choose the placement by role, then lock it in writing
The left chest is the default location for an embroidered logo on a polo shirt. It is visible during a handshake and does not interfere with lanyards. Published decorator specs place the center of an adult men's left-chest logo about 7–9 inches below the shoulder seam, between the placket and the side seam. A common metric version puts it 8–10 cm from the placket. Choose one convention and write it into the approval, because the disagreements behind "it looks off" usually come from two people measuring from different reference points.
Do not copy the men's measurement onto women's or youth cuts. The distance from shoulder to bust is shorter, and a mark placed by men's numbers ends up sitting on the bust rather than just above it. Experienced embroiderers flag this as one of the most frequent placement errors. Ask for each fit to be marked separately on the sample.
Step 2: Size the logo by its smallest detail, not its overall width
Most published guidance agrees that lettering under about 0.2 inch (5 mm) becomes illegible once stitched. Start with your smallest letter and work outward. For example, take a horizontal wordmark 3.5 inches wide and 1 inch tall, with a tagline at 15% of the logo height. That tagline is 0.15 inch tall, which is below the threshold. Your choices are to remove the tagline, set it on its own line in larger type, or move it to a location where the logo can run wider. A left-chest logo commonly runs 3–3.5 inches wide, and many decorators cap the area at about 4 × 4 inches. If your mark only works at 5 inches, it belongs on the back yoke.
Step 3: Supply clean artwork and expect a real digitizing pass
Send vector artwork (AI, EPS, SVG or PDF) where possible. If only a raster file exists, it should be at least 300 DPI at the stitched size. Logos saved from a website at 72–96 DPI blur when traced. A competent digitizer does far more than auto-convert the file. The work includes the following decisions:
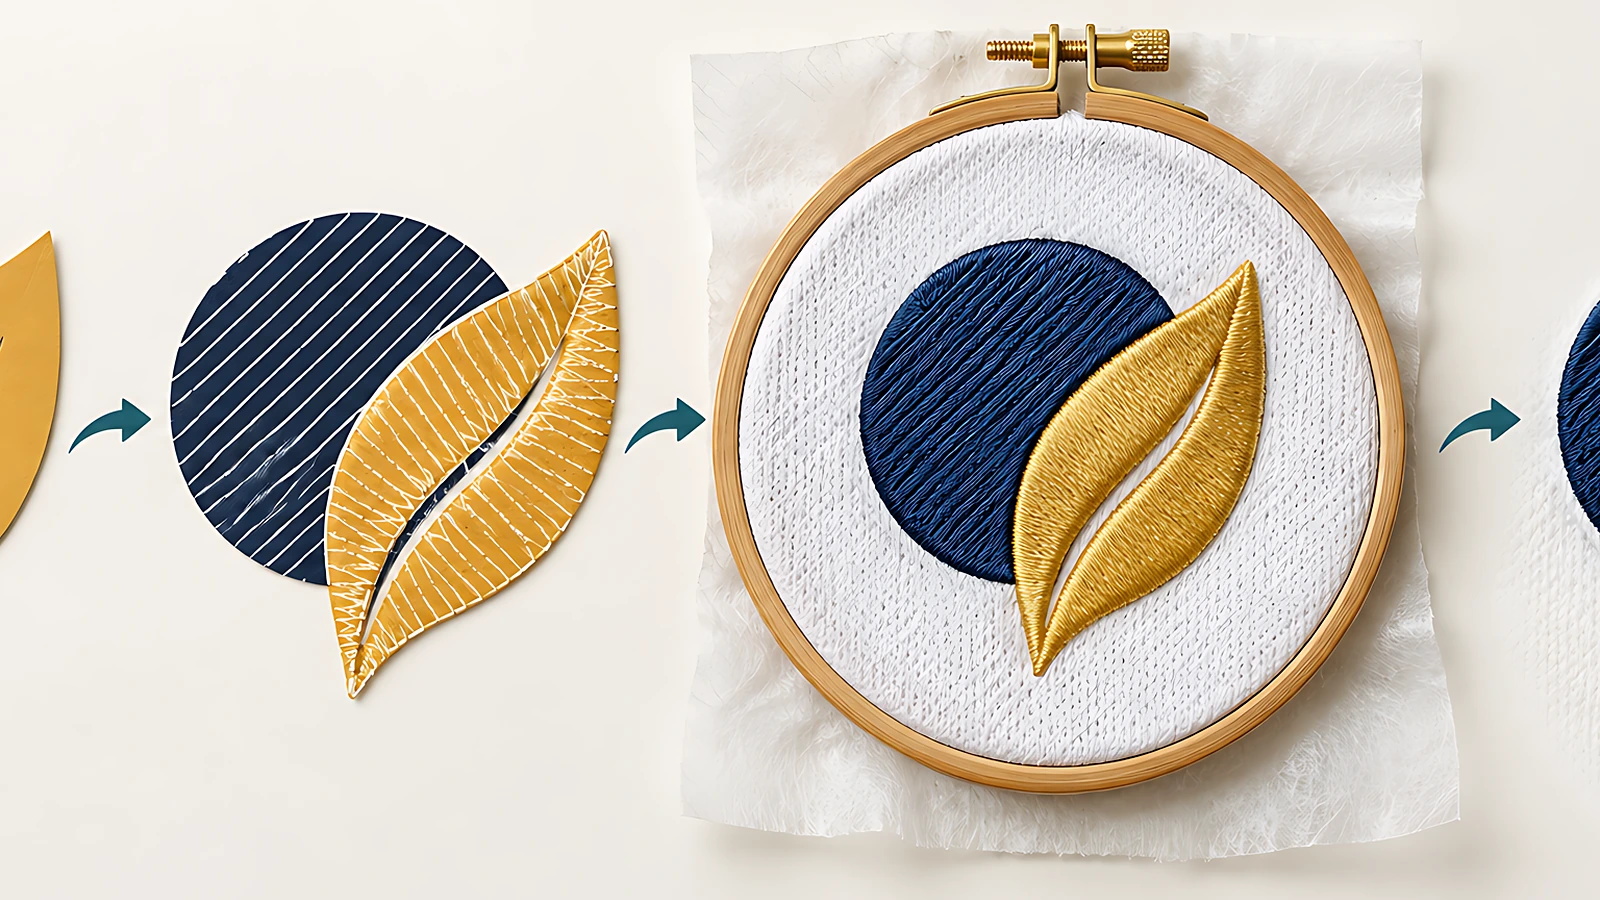
- Assigning satin, fill or run stitches to each shape, and adding underlay so the top stitches sit on the piqué rather than sinking into it.
- Setting pull compensation, commonly about 0.20–0.25 mm, so letters don't narrow when the knit draws in.
- Opening up density for knits. Practitioners report that a 0.40 mm default spacing is too dense for soft knits. Piqué typically runs at 0.42–0.50 mm, and stretch performance polos at 0.50–0.60 mm.
- Varying stitch direction between neighboring fills so the pull doesn't all run one way.
These figures reflect production practice, not a pass/fail standard. Ask your supplier to keep the final stitch file (DST, PES or similar) on record, together with the garment style and thread numbers, so reorders sew identically.
Step 4: Budget the stitch count
Stitch count is the most useful single number on an embroidery quote. A simple text mark typically runs 3,000–6,000 stitches. A standard detailed left-chest logo runs 5,000–10,000, and many decorators cap a single logo somewhere around 11,000–12,500. Above that range, add open space instead of forcing more thread. Shrink the mark, swap solid fills for outlines, or let the shirt color show through. Every additional stitch adds thread tension on the knit and makes the patch stiffer. Ask for the stitch count on the digitized proof. Because many suppliers price by stitches, the count also affects cost, and our product page explains how pricing models change unit cost.
Step 5: Match thread colors against a physical card, not a screen
Embroidery thread comes from a fixed color chart. Commercial charts run to several hundred shades, but none is a true Pantone ink. Thread sheen also reflects light, so a stitched color reads slightly brighter than the same color in print. Approve colors against a physical thread card held next to the actual shirt fabric in daylight, and record the thread numbers on the approval rather than a description like "close to navy."
Contrast needs more care than hue. Thin white lettering on a dark polo needs solid underlay, or the dark knit shows through. A tonal option, with thread one or two shades from the shirt color, suits the quieter look that corporate buyers increasingly request. Fewer colors also sew cleaner, because every color change adds a trim and restart. Most suppliers quote extra beyond a set number of colors.

Step 6: Adapt complex, gradient or photographic logos
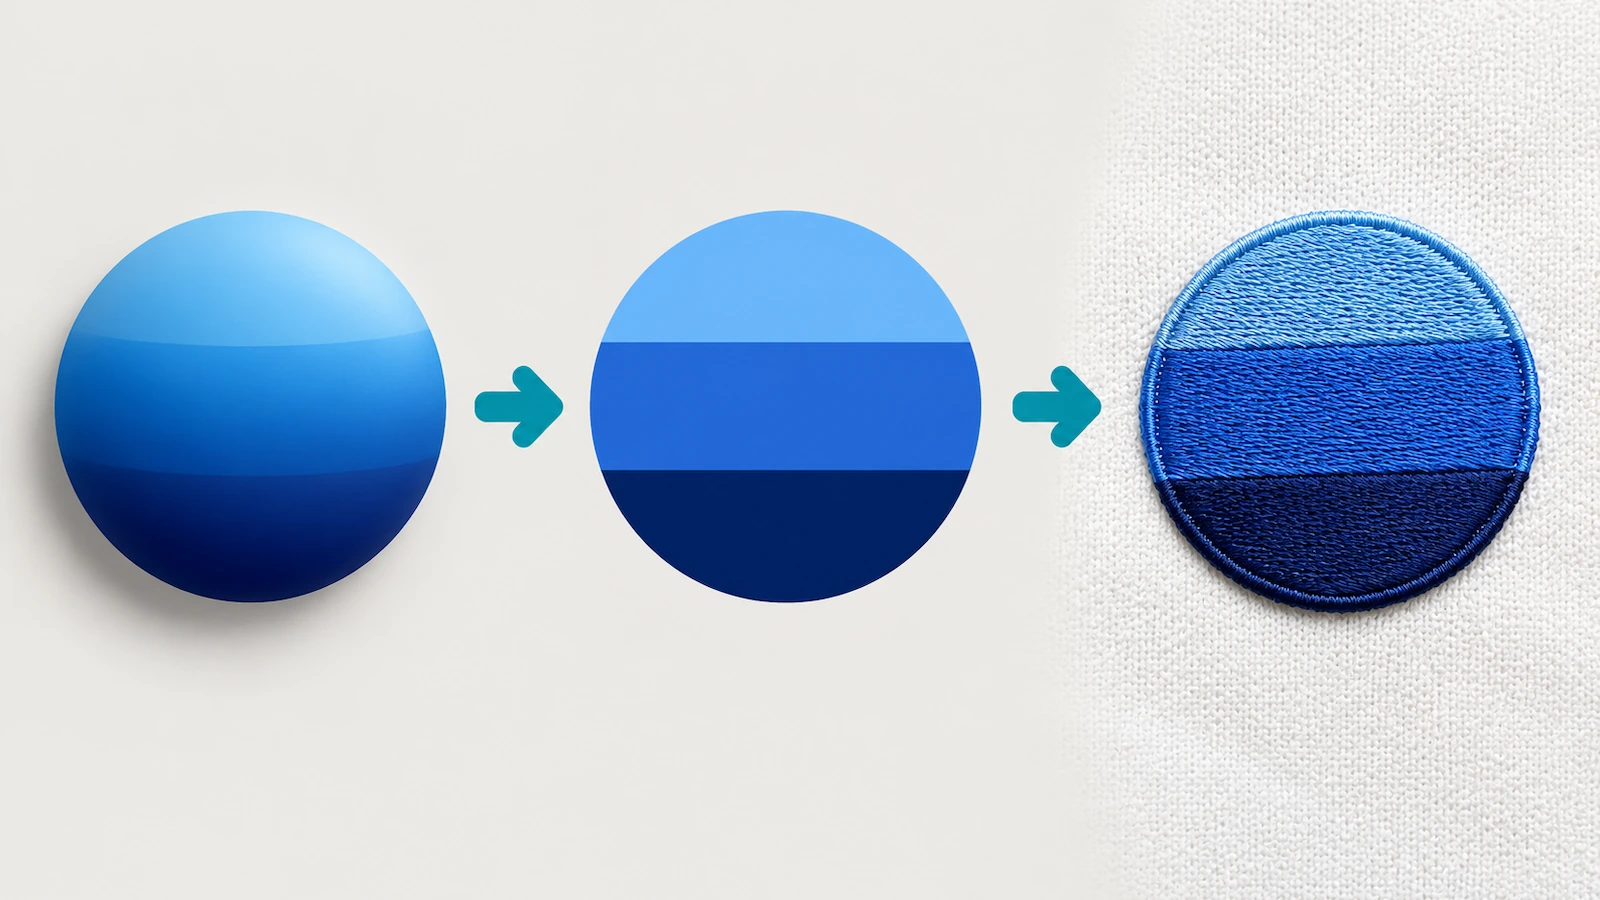
This step decides whether a busy brand mark embroiders cleanly. A gradient becomes two or three flat color bands. A drop shadow is removed. Hairlines are either thickened into satin columns or deleted. Large solid areas are knocked out to the shirt color or reduced to an outline. Photographic artwork cannot be stitched at all, and our comparison of embroidery with print and DTG on the product page explains when another method fits better. Raised 3D puff embroidery is usually reserved for the left chest on heavier piqué, about 250 GSM and up. The comparison table below maps each logo element to its fix.
Step 7: Approve a sewn sample and wash it before the run
A digital proof shows placement and color. It cannot show pucker, holes or stiffness. On a sewn sample, check five things:
- The position matches the written spec.
- The thread colors match the card.
- There are no open gaps inside letters such as B, e or a.
- The placket lies flat.
- The cut-away backing inside is trimmed close and does not scratch the skin.
Then wash the sample. If you want a repeatable result rather than a single home load, reference test methods by number in your spec. Examples are the AATCC standardized home laundering procedures and the related methods for colorfastness and dimensional change (AATCC[5]). If you need chemical-safety assurance, note that an OEKO-TEX STANDARD 100[6] certificate requires every component, including thread and interlining, to meet its limits, and is valid for one year. A certificate held for the blank shirt does not automatically cover thread and backing added later. Ask for the thread and stabilizer certificates separately.
Placement Comparison: Left Chest, Sleeve, Back Yoke and Collar
Size guidance below reflects common published decorator limits. Exact hoop sizes vary by supplier, so confirm them on your quote.
| Location | Typical use | Common size guidance | Piqué watch-outs | Best logo types |
|---|---|---|---|---|
| Left chest | Primary brand mark | About 3–3.5 in wide; often capped near 4 × 4 in | Fit-specific height; placket ripple if the mark is too dense | Icons, short wordmarks, stacked lockups |
| Right chest | Employee name, second mark, certification badge | Similar cap to left chest | Counts as an extra location with its own stitch count | Names in plain block or script type |
| Sleeve | Secondary icon, flag, sponsor | Often capped near 3 × 3 in | The hoop must clear the sleeve seam; curved surface | Simple icons, one or two colors |
| Back yoke | Large wordmark readable at distance | Wider band between the shoulders; confirm hoop size | Large fills raise stitch count fast; use outlines | Long horizontal wordmarks, websites |
| Back neck / below collar | Discreet secondary mark | Small; set just below the collar seam | Collar layers are thick; stitch below the seam, not on it | Monograms, small icons |
| Collar points | Fashion detail | Very small | Folded, multi-layer fabric restricts hooping | Tiny single-color icons only |
Logo Element Fixes: What to Change Before Digitizing
| Logo element | What happens on piqué | Recommended adaptation |
|---|---|---|
| Gradient or blend | Stitches can't blend smoothly; result looks banded or muddy | Redraw as 2–3 flat thread colors, or use a single color |
| Photo or photographic detail | Not reproducible in thread | Use a print method, or substitute a simplified icon |
| Text under ~5 mm | Letters close up and become unreadable | Enlarge, move to a larger location, or delete |
| Hairlines and thin outlines | Run stitches sink into the knit cells | Thicken into satin columns or remove |
| Large solid fill | Pulls the knit, causes pucker and a stiff patch | Open density, knock out to shirt color, or use an outline or appliqué |
| Drop shadow / glow | Adds stitches with no visual payoff | Remove |
| Many brand colors | More trims, more stops, more registration risk | Consolidate to the fewest colors that keep the mark recognizable |
| Light fine text on a dark shirt | Shirt color shows through | Add underlay, bolden the type, or go tonal |
Labeling also has a logo angle. The US fiber-content rule treats ornamentation, such as decorative embroidery thread, separately from the body fiber disclosure (16 CFR Part 303[7]). The care label must remain legible for the life of the finished garment, so its instructions should reflect the decorated shirt rather than only the blank (16 CFR Part 423[8]). The wider labeling rules are summarized on our product page.
FAQ
FAQ: How big should an embroidered logo be on a polo shirt?
On the left chest, about 3–3.5 inches wide is the common range, and many decorators cap the area near 4 × 4 inches. The better test is your smallest letter. If it falls below about 0.2 inch (5 mm) at the planned width, simplify the logo or move it to a larger location such as the back yoke.
FAQ: Can a gradient or full-color logo be embroidered?
Not as a true gradient. Thread can't blend smoothly, so a digitizer redraws the gradient as two or three flat color bands. Photographic logos cannot be stitched. In that case, use a print method or a simplified icon version of the mark.
FAQ: What file should I send for digitizing?
Vector files (AI, EPS, SVG or PDF) give the cleanest result. A raster file should be at least 300 DPI at the stitched size. Include your brand color references and mark which elements are optional, so the digitizer knows what can be removed if it is too small to stitch.
FAQ: Will the stitched colors match my Pantone references?
They will be close, not exact. Thread comes from a fixed chart and has a sheen that makes it read brighter than ink. Approve against a physical thread card next to the real shirt fabric, and record the thread numbers so reorders match.
FAQ: Can I add employee names along with the logo?
Yes. Names usually go on the right chest or directly under the logo, and they count as a separate location with their own stitch count. Plain block or simple script type stitches most legibly at small sizes.
FAQ: Does embroidering a polo in the US make it "Made in USA"?
Generally not. Textile origin follows specific customs rules rather than the last decoration step. An imported blank shirt embroidered domestically typically keeps its foreign country of origin, which must be marked in English (U.S. Customs and Border Protection[9]).
Key Takeaways
- Branded apparel is the promo channel's biggest category, so logo errors repeat at scale — 26.6% of 2024 US distributor sales (Source)
- Corporate buyers are moving toward smaller, tonal logos on stretch performance blanks, which need lighter stitch density — blends such as 85% recycled polyester / 10% lyocell / 5% spandex (Source)
- Embroidery uses the lockstitch family, so stitch, fabric and thread must be engineered together — Class 300 of the six ISO stitch classes (100–600) (Source)
- Specify wash testing by method number instead of writing "colorfast" — standardized AATCC home laundering procedures (Source)
- A blank shirt's chemical-safety certificate does not automatically cover the added thread and backing — OEKO-TEX certificates cover every component and last 1 year (Source)
- Fiber labels list body fibers by weight, while decorative thread is handled under separate ornamentation rules — fibers at 5% or more are named individually (Source)
Conclusion
Clean polo shirts with logo embroidered start well before the machine runs. Each shirt depends on a written placement spec for every fit, a size set by the smallest letter, a digitizing pass tuned for knit density, a stitch count kept in a sensible range, and thread colors approved on a physical card. Complex marks need deliberate simplification: flatten gradients, remove hairlines and open up solid fills. The work is worth getting right. US promotional distributor sales reached $27.1 billion in 2025 (PPAI[10]), and a polo with an embroidered logo is often the branded item people wear most.
Send us your logo file and we will review it for embroidery: where it should sit, what needs simplifying, and how it will stitch on cotton piqué. We will then quote a sewn sample for you to inspect and wash before you commit. Start with our custom embroidered cotton piqué polo shirts and request a quote.
Sources
- Promotional Products Association International, "PPAI Sales Volume Estimate: Modest Growth in 2024, But Reasons for Optimism Remain," 2025-02-20. https://www.ppai.org/media-hub/ppai-sales-volume-estimate-modest-growth-in-2024-but-reasons-for-optimism-remain/ ↩
- ISO 4915:1991, Textiles — Stitch types — Classification and terminology (confirmed 2021). https://www.iso.org/standard/10932.html ↩
- ASTM International, D6193 Standard Practice for Stitches and Seams (Committee D13.54). https://v1backup.astm.org/Standards/D6193.htm ↩
- PPAI, "The Most Wearable Upgrade In Corporate Apparel," 2026-07-20. https://www.ppai.org/media-hub/the-most-wearable-upgrade-in-corporate-apparel/ ↩
- AATCC, Standardized Home Laundering (page updated 2026-04-15). https://www.aatcc.org/testing/standard-laundering ↩
- International OEKO-TEX Association, OEKO-TEX STANDARD 100. https://www.oeko-tex.com/en/our-standards/oeko-tex-standard-100/ ↩
- 16 CFR Part 303, Rules and Regulations under the Textile Fiber Products Identification Act (Legal Information Institute, Cornell Law School). https://www.law.cornell.edu/cfr/text/16/part-303 ↩
- 16 CFR Part 423, Care Labeling of Textile Wearing Apparel and Certain Piece Goods (eCFR). https://www.ecfr.gov/current/title-16/chapter-I/subchapter-D/part-423 ↩
- U.S. Customs and Border Protection, "Marking of Country of Origin on U.S. Imports," Informed Compliance Publication. https://www.cbp.gov/trade/rulings/informed-compliance-publications/marking-country-origin-us-imports ↩
- PPAI, "PPAI Sales Volume Estimate: Promo Reaches New Height But Hampered by External Volatility," 2026-01-12. https://www.ppai.org/media-hub/ppai-sales-volume-estimate-promo-reaches-new-height-but-hampered-by-external-volatility/ ↩





The information below is required for social login
Sign In
Create New Account