


 Blog PDF for offline reading
Quick answer: Resin 3D stickers work like a small lens. The clear dome deepens color, magnifies the center and bends whatever sits near the edge. Artwork is most likely to be approved on the first proof when critical text stays off the dome's shoulder, sharp die-cut corners are rounded, metallic effects come from the printed base film rather than the resin, and aliphatic polyurethane replaces standard epoxy wherever light colors will see daylight.
Updated October 2026 · A design and prepress guide for brand, packaging and product teams
Resin 3D stickers rarely fail at the quote stage. They fail at the proof stage. The PDF looks perfect on screen. Then the physical sample arrives with the serial number warped at the edge, a hairline border that seems to vanish, a white field that turns cream a few months after launch, and a script logo whose thin connecting strokes have pulled the resin into lumpy islands. Each correction costs another proof cycle. Some problems, such as yellowing and edge lift, only show up after the labels are already on shipped products.
Nearly all of these problems can be predicted from the artwork file and the resin specification before anything is printed. A dome is not a coating. It is an optical element that sits on top of your design and changes how every line, color and shape reads. The sections below show how each element behaves under resin and how resin chemistry changes the effect. You will also get an artwork checklist your prepress team can use before sending files. For procurement questions such as sampling, pricing tiers and use cases, see our custom epoxy dome stickers page.
What Resin 3D Stickers Actually Do to Your Artwork
A domed sticker is a printed, die-cut label with a clear liquid resin dispensed on top. The resin flows outward until it reaches the cut edge, and surface tension stops it there. That forms a curved meniscus, which cures into a solid lens. Our product page covers the full construction. For designers, one fact matters most: the cured dome is a plano-convex lens, and different parts of it treat your artwork in different ways.
It helps to divide every dome into three optical zones:
- The crown (the flat-ish center). This is the zone of most faithful reproduction. The design looks slightly magnified, saturated and glossy, which is the "jewel" effect buyers are paying for.
- The body (the zone between center and edge). The curvature increases here, and highlights from overhead lighting land in this ring. Small dark text in this zone can be hidden by glare at some viewing angles.
- The shoulder (the steep rim just inside the cut line). Refraction is strongest here. Lines bend, small type distorts, and any print defect is enlarged. One widely cited printer's guide puts it bluntly: the curve magnifies anything sitting under its shoulder.
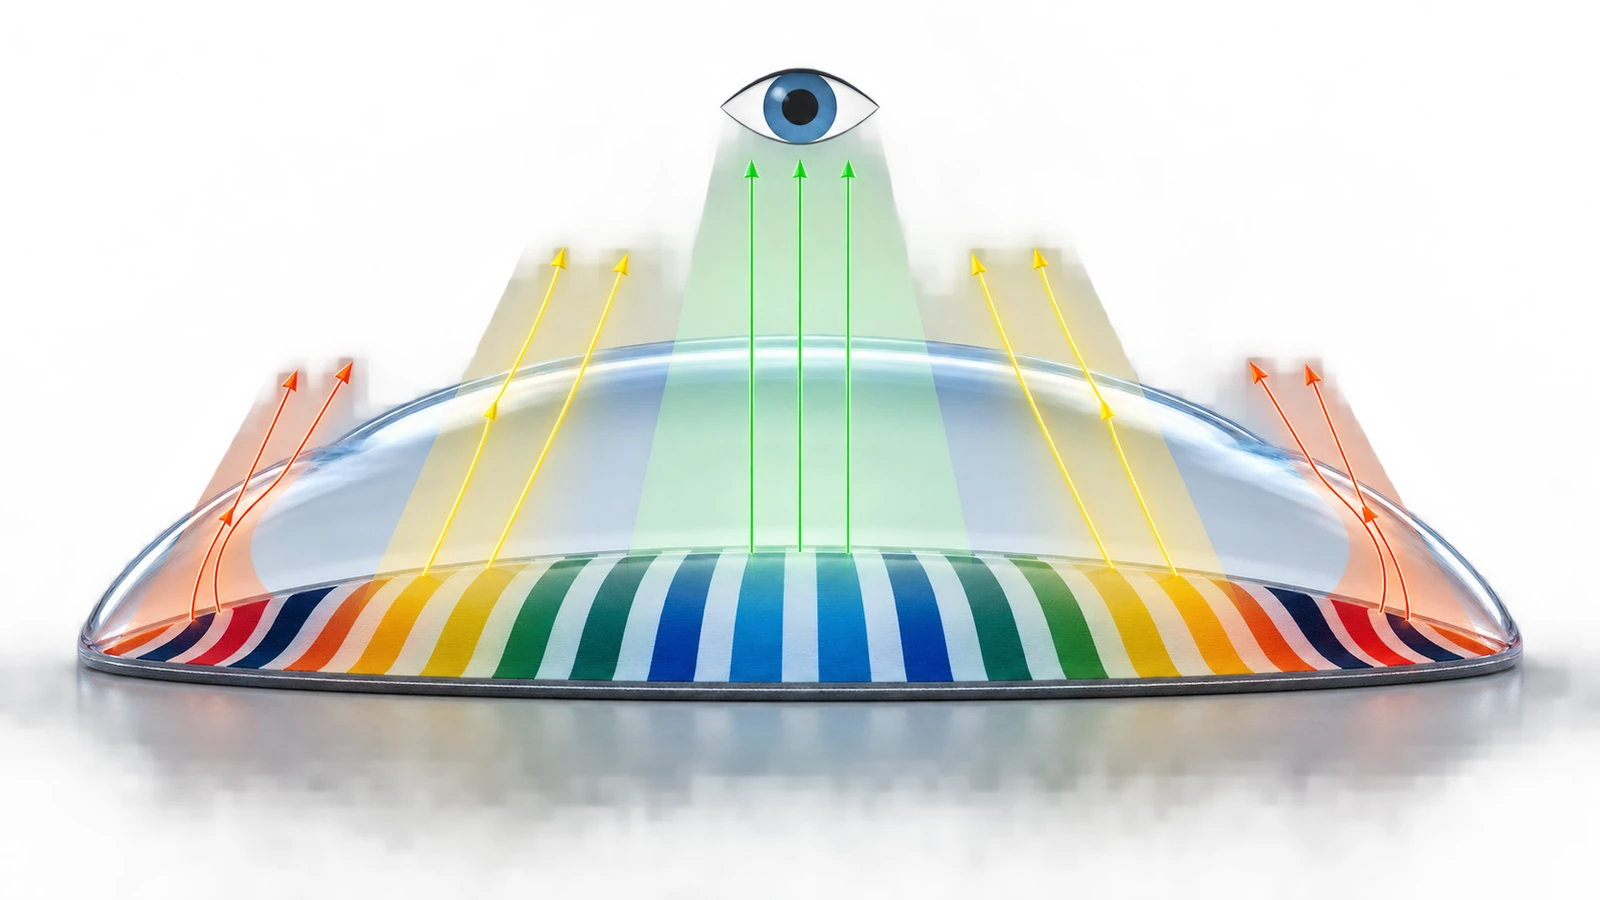
This zoning explains most first-proof rejections. Brand teams approve a flat PDF where every element has equal visual weight. After doming, elements near the edge lose legibility and elements in the center gain emphasis. Good dome artwork is laid out for the lens, not for the flat sheet.
How Resin Choice Changes the Optical Effect
Freshly cured epoxy and polyurethane look almost identical. Both are clear, high-gloss and three-dimensional. The differences appear over the following weeks and months, and they affect color more than shape.
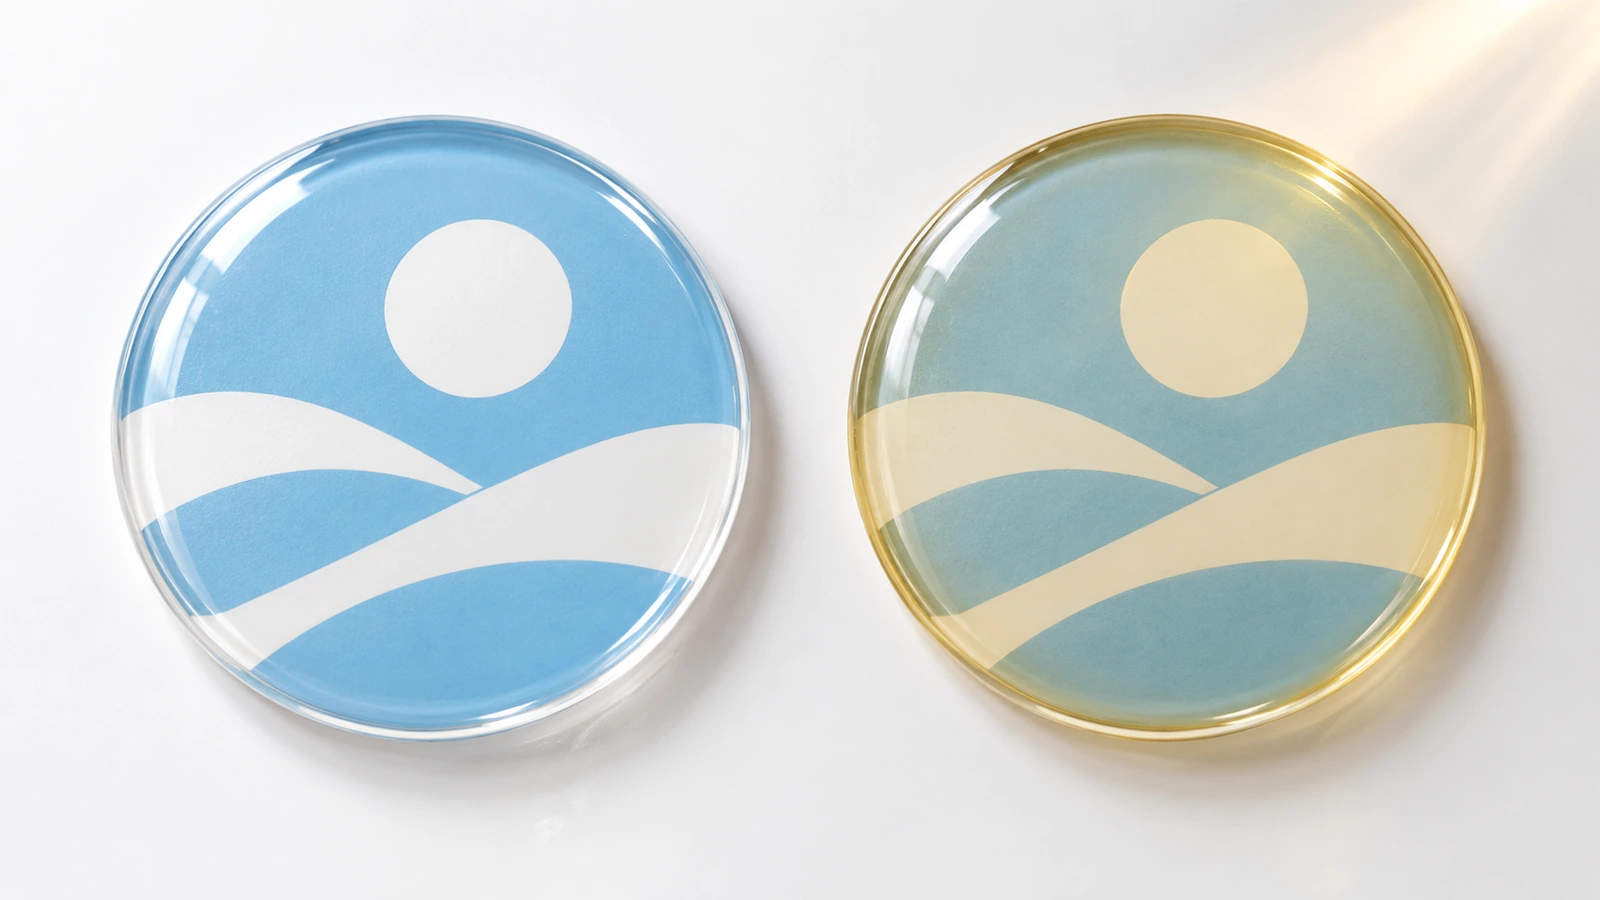
Standard epoxy cures hard and rigid. Because the dome holds its shape crisply, edges can look sharp and glassy. The trade-off is color stability. Epoxy chemistry is prone to yellowing under UV light and heat. Doming producers describe the shift as noticeable within a season or two of daylight, and heat-driven discoloration can even develop in a warehouse or on a machine casing with no direct sun. The shift is irreversible, and it is most visible over white, pale grey, light blue and pastel artwork. Coatings research shows that resin and curing-agent selection drives this behavior. Work published by the American Coatings Association describes a cycloaliphatic epoxy paired with a low-yellowing amine curative that significantly improved gloss and color retention in accelerated UV testing to ASTM G154 Cycle 2[1]. That study concerns industrial metal coatings, not stickers. Its lesson for designers is that "epoxy" is not one optical behavior, and a low-yellowing claim only means something when it is tied to a test method.
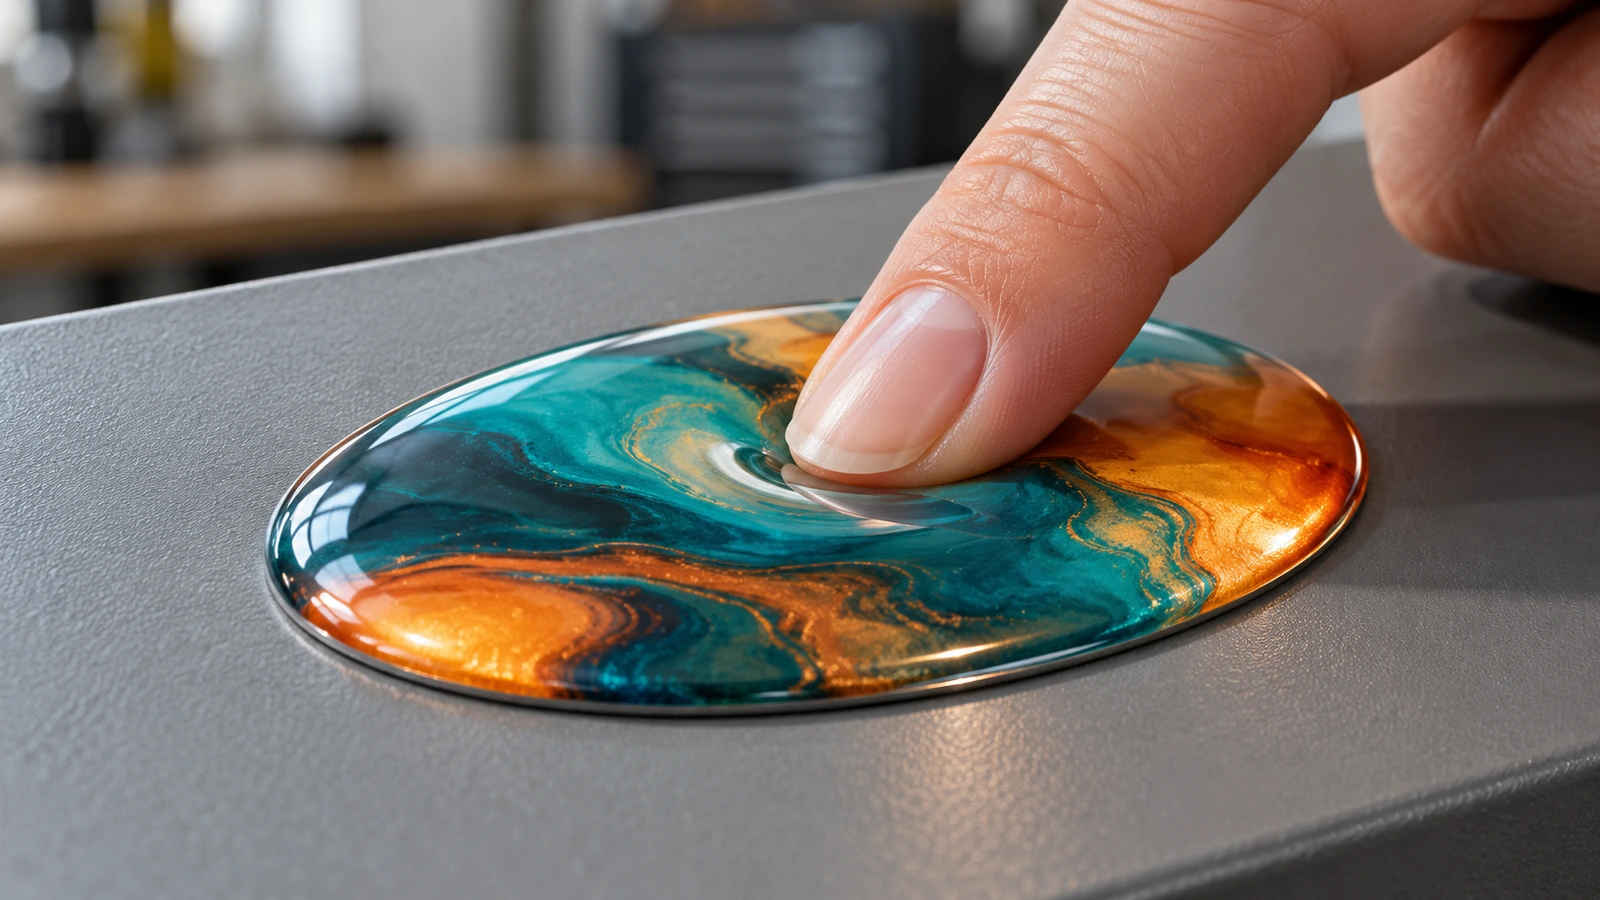
Aliphatic polyurethane (PU) stays flexible after curing. Flexible doming resins typically land around Shore A 70–90, while structural epoxies can exceed Shore D 80. A soft dome recovers from light dents: press a fingernail into a good PU dome and the mark fades within a dozen or so seconds. Optically, aliphatic PU is the resin for resin 3D stickers whose whites and light brand colors need to stay accurate outdoors. Aromatic polyurethane is a cheaper variant that also yellows under UV, so "polyurethane" alone is not a sufficient specification. Ask for "aliphatic" in writing.
UV-cured resin hardens in seconds under lamps rather than over many hours. That suits fast production, but its long-term color behavior depends on the specific formula, so treat it like epoxy until the supplier shows weathering data.
One market quirk matters for artwork approval. Many product pages labeled "epoxy" actually describe a polyurethane coating, and some suppliers never state the chemistry at all. Industry guidance is to treat an unnamed resin as an indoor product. Before you approve light-colored artwork, confirm the resin family in writing. The resin for stickers you choose decides whether your white stays white.
How to Prepare Artwork for a Dome: Eight Steps
The steps below follow the order in which a prepress reviewer checks a dome file. Each one targets a specific proof rejection.
Step 1: Lock the environment before you lock the colors
Indoor, flat and short-lived applications can use epoxy. Daylight, curved surfaces or a long brand life point to aliphatic PU. Make this decision first, because it changes how much light-colored area your design can safely carry. If epoxy is fixed by budget, move large white fields toward mid-tones or saturated brand colors, which hide a slight warm shift far better than paper white. Our product page explains how to scope the environment and approve the sample, so this guide does not repeat it.
Step 2: Build a lens-aware layout
- Place the logo mark, product name and anything that must be read in the crown.
- Keep serial numbers, URLs, small legal lines and thin rules out of the shoulder. If they must appear, move them inward and enlarge them rather than relying on edge space.
- Let decorative elements such as background color, texture and pattern run to the cut line. Some distortion there looks natural.
- Extend background color past the die line as bleed, so slight cut drift never leaves an unprinted sliver under the resin. Ask your printer for their bleed and safe-zone values on domed work and build them into the template.
Step 3: Simplify the die-cut shape
The resin forms its shape through surface tension against the cut edge, so the outline controls the dome. Sharp outside corners and tight inside angles make surface tension unstable. Resin either overruns the outline or pulls back and exposes bare print at the points. Narrow necks and thin bridges split one dome into uneven lobes. Interior cutouts, such as the counters inside letters on a contour-cut wordmark, add extra edges that each need their own meniscus.
The practical fix is to round every corner and set intricate logos on a simple backer shape such as a circle, oval, rounded rectangle or soft shield. The logo keeps its detail in print, and the resin gets one clean edge to settle against. Complex multi-element outlines also add dispensing positions and scrap, so a simpler die tends to cost less to produce consistently.

Step 4: Plan colors for gloss and depth
A dome increases saturation and gloss, so colors approved from matte swatches will look deeper and richer under resin. Dark navy can read as near-black, and mid-greens gain intensity. If your brand color has a Pantone target, approve it on a physical domed proof printed on the final film, not on a flat print or a screen. Large solid blacks look luxurious but act like mirrors and reflect light sources. If you need dark backgrounds, use reversed white or bright type so that glare does not swallow the message.
Step 5: Handle fine lines, small type and gradients
The lens magnifies print defects as faithfully as it magnifies the design. Halftone dots, banding in gradients and slight misregistration all become more visible, especially near the shoulder. In practice:
- Use vector art and outlined fonts. Avoid low-resolution raster logos, because the magnification exposes pixel edges.
- Ask for the printer's minimum positive and reversed line weight on domed work, then proof at 100% size.
- Keep gradients smooth and generous. Very subtle tonal steps near the edge tend to band.
- Avoid hairline keylines that hug the die line. Even small cut tolerance looks obvious when a thin border runs off-center under a lens.
Step 6: Get metallics from the base, not the resin
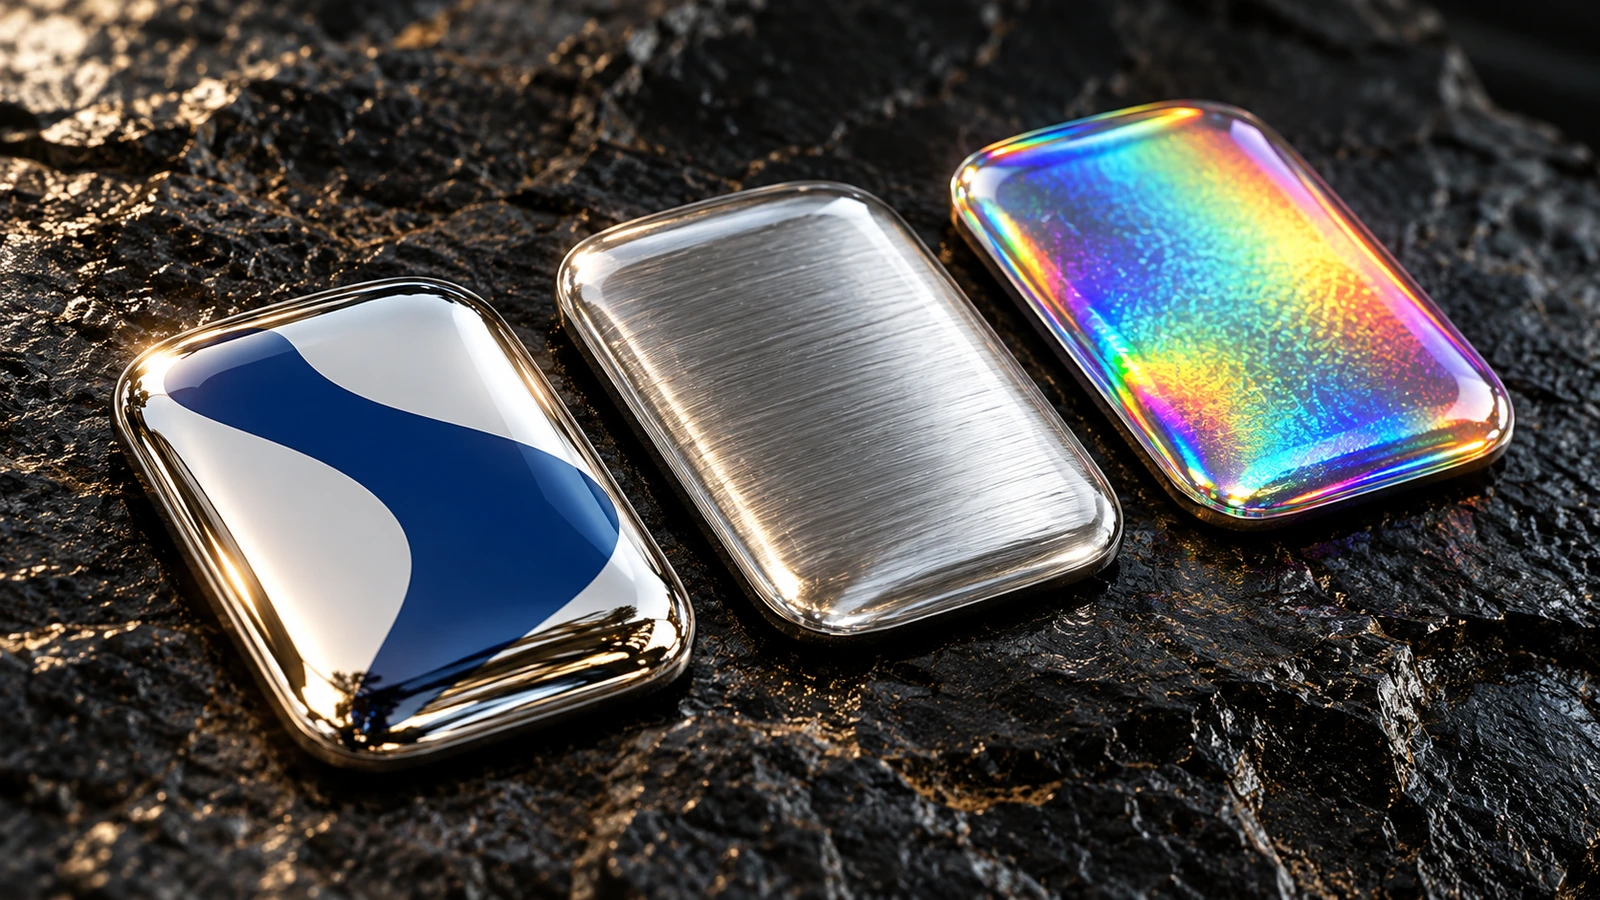
Metallic and holographic effects are where domes look best, provided the effect lives in the printed base. The common routes are:
- Chrome or brushed-metal film. Colors are printed over a white underbase, and the areas left without white show the metal through the dome. Under resin, bright chrome reads like liquid metal and brushed finishes gain depth. Hobbyists restoring vintage computer case badges report that brushed sticker stock under domed resin works well for exactly this reason.
- Holographic foil. The lens enlarges the rainbow pattern and adds movement as the viewer tilts the product.
- Metallic inks on white film. These are subtler and lower in contrast. Proof them, because the dome can flatten the metallic sparkle into simple gloss.
Plan the white underbase as a separate spot layer in your file. Ink must be fully cured before doming. Under-dried water-based ink is a common cause of resin delamination, and screen, offset, laser and thermal-transfer prints accept resin more reliably.
Step 7: Proof the physical sample, not just the color
When the domed proof arrives, check more than color. Look at the edge under a light at a low angle. The dome should run fully to the cut, with no pull-back at corners and no overflow. Look for bubbles, cloudy streaks and tacky spots. Production guidance links these to mix-ratio errors as small as 1–2% and to humidity, which is why doming rooms are typically held near 22–24°C and below roughly 40–45% relative humidity. Press a fingernail into the center to confirm the resin family matches the order. Then stick a few samples on the actual product surface, not a sample card. Clean the surface with isopropyl alcohol, press from the center outward, and keep the surface above about 10°C (50°F) during application. If adhesion matters contractually, ask for peel data measured with a recognized method such as ASTM D3330/D3330M[2], and ask which test surface was used.
Step 8: Check the words that carry legal weight
Some text on the artwork carries obligations beyond design. If a domed label serves as a permanent equipment nameplate or safety marking, UL evaluates the whole label construction (face stock, ink, adhesive and mounting surface) under its marking and labeling systems program[3], referencing UL 969 (6th edition, 2025)[4]. A decorative dome does not inherit that status. An origin line such as "Made in USA" printed into the art must meet the FTC's Made in USA standard[5], which is codified in 16 CFR Part 323[6]. If the label sits on food packaging near a food-contact area, note that EU rules on bisphenol A in epoxy coatings changed under Regulation (EU) 2024/3190[7]. That regulation targets food-contact coatings, not domed labels in general. The wider 2026 rule set for dome orders is summarized on our domed resin label product page.
Comparison: How Each Finish Renders Common Design Elements
The table compares optical behavior only. For cost and budget trade-offs between these finishes, see the product page.
| Design element | Standard epoxy dome | Aliphatic PU dome | UV-cured resin dome | Flat vinyl + laminate (no dome) |
|---|---|---|---|---|
| Initial clarity and gloss | Very high, glassy | Very high | High; depends on formula | Moderate gloss, no depth |
| White and pastel fields over time | Warm or amber shift under UV and heat; irreversible | Stays clear in suppliers' outdoor claims | Unproven until weathering data is shown | Depends on laminate UV rating |
| Fine lines and small text near the edge | Distorted by shoulder refraction | Distorted by shoulder refraction | Distorted by shoulder refraction | Reproduced flat and accurately |
| Metallic and holographic bases | Strong lens enhancement | Strong lens enhancement | Strong lens enhancement | Visible but flat |
| Dents and scratches | Permanent; hard surface | Light dents recover | Usually hard; permanent marks | Scuffs on laminate |
| Curved surfaces | Rim tends to lift or crack | Follows gentle curves | Formula-dependent | Conforms well |
| Best artwork fit | Saturated colors, indoor, flat, short life | Light brand colors, outdoor, long life | Fast-turn runs after validation | Tiny text, large curves, heat processes |
Two limits apply to every dome. First, never run domed pieces through a laminator, heat press or oven, because the resin softens before the vinyl underneath and takes permanent marks. Second, the dome seals the face but not the underside. Water enters at the adhesive line, so surface prep at application matters more than the resin's waterproof claim.
FAQ
FAQ: Can small text such as a serial number go on resin 3D stickers?
Yes, if it sits in the crown and is sized up from what you would use on a flat label. Text placed in the steep shoulder bends and can become unreadable at an angle. If the number must be read by scanners or inspectors, put it in the center or print it on a separate flat label.
FAQ: Why did my white background look cream months after approval?
White is the most sensitive color for revealing resin aging. Standard epoxy and aromatic polyurethane both discolor under UV light and heat, and the change is irreversible. For light-colored art in daylight, specify aliphatic polyurethane in writing, or redesign toward mid-tone backgrounds if epoxy is fixed.
FAQ: Can a script or contour-cut logo be domed without a backer shape?
Sometimes, but thin strokes and inside angles break the meniscus into uneven lobes, and resin pulls back at sharp points. Placing the script on a rounded backer shape gives the resin one clean edge and keeps every stroke under the dome.
FAQ: How can I tell if a proof is epoxy or polyurethane?
Press a fingernail into the center of the dome. A mark that fades within a dozen or so seconds indicates flexible polyurethane. A permanent mark, or a surface too hard to dent, indicates epoxy. Then confirm the exact resin family and grade in writing, because new samples of both look nearly identical.
FAQ: What should the adhesive and resin documentation cover in 2026?
Ask for safety data sheets for both the resin and the adhesive layer. In the US, adhesive manufacturers and importers now face one-time reporting of PFAS used since 2011 under TSCA Section 8(a)(7)[8], including processing aids. Separately, 40 CFR 751.407[9] prohibits commercial distribution of articles containing PIP (3:1) after October 31, 2026, so confirm that no adhesive or additive in the construction contains it.
FAQ: Do domes work on curved products like bottles or helmets?
Small domes on gentle curves usually work with flexible polyurethane. Rigid epoxy tends to crack or lift at the rim, and on large curves domes peel at the edges whatever adhesive is used. For tight curves, a flat printed vinyl with laminate is the safer design choice.
Key Takeaways
- Light colors reveal resin aging first, so tie any "low-yellowing" claim to a test method. — ASTM G154 Cycle 2 QUV-A was used to measure gloss and color retention in published low-yellowing epoxy work (Source)
- Prove adhesion on the real product surface, not a sample card. — ASTM D3330 covers 180° peel (Method A) and 90° peel (Method F) (Source)
- Nameplate artwork is approved as a full label system, not as a sticker design. — UL 969, 6th edition, published 2025 (Source)
- A "Made in USA" line printed in the art is a regulated claim. — 16 CFR Part 323 requires all or virtually all components to be US-made and sourced (Source)
- Adhesive chemistry is part of the spec, not an afterthought. — Distribution of PIP (3:1)-containing articles is prohibited after October 31, 2026 (Source)
- Supplier documentation should trace hidden additives. — TSCA PFAS reporting for adhesives reaches back to 2011 (Source)
Conclusion
First-proof approval for domed labels comes down to designing for the lens. Put what matters in the crown, keep fragile detail out of the shoulder, give the resin a simple rounded edge, build metallic effects into the base film, and choose a resin whose long-term color matches how much white and pastel your brand uses. Approve on a physical domed proof stuck to the real surface, never on a flat PDF.
If your artwork is ready, or nearly ready, send it with a note on the environment and surface. We will check it against the points above before anything goes to print. Start on our custom domed resin stickers page to request a quote and a proof.
Sources
- American Coatings Association, CoatingsTech Magazine, "Higher-Solids, Lower-Yellowing Epoxy System for Industrial DTM Coatings," published 2025-12-18; accessed 2026-10. https://www.paint.org/coatingstech-magazine/articles/higher-solids-lower-yellowing-epoxy-system-for-industrial-dtm-coatings/ ↩
- ASTM International, ASTM D3330/D3330M-04(2025), Standard Test Method for Peel Adhesion of Pressure-Sensitive Tape, approved 2025-08-01; via ANSI Webstore. https://webstore.ansi.org/standards/astm/astmd3330d3330m042025 ↩
- UL Solutions, Marking and Labeling Systems Program; accessed 2026-10. https://www.ul.com/services/marking-and-labeling-systems-program ↩
- ANSI/UL 969, Standard for Marking and Labeling Systems, 6th edition, published 2025-07-24 (revised 2025-07-28); via ANSI Webstore. https://webstore.ansi.org/standards/ul/ul969ed2025 ↩
- U.S. Federal Trade Commission, "Complying with the Made in USA Standard," business guidance; accessed 2026-10. https://www.ftc.gov/business-guidance/resources/complying-made-usa-standard ↩
- Electronic Code of Federal Regulations, 16 CFR Part 323, Made in USA Labeling Rule; text current as of 2026-10. https://www.ecfr.gov/current/title-16/chapter-I/subchapter-C/part-323 ↩
- "Migration of Bisphenol A and Its Derivatives From Epoxy Coatings and Demand for BPA-NI Products: Scientific Insights and Perspectives Leading to Regulation (EU) 2024/3190," review, 2025-11-19; via ResearchGate. https://www.researchgate.net/publication/397781637 ↩
- Adhesives & Sealants Industry, "PFAS Update 2026: Continued Refinement of US and Global Strategies and Greater Focus on Adhesives and Sealants," 2026-04-22. https://www.adhesivesmag.com/articles/102349-pfas-update-2026-continued-refinement-of-us-and-global-strategies-and-greater-focus-on-adhesives-and-sealants ↩
- Cornell Law School Legal Information Institute, 40 CFR § 751.407, Phenol, isopropylated phosphate (3:1) prohibitions; accessed 2026-09. https://www.law.cornell.edu/cfr/text/40/751.407 ↩








The information below is required for social login
Sign In
Create New Account