We use cookies to enable our websites to remember information, to help some website functionalities to work properly, to understand how you interact with and use our websites and to display you content and ads that are relevant and engaging for you.
By clicking Accept All you consent to the use of these cookie.
The store will not work correctly when cookies are disabled.
Quick answer: Sew a t shirt woven label at the center back neck when it must carry your brand and country of origin. Use a side-hem flag when comfort matters more, and treat the sleeve as a secondary brand spot. Choose a center or loop fold for seams, an end fold for flat stitching, and switch the neck to a printed tagless mark on lightweight jersey.
Most merch brands and small apparel labels never cut a T-shirt from scratch. They buy blanks, remove the factory tag and sew in their own t shirt woven label. Placement is where that plan most often goes wrong. A label can pass every proof and still fail on the garment. It may be sewn through the stretchy neck rib so the collar no longer recovers, or folded so a heat-cut edge points straight at the wearer's skin. It may sit at the hem of a tubular blank that has no side seam to catch it.
The costs show up in three places. Customers return or cut out scratchy woven neck tags, and comfort complaints are the most consistent theme in public buyer discussions of woven labels. Production lines lose time unpicking labels that will not lie flat on lightweight jersey. The most serious cost is legal. When the original neck tag is removed, the fiber content, country of origin and care instructions go with it, and US rules expect that information back on the shirt.
This guide works through the decisions that come before you order custom woven neck labels. It covers which position does which job, which fold suits which seam, how to size the label against the back-neck tape, how to sew it by fabric weight, and when a printed tagless neck mark is the better choice.
What a T Shirt Woven Label Does at Each Position
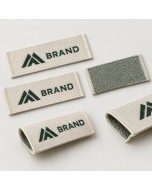
A woven label is made on a jacquard loom. Colored yarns are woven into the label structure itself, so the logo is part of the fabric rather than ink sitting on top. That construction explains both its strengths and its limits on a T-shirt. It keeps its color and edge definition through repeated laundering. It is also a rigid, non-stretch rectangle sewn onto a knit that stretches in every direction, with edges that are sealed by heat or ultrasonic cutting.
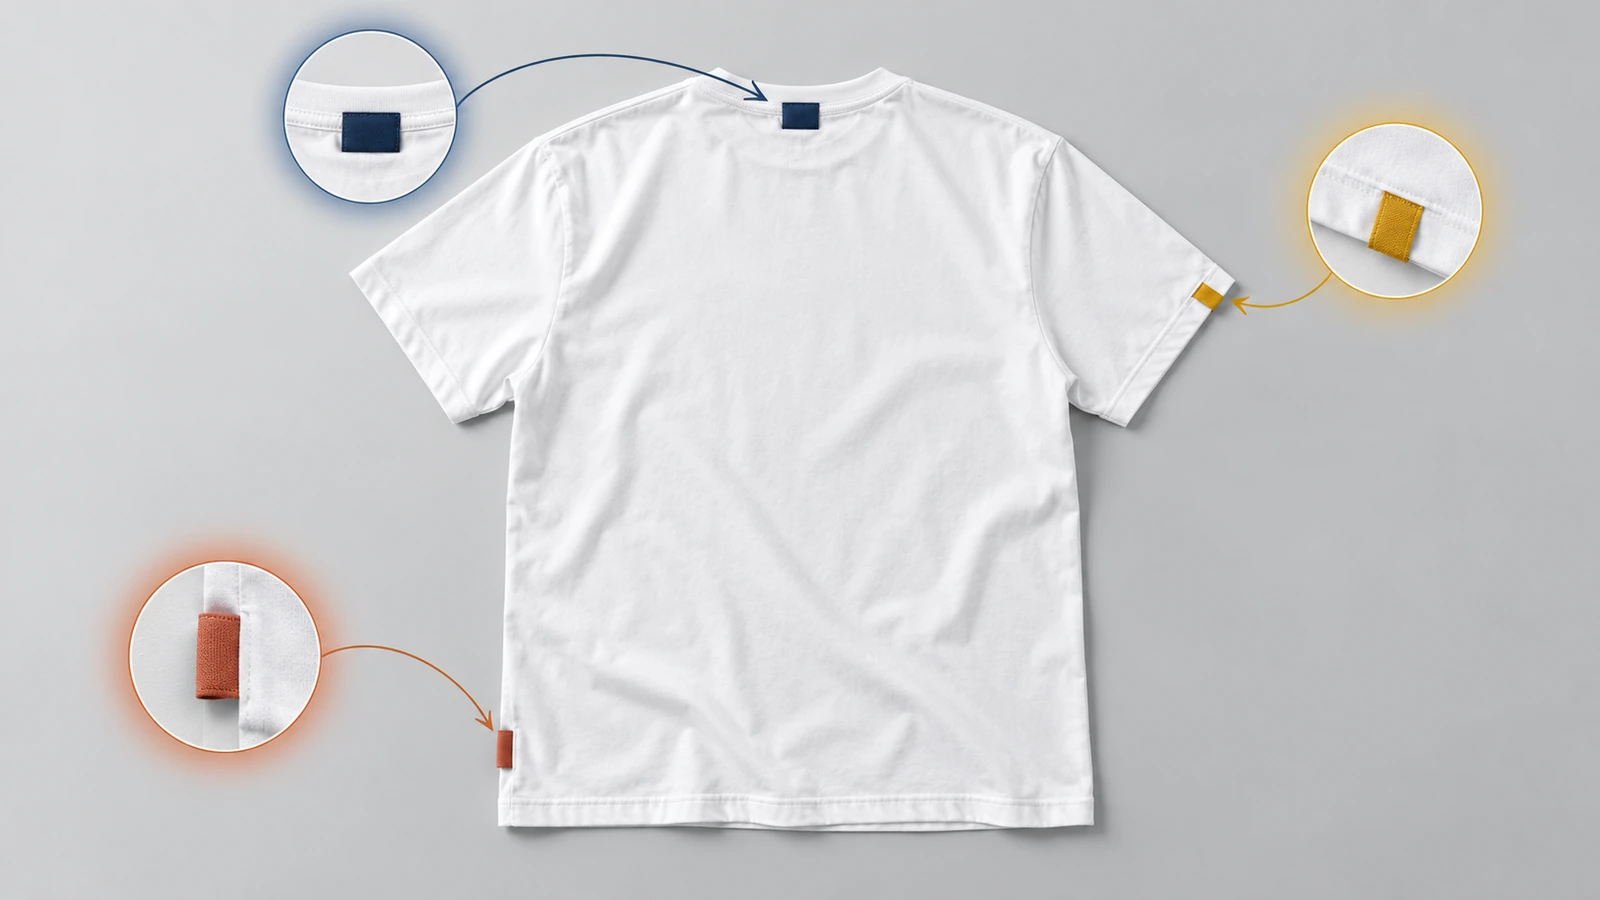
Position decides which job the label has to do:
Center back neck: the legal anchor point. For garments with a neck, FTC textile guidance places the country-of-origin disclosure on the front of a label at the inside center of the neck[3]. It is also the first place a customer looks for the brand and size.
Side hem: a branding position. A flag here is visible when the shirt is worn and rarely touches sensitive skin, but it has no legal role on its own.
Sleeve: a secondary brand mark that is seen on the body and in photographs. It suits capsule drops and team merch better than everyday basics.
If you need the full set of US rules for the garment that carries your label, the product page on custom woven tags summarizes them. This article stays on placement.
How to Place and Sew a T Shirt Woven Label in Six Steps
Step 1: Split brand information from required information
Before you choose a position, write down every piece of information the shirt must carry and decide where each one will live. A small logo label cannot carry dense legal text cleanly, because fine strokes and multi-line care blocks blur at the scale of a woven label. A widely used US approach puts the brand on a woven neck label and the regulatory text on a printed side-seam label. Textile World summarizes the FTC baseline as three items on every covered product: fiber content, country of origin and manufacturer identity[12]. Care instructions are a separate requirement on top of those.
Generic fiber names listed in order of predominance by weight, with equal prominence[6]
Care instructions
A permanent label, often at the side seam
Must stay attached and legible for the useful life of the product[1]
Two details affect layout. Required disclosures must appear in English, and under the textile rules non-wool fibers below 5% by weight can generally be listed as "other fiber"[4]. If you plan to use care symbols with no words, US rules accept only the ASTM D5489-96c symbol set for that purpose[7]. In practice that usually decides the question: symbols plus words belong on a printed care label, not on a woven logo tag.
Step 2: Choose the position for each label
Start with the neck. If the shirt has no other neck marking, the neck label has to carry the country of origin, so you need either a woven neck label or a printed neck mark in that location. Add a hem flag when the brand should be visible while the shirt is worn. Add a sleeve label only when the design calls for it, because sleeve hems are the hardest place to sew neatly on a finished blank.
Check how your blank is built before you commit to a hem flag. Tubular or side-seamless blanks have no side seam to catch the folded label. On those shirts, the flag either goes into the bottom hem itself, which means opening and re-stitching the hem, or it becomes an end-fold label stitched flat just above the hem.
Step 3: Match the fold to the seam
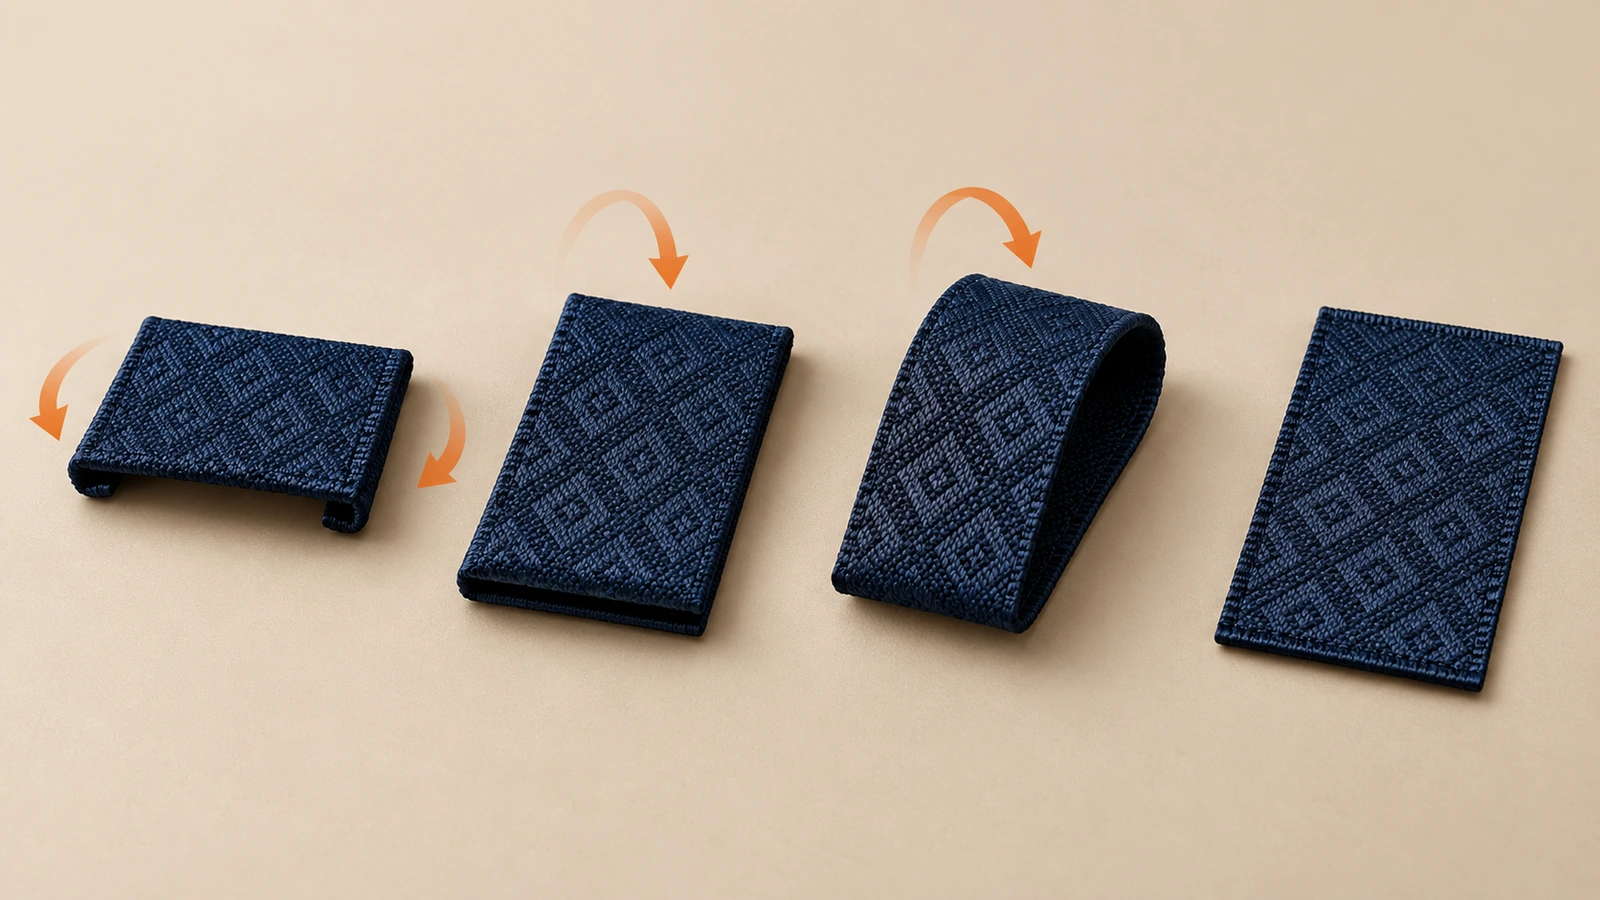
The fold decides where the raw ends go and therefore how the label is attached. Supplier terminology varies, so confirm with a sketch when you request a quote.
Fold
What it looks like
How it attaches
Best T-shirt position
End fold
Both short ends tucked underneath, leaving a flat, finished rectangle
Stitched flat across both folded ends, or around all four sides
Inside neck below the tape; flat above the hem on tubular blanks; sleeve surface
Center fold
Folded in half and pressed flat, with both raw ends together
Raw ends caught inside a seam, so the label hangs as a flag
Neck seam in cut-and-sew production; side-seam hem flag
Loop fold
Folded in half but not pressed, leaving an open loop
Raw ends caught inside a seam, so the label stands slightly proud
Hem flag meant to be seen; hanger loop at the back neck
Straight cut
No fold; all edges sealed
Stitched around all four sides
Sleeve or chest patch-style marks; not recommended against the neck
Two folds solve most comfort problems at the neck. A center fold keeps both sealed cut edges inside the seam. An end fold sewn down on both ends cannot flip up and rub. A straight-cut label sewn on only one side is the arrangement most likely to end up cut out by the customer.
Step 4: Size the neck label against the back-neck tape
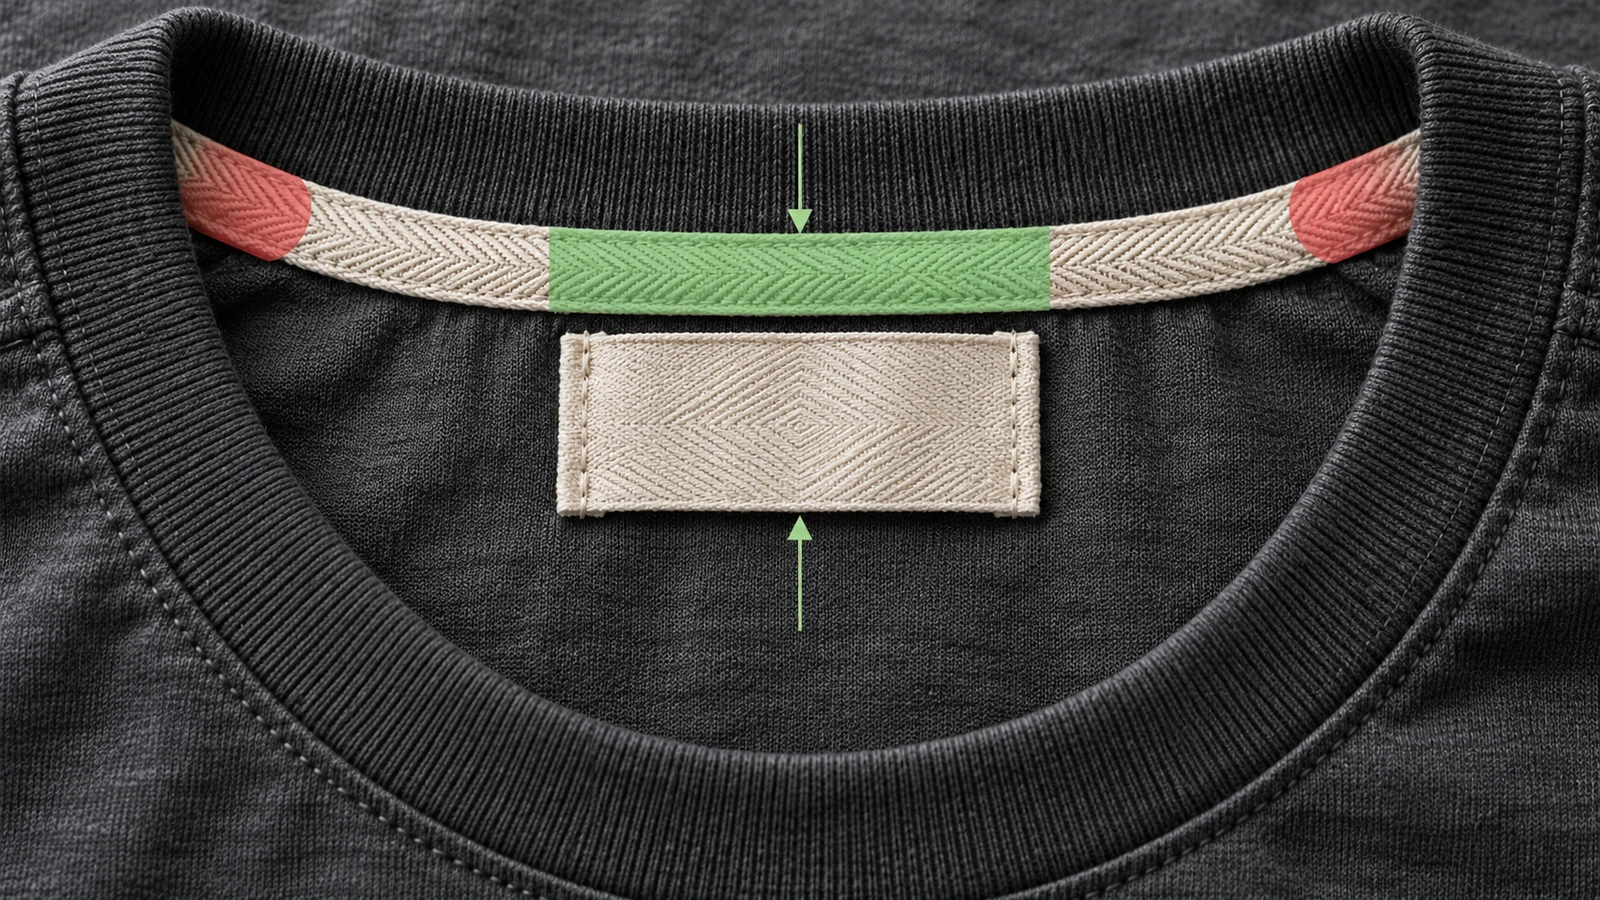
The back of a T-shirt neckline is curved, and only a short center section between the shoulder seams lies close to straight. A woven label is rigid, so it lies flat only on that section. If it is wider, the ends ride up the curve and the label ripples or pulls the neckline out of shape. Measure that flat section on the smallest size in your run, not your sample size, and keep the label width inside it with visible tape on both sides.
Then fix the height:
Center fold in the neck seam: the folded label hangs below the seam. Keep its drop short enough that it does not reach far into the back panel, where it can flip and show through thin fabric.
End fold stitched below the tape: align the top edge with the lower edge of the back-neck tape so the stitch lines land on stabilized fabric. A label that extends far below the tape forces stitching into single-layer jersey, which puckers.
Artwork: keep the logo clear of fold lines and stitch lines on every side. Stitches through the design are the most common visual defect on relabeled blanks.
Step 5: Sew by fabric weight
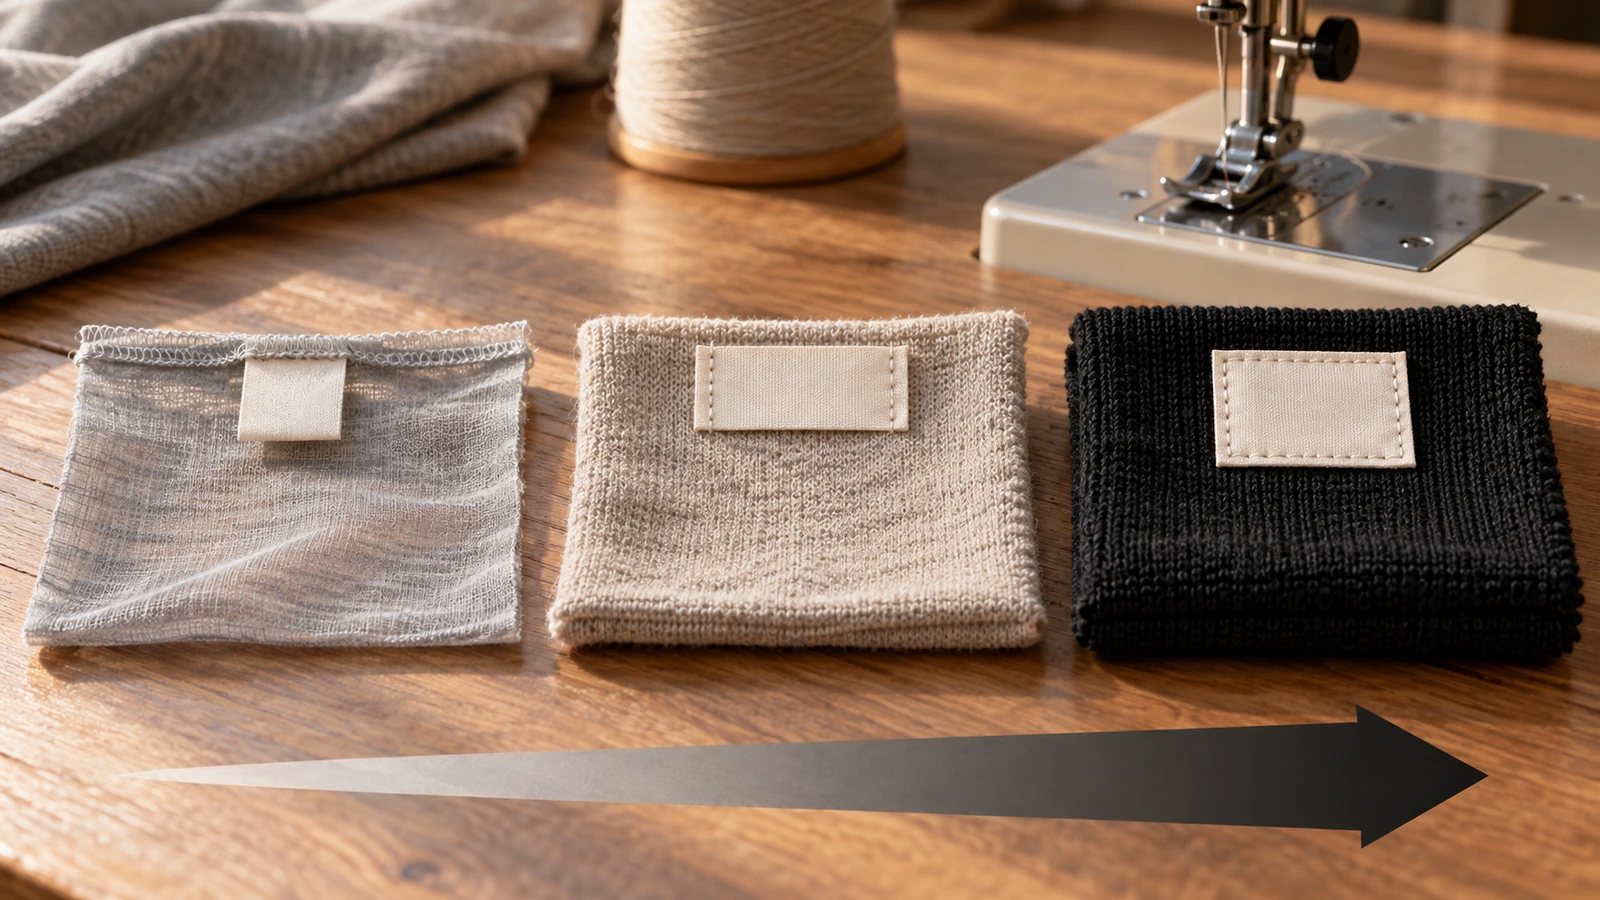
Fabric weight changes how a rigid label behaves on a knit. Whatever the weight, use a ballpoint or jersey needle so the needle parts the knit loops instead of cutting them, use polyester thread matched to the label ground color, and never stitch across the neck rib itself. The rib is the part that stretches when the shirt goes over the head. A label sewn through it locks that stretch and puts strain on the stitches.
Fabric
Typical behavior
Recommended method
Lightweight jersey
Label outline and stitch lines can show through on the front; puckering is common
Sew only into the back-neck tape or seam; consider a printed tagless neck plus a woven hem flag
Midweight jersey
Stays flat under an end-fold label stitched to the tape
End fold, stitched across both short ends; add the long edges only if the label lifts in wear
Heavyweight jersey
Supports a label stitched on all four sides without distortion
End fold or straight cut stitched on four sides; center fold works well in cut-and-sew neck seams
For a sleeve label on a finished blank, place a tear-away stabilizer behind the single layer of jersey while stitching, then remove it. This keeps the sleeve from tunneling under the label.
Step 6: Run a wear-and-wash test on the first piece
Sew one finished shirt per fabric and color before the full run. Wash and dry it the way your care label tells the customer to. If your care label specifies a water temperature, test at that temperature; the Care Labeling Rule allows a label to omit water temperature only when regular use of hot water up to 145°F (63°C) will not harm the product[5].
After washing, check three things:
Edges and corners against the inside of the wrist, the closest stand-in for the back of the neck.
Whether the label has curled or lifted.
Whether the neckline still recovers when stretched.
Then have someone wear the shirt for a full day. Comfort complaints come from long wear, not from the first try-on.
Neck vs. Hem vs. Sleeve: Placement Comparison
Factor
Center back neck
Side hem flag
Sleeve
Legal role
Required location for country of origin on garments with a neck
None by itself
None
Skin contact
Constant, the highest comfort risk
Low; touches the hip only occasionally
Low
Visibility when worn
Hidden
Visible from the side and back
Visible from the front and in photos
Usual fold
Center fold in seam, or end fold under tape
Center or loop fold in the side seam; end fold on tubular blanks
End fold or straight cut stitched flat
Ease on finished blanks
Moderate: remove the old tag, stitch to the tape
Easy with a side seam; harder on tubular bodies
Hardest: single layer, needs a stabilizer
Best for
Core brand identity and size
Streetwear and merch where the brand should be seen
Limited drops, team and event shirts
When to Pair or Replace the Neck Label With a Printed Tagless Mark
A printed tagless neck mark, usually screen-printed or heat-applied directly onto the inside back, removes the edge problem entirely. Three configurations cover most T-shirt programs:
Woven neck plus printed side-seam care label. This is the standard retail setup for midweight and heavyweight blanks. The woven label carries the brand and the printed label carries the dense regulatory text.
Printed tagless neck plus woven hem flag. This suits lightweight jersey, performance tees and shirts for wearers sensitive to tags. The woven flag keeps the tactile brand cue where the skin does not feel it. Origin still has to appear at the inside center neck, so it goes into the print.
Woven neck only, with all disclosures on a separate printed label. This works when the logo is small and the brand wants a minimal neck.
For labels that touch skin all day, some buyers ask for OEKO-TEX® STANDARD 100 coverage. Under that standard, Class II covers articles in direct skin contact and Class I covers babies and toddlers up to 3 years. A certificate also covers only the articles listed on it[10]. It is a voluntary scheme. NIST's US compliance guide draws the line clearly: regulations are mandatory, while standards are voluntary unless a regulation incorporates them by reference[8].
A QR code or link does not yet replace the physical care label. The American Apparel & Footwear Association petitioned the FTC in March 2025 to allow digital care labeling, but the petition itself confirms that the current rule still requires a permanent physical label[11]. If you want a full side-by-side of woven, printed, embroidered and heat-transfer labels, see the comparison on the woven tag product page.
FAQ
FAQ: Can I sew my woven label over the blank's original neck tag?
You can, but it stacks two rigid layers against the neck and keeps the other manufacturer's information on your product. Most brands remove the original tag and replace every required disclosure. FTC textile guidance treats fiber content, country of origin and identity as information that must stay with the garment, so removing a label means the replacement has to carry that information, not just your logo [3].
FAQ: Should a woven neck label be sewn on one end or both ends?
A center-fold label is caught at one edge inside the neck seam, and both of its cut ends are hidden. An end-fold label should be sewn on both short ends so it cannot flip up and rub. Do not stretch a single strip across the neck and stitch it at both ends into the rib. That arrangement stops the neckline from stretching and is the version customers say they have to cut out.
FAQ: Which fold works best for a T-shirt hem flag?
Use a center fold for a flat, pressed flag inside a side seam, or a loop fold if you want the label to stand slightly proud and catch the eye. On side-seamless blanks there is no seam to hold the folded ends, so an end-fold label stitched flat just above the hem is the cleaner choice.
FAQ: If I go tagless at the neck, where does the country of origin go?
It still goes at the inside center of the neck. For garments with a neck, FTC guidance places the origin disclosure there, so it becomes part of the printed tagless mark [3]. Fiber content and identity can sit on another conspicuous label, such as one at the side seam.
FAQ: Can care instructions go on the back of my neck label?
Yes, under one condition. FTC guidance allows care information on the reverse of a permanent label only if one end is sewn in and the consumer can easily see both sides[2]. A label sewn down on both ends does not qualify.
FAQ: Where can I find the official US labeling references in one place?
The American Apparel & Footwear Association maintains an index that links to the FTC textile and care rules, NIST's compliance guide and CBP origin guidance[9]. Use it as a map, and quote the FTC and eCFR texts themselves when you set your labeling specification.
Key Takeaways
The neck is the only label position with a fixed legal role. — 1 required location for country of origin: the inside center neck on garments with a neck (Source)
Removing a blank's tag removes required information that you must replace. — 3 core disclosures: fiber content, origin and identity (Source)
Symbol-only care text belongs on a printed label, not on a woven logo tag. — Only ASTM D5489-96c symbols are accepted without words (Source)
Wash-test the first piece at the temperature your label states. — 145°F (63°C) is the threshold for omitting water temperature from care labels (Source)
Skin-contact certification is voluntary and covers only the listed items. — OEKO-TEX Class I covers ages up to 3 years (Source)
A QR code cannot replace the physical care label yet. — The digital-label petition was filed in March 2025, and the current rule still requires a permanent label (Source)
Conclusion
Good label placement on a T-shirt comes down to a few fixed decisions. Keep the country of origin at the inside center of the neck. Keep rigid woven edges out of the neck rib and inside the flat section of the back-neck tape. Fold the label so its cut edges disappear into a seam or under a turned end. Let fabric weight decide whether the neck gets a woven label or a printed tagless mark. Settle these points before you order, and both the artwork and the quote will match how the label is actually sewn.
When your placement plan is ready, send it with your logo through the custom woven tags page. Include the position, fold, blank style and fabric weight, and we will advise on construction and prepare a woven sample for approval.
Hi there! I'm Bruce, proud dad to my amazing son. I'm the founder of Zigpac, a printing and packaging company empowering small and medium-sized businesses with custom solutions. Let's create something great together!



 Blog PDF for offline reading






The information below is required for social login
Sign In
Create New Account